springboot
微服务阶段
javase:AOP
mysql:持久化
html+css+js+jquery-+框架:视图,框架不熟练,css不好;
avaweb:独立开发MVC三层架构的网站了:原始
ssm:框架:简化了我们的开发流程
war:tomcati运行
spring再简化:SpringBoot;微服务架构!
服务越来越多:springcloud;
一、什么是SpringBoot?什么是微服务? SpringBoot01:Hello,World!
环境准备
jdk1.8
maven 3.6.1
springboot:2.2.13
IDEA
创建项目 官方:提供了一个快速生成的网站!IDEA集成了这个网站!
可以在官网直接下载后,导入idea开发(官网在哪)
直接使用idea创建一个springbootI项目(一般开发直接在IDEA中创建)
SpringBoot官网 SpringBoot官网下载项目jar包
IDEA创建步骤 选择springboot3.0以下的版本(3.0以上的版本当前maven版本不支持)踩坑
推荐使用(2.3.12.RELEASE)版本
由于我当前版本最低也是2.7的版本所以在新建项目的时候去pom.xml改下springboot的版本
1 2 3 4 5 6 <parent > <groupId > org.springframework.boot</groupId > <artifactId > spring-boot-starter-parent</artifactId > <version > 2.3.12.RELEASE</version > <relativePath /> </parent >
项目结构
删除不用的文件
启动程序
添加controller层(注意创建包要在同级目录下)
1
2
3
4
5
6
7
8
9
10
11
12
13
14
15
16
17
package com.wu.springboot01helloworld.controller;import org.springframework.stereotype.Controller;import org.springframework.web.bind.annotation.GetMapping;import org.springframework.web.bind.annotation.RequestMapping;import org.springframework.web.bind.annotation.ResponseBody;@Controller @RequestMapping("/hello") public class HelloController { @GetMapping("/hello") @ResponseBody public String hello () { return "hello" ; } }
通过端口实现web效果
小玩意
改端口号
在application.properties里编写
更改banner艺术字
官网: https://www.bootschool.net/ascii-art
在resources目录下创建banner.txt文件
1 2 3 4 5 6 _ _ _ _ _ (_ ) _ _ _ _ _ _ _ _ _ _ _ _ _ _ \ \ / | | / _ ` | / _ \ \ V V /| +| | /_ \_ \ _ |_ |_ \_ _ ,_ | \_ _ _ / \_ /\_ / \_ ,_ | _ |"""""|_ |"""""|_ |"""""|_ |"""""|_ |"""""|_ |"""""| "`-0-0-'"`-0-0-'"`-0-0-'"`-0-0-'"`-0-0-'"`-0-0-'
二、原理初探 运行原理
SpringBoot02:运行原理初探
自动配置:
pom.xml
spring-boot-dependencies:核心依赖在父工程中!
我们在写或者引入一些Springboot依赖的时候,不需要指定版本,就因为有这些版本仓库
启动器 1 2 3 4 <dependency > <groupId > org.springframework.boot</groupId > <artifactId > spring-boot-starter</artifactId > </dependency >
启动器:说白了就是Springboot的启动场景;
比如spring-boot-starter-web,他就会帮我们自动导入web环境所有的依赖!
springboot会将所有的功能场景,都变成一个个的启动器
我们要使用什么功能,就只需要找到对应的启动器就可以了starter
主程序 1 2 3 4 5 6 7 8 9 10 11 12 13 14 package com.wu.springboot01helloworld;import org.springframework.boot.SpringApplication;import org.springframework.boot.autoconfigure.SpringBootApplication;@SpringBootApplication public class Springboot01HellowordApplication { public static void main (String[] args) { SpringApplication.run(Springboot01HellowordApplication.class, args); } }
注解 1 2 3 4 5 6 7 8 9 10 11 12 @SpringBootConfiguration : springboot的配置 @Configuration : spring配置类 @Component : 说明这也是一个spring的组件 @EnableAutoConfiguration : 自动配置 @AutoConfigurationPackage : 自动配置包 @Import(AutoConfigurationPackages.Registrar.class) : 自动配置`包注册 @Import(AutoConfigurationImportselector.class) : 自动配置导入选择 List<string>configurations getCandidateConfigurations (annotationMetadata, attributes) ;
获取候选的配置
1 2 3 4 5 6 7 8 9 10 11 protected List<string>getCandidateConfigurations(AnnotationMetadata metadata, AnnotationAttributes attributes){ List<string>configurations= SpringFactoriesLoader.loadFactoryNames(getSpringFactoriesLoaderFactoryclass(), getBeanclassLoader()); Assert.notEmpty(configurations,"No auto configuration classes found inMETA-INF/spring.factories.If you" + "are using a custom packaging,make sure that file is correct." ); return configurations; }
META-lNF/spring.factories:自动配置的核心文件
1 2 Properties properties PropertiesLoaderutils.loadProperties(resource);
结论: springboot所有自动配置都是在启动的时候扫描并加载:spring.factories所有的自动配置类都在这里面,但是不一定生效,要判断条件是否成立,只要导入了对应的start,就有对应的启动器了,有了启动器,我们自动装配就会生效,然后就配置成功!
springboot在启动的时候,从类路径下/META-INF/spring.factories获取指定的值;
将这些自动配置的类导入容器,自动配置就会生效,帮我进行自动配置!
以前我们需要自动配置的东西,现在springboot帮我们做了!
整合javaEE,解决方案和自动配置的东西都在spring-boot-autoconfigure-.2.7.13.RELEASE.jar这个包下
它会把所有需要导入的组件,以类名的方式返回,这些组件就会被添加到容器;
容器中也会存在非常多的xxxAutoConfiguration的文件(@Bean),就是这些类给容器中导入了这个场景需要的所有组件;并自动配置,@Configuration,JavaConfig!
有了自动配置类,免去了我们手动编写配置文件的工作!
关于SpringBoot,谈谈你的理解:
三、yaml语法 SpringBoot03:yaml配置注入
级别:yaml 比 properties高
yaml
1 2 3 4 5 6 7 8 9 10 11 student: name: xiaowu age: 20 student: name: xiaowu age: 20
3.1、给属性赋值的几种方式 1、@Value 注:偷懒使用了lombok插件
Dog
1 2 3 4 5 6 7 8 9 10 11 12 13 14 15 16 package com.wu.springboot02config.pojo;import lombok.AllArgsConstructor;import lombok.Data;import lombok.NoArgsConstructor;import org.springframework.beans.factory.annotation.Value;import org.springframework.stereotype.Component;@Component @Data @NoArgsConstructor @AllArgsConstructor public class Dog { private String name; private Integer age; }
Person
1 2 3 4 5 6 7 8 9 10 11 12 13 14 15 16 17 18 19 20 21 22 23 24 25 package com.wu.springboot02config.pojo;import lombok.AllArgsConstructor;import lombok.Data;import lombok.NoArgsConstructor;import org.springframework.stereotype.Component;import java.util.Date;import java.util.List;import java.util.Map;@Component @Data @NoArgsConstructor @AllArgsConstructor public class Person { private String name; private Integer age; private Boolean happy; private Date birth; private Map<String,Object> maps; private List<Object> lists; private Dog dog; }
注入Dog
1 2 3 4 5 6 7 8 9 10 @Component @Data @NoArgsConstructor @AllArgsConstructor public class Dog { @Value("小白") private String name; @Value("3") private Integer age; }
测试
1 2 3 4 5 6 7 8 9 10 11 12 13 14 15 16 17 package com.wu.springboot02config;import com.wu.springboot02config.pojo.Dog;import org.junit.jupiter.api.Test;import org.springframework.beans.factory.annotation.Autowired;import org.springframework.boot.test.context.SpringBootTest;@SpringBootTest class Springboot02ConfigApplicationTests { @Autowired private Dog dog; @Test void contextLoads () { System.out.println(dog); } }
结果:
2、yaml赋值 application.yaml
1 2 3 4 5 6 7 8 9 10 11 12 13 person: name: xiaowu age: 20 happy: true birth: 2003 /05/03 maps: {k1: v1 ,k2: v2 } lists: - code - music - girl dog: name: 旺财 age: 3
在实体类上加上注解
1 @ConfigurationProperties(prefix = "person")
会出现下面的状况
点击次链接,进官方解决方案
加上依赖
可加可不加,不加爆红能正常使用,加了爆红没了,多了提示
1 2 3 4 5 <dependency > <groupId > org.springframework.boot</groupId > <artifactId > spring-boot-configuration-processor</artifactId > <optional > true</optional > </dependency >
3、第三种——加载指定的配置文件 1 2 3 4 5 6 7 8 name =xiaowu //加载指定配置文件 @PropertySource(value = "classpath:xiaowu.properties") public class Person { //SPEL表达式取出配置文件的值 @Value("${name}") private String name; }
3.2、配置文件占位符: 1 2 3 4 5 6 7 8 9 10 11 12 13 14 person: name: xiaowu${random.uuid} age: ${random.int} happy: true birth: 2003 /05/03 maps: {k1: v1 ,k2: v2 } hello: haapy lists: - code - music - girl dog: name: ${person.hello:hello}_旺财 age: 3
输出
Person(name=xiaowu2ddc72f0-7353-4fe4-8b84-2efbb138c5b3, age=-866389890, happy=true, birth=Sat May 03 00:00:00 CST 2003, maps={k1=v1, k2=v2}, lists=[code, music, girl], dog=Dog(name=haapy_旺财, age=3))
松散绑定: application.yaml
1 2 3 dog: first-name: 小白 age: 2
Dog
1 2 3 4 5 6 7 8 9 10 11 12 @Component @Data @NoArgsConstructor @AllArgsConstructor @ConfigurationProperties(prefix = "dog") public class Dog { private String firstName; private Integer age; }
测试
1 2 3 4 5 6 7 8 9 10 11 12 13 14 15 16 17 18 19 20 package com.wu.springboot02config;import com.wu.springboot02config.pojo.Dog;import com.wu.springboot02config.pojo.Person;import org.junit.jupiter.api.Test;import org.springframework.beans.factory.annotation.Autowired;import org.springframework.boot.test.context.SpringBootTest;@SpringBootTest class Springboot02ConfigApplicationTests { @Autowired private Dog dog; @Autowired private Person person; @Test void contextLoads () { System.out.println(dog); } }
输出
Dog(firstName=小白, age=2)
3.3、结论:
配置yml和配置properties都可以获取到值 , 强烈推荐 yml;
如果我们在某个业务中,只需要获取配置文件中的某个值,可以使用一下 @value;
如果说,我们专门编写了一个JavaBean来和配置文件进行一一映射,就直接@configurationProperties,不要犹豫!
3.4、JSR303数据校验 JSR303介绍和使用_java303_不知所终,不知所起的博客-CSDN博客
使用
1 2 3 4 5 6 7 8 9 10 11 12 @Validated public class Person { @Email(message = "邮箱格式错误") private String name; private Integer age; private Boolean happy; private Date birth; private Map<String, Object> maps; private List<Object> lists; private Dog dog; }
可能会出现@Validated下的某个@XXX()注解的爆红
1 2 3 4 5 <dependency > <groupId > org.springframework.boot</groupId > <artifactId > spring-boot-starter-validation</artifactId > </dependency >
注解源码地址
1 2 3 4 5 6 7 8 9 10 11 12 13 14 15 16 17 18 19 20 21 22 23 24 25 26 27 28 29 30 31 32 33 34 空检查 @Null 验证对象是否为null @NotNull 验证对象是否不为null, 无法查检长度为0的字符串 @NotBlank 检查约束字符串是不是Null还有被Trim的长度是否大于0,只对字符串,且会去掉前后空格. @NotEmpty 检查约束元素是否为NULL或者是EMPTY. Booelan检查 @AssertTrue 验证 Boolean 对象是否为 true @AssertFalse 验证 Boolean 对象是否为 false 长度检查 @Size(min=, max=) 验证对象(Array,Collection,Map,String)长度是否在给定的范围之内 @Length(min=, max=) Validates that the annotated string is between min and max included. 日期检查 @Past 验证 Date 和 Calendar 对象是否在当前时间之前,验证成立的话被注释的元素一定是一个过去的日期 @Future 验证 Date 和 Calendar 对象是否在当前时间之后 ,验证成立的话被注释的元素一定是一个将来的日期 @Pattern 验证 String 对象是否符合正则表达式的规则,被注释的元素符合制定的正则表达式,regexp:正则表达式 flags: 指定 Pattern.Flag 的数组,表示正则表达式的相关选项。 数值检查 建议使用在Stirng,Integer类型,不建议使用在int类型上,因为表单值为“”时无法转换为int,但可以转换为Stirng为”“,Integer为null @Min 验证 Number 和 String 对象是否大等于指定的值 @Max 验证 Number 和 String 对象是否小等于指定的值 @DecimalMax 被标注的值必须不大于约束中指定的最大值. 这个约束的参数是一个通过BigDecimal定义的最大值的字符串表示.小数存在精度 @DecimalMin 被标注的值必须不小于约束中指定的最小值. 这个约束的参数是一个通过BigDecimal定义的最小值的字符串表示.小数存在精度 @Digits 验证 Number 和 String 的构成是否合法 @Digits(integer=,fraction=) 验证字符串是否是符合指定格式的数字,interger指定整数精度,fraction指定小数精度。 @Range(min=, max=) 被指定的元素必须在合适的范围内 @Range(min=10000,max=50000,message=”range.bean.wage”) @Valid 递归的对关联对象进行校验, 如果关联对象是个集合或者数组,那么对其中的元素进行递归校验,如果是一个map,则对其中的值部分进行校验.(是否进行递归验证) @CreditCardNumber信用卡验证 @Email 验证是否是邮件地址,如果为null,不进行验证,算通过验证。 @ScriptAssert(lang= ,script=, alias=) @URL(protocol=,host=, port=,regexp=, flags=)]()]()
测试:
错误确邮箱地址
正确
3.5、多环境配置 采用.properties文件 1 2 3 spring.profiles.active =dev server.port =8081
采用yml文件 application.yaml
1 2 3 4 5 6 7 8 9 10 11 12 13 14 15 16 server: port: 8081 spring: profiles: active: dev --- server: port: 8082 spring: profiles: dev --- server: port: 8083 spring: profiles: test
四、自动配置原理 SpringBoot05:自动配置原理
精髓 1 、SpringBoot启动会加载大量的自动配置类2 、我们看我们需要的功能有没有在SpringBoot默认写好的自动配置类当中;
3 、我们再来看这个自动配置类中到底配置了哪些组件;(只要我们要用的组件存在在其中,我们就不需要再手动配置了)4 、给容器中自动配置类添加组件的时候,会从properties类中获取某些属性。我们只需要在配置文件中指定这些属性的值即可;
xxxxAutoConfigurartion:自动配置类;给容器中添加组件
xxxxProperties:封装配置文件中相关属性;
我们可以通过启用 debug=true属性;来让控制台打印自动配置报告,这样我们就可以很方便的知道哪些自动配置类生效;
1 2 # 开启springboot的调试类debug=true
五、静态资源处理 SpringBoot10:Web开发静态资源处理
5.1、webjars 第一种:
网址
1 2 3 4 5 <dependency > <groupId > org.webjars</groupId > <artifactId > jquery</artifactId > <version > 3.4.1</version > </dependency >
导入完毕,查看webjars目录结构,并访问Jquery.js文件!
第二种:
1 2 3 4 5 6 7 "classpath:/META-INF/resources/" "classpath:/resources/" "classpath:/static/" "classpath:/public/"
5.2、首页定制 源码:
添加index
5.3、图标 老版本2.1.7以之前的有,后面的版本都换写法了
步骤
去配置文件写
清理浏览器缓存
把ico文件放到resource目录下public,resource,static任意一个目录中
新版写法
1 2 #关闭默认图标 spring.favicon.enabled=false
六、Thymeleaf模板引擎 SpringBoot11:Thymeleaf模板引擎
6.1、引入Thymeleaf Thymeleaf文档
1 2 3 4 5 <dependency > <groupId > org.springframework.boot</groupId > <artifactId > spring-boot-starter-thymeleaf</artifactId > </dependency >
6.2、模板引擎的作用 就是我们来写一个页面模板 ,比如有些值呢,是动态的,我们写一些表达式。而这些值,从哪来呢,就是我们在后台封装一些数据。然后把这个模板和这个数据交给我们模板引擎,模板引擎按照我们这个数据帮你把这表达式解析、填充到我们指定的位置,然后把这个数据最终生成一个我们想要的内容给我们写出去,这就是我们这个模板引擎,不管是jsp还是其他模板引擎,都是这个思想。只不过呢,就是说不同模板引擎之间,他们可能这个语法有点不一样。其他的我就不介绍了,我主要来介绍一下SpringBoot给我们推荐的Thymeleaf模板引擎,这模板引擎呢,是一个高级语言的模板引擎,他的这个语法更简单。而且呢,功能更强大。
6.3、测试 Thymeleaf的所有模板引擎都写在这个包下—templates
源码——ThymeleafProperties
写一个test.html
1 2 3 4 5 6 7 8 9 10 <!DOCTYPE html > <html lang ="en" > <head > <meta charset ="UTF-8" > <title > Title</title > </head > <body > <p > xiaowu努力学习</p > </body > </html >
测试IndexController
1 2 3 4 5 6 7 @Controller public class IndexController { @RequestMapping("/test") public String test () { return "test" ; } }
结果:
结论:
导入约束 1 <html xmlns:th ="http://www.thymeleaf.org" >
IndexController
1 2 3 4 5 6 7 8 @Controller public class IndexController { @RequestMapping("/test") public String test (Model model) { model.addAttribute("msg" ,"hello,springboot" ); return "test" ; } }
test.html
1 2 3 4 5 6 7 8 9 10 11 12 <!DOCTYPE html > <html lang ="en" xmlns:th ="http://www.thymeleaf.org" > <head > <meta charset ="UTF-8" > <title > xiaowu努力学习</title > </head > <body > <h1 th:text ="${msg}" > </h1 > </body > </html >
运行
thymeleaf语法 IndexController
1 2 3 4 5 6 @RequestMapping("/test") public String test (Model model) { model.addAttribute("msg" ,"<h1>hello,springboot</h1>" ); model.addAttribute("users" , Arrays.asList("xiaowu" ,"吴志强" )); return "test" ; }
test.html
1 2 3 4 5 6 7 8 9 10 11 12 13 14 15 16 17 18 19 20 21 <!DOCTYPE html > <html xmlns:th ="http://www.thymeleaf.org" > <head > <meta charset ="UTF-8" > <title > xiaowu努力学习</title > </head > <body > <div th:text ="${msg}" > </div > <div th:utext ="${msg}" > </div > <hr > <h3 th:each ="user:${users}" th:text ="${user}" > </h3 > </body > </html >
结果:
MVC自动配置原理 1 2 3 4 5 6 7 8 9 10 11 12 13 14 15 16 17 18 19 20 21 22 23 24 Spring MVC Auto-configuration Spring Boot provides auto-configuration for Spring MVC that works well with most applications. The auto-configuration adds the following features on top of Spring’s defaults: Inclusion of ContentNegotiatingViewResolver and BeanNameViewResolver beans. Support for serving static resources, including support for WebJars Automatic registration of Converter, GenericConverter, and Formatter beans. Support for HttpMessageConverters (covered later in this document) . Automatic registration of MessageCodesResolver (covered later in this document) . Static index.html support. Custom Favicon support (covered later in this document) . Automatic use of a ConfigurableWebBindingInitializer bean (covered later in this document) .
扩展视图解析器 1 2 3 4 5 6 7 8 9 10 11 12 13 14 15 16 17 18 19 20 21 22 23 24 25 26 package com.wu.config;import org.springframework.context.annotation.Bean;import org.springframework.context.annotation.Configuration;import org.springframework.web.servlet.View;import org.springframework.web.servlet.ViewResolver;import org.springframework.web.servlet.config.annotation.WebMvcConfigurer;import java.util.Locale;@Configuration public class MyMvcConfig implements WebMvcConfigurer { @Bean public ViewResolver myViewResolver () { return new MyViewResolver (); } public static class MyViewResolver implements ViewResolver { @Override public View resolveViewName (String s, Locale locale) throws Exception { return null ; } } }
底层:获取所有视图
断点查看springboot后台信息:发现我们自定义的视图也在里面
源码:****WebMvcAutoConfiguration
在WebMvcAutoConfiguration下的
由上可知,它能通过配置文件(this.mvcProperties )读取我们格式化,所以我们能在配置文件里设置他的格式
例子:
视图跳转
1 2 3 4 5 6 7 8 9 10 @Configuration @EnableWebMvc public class MyMvcConfig implements WebMvcConfigurer { @Override public void addViewControllers (ViewControllerRegistry registry) { registry.addViewController("/xiaowu" ).setViewName("test" ); } }
员工管理系统 (一)环境搭建 基于我们创建好的“springboot-03-web”修改
1.导入静态资源 链接:https://pan.baidu.com/s/1URaFmN6rt2AzDOwVogWBNQ
将html静态资源放置templates目录下
将asserts目录下的css、img、js等静态资源放置static目录下
2. 模拟数据库 1. 创建数据库实体类 在主程序同级目录下新建pojo包,用来存放实体类
在pojo包下创建一个部门表Department和一个员工表Employee
为了方便,我们导入lombok
1 2 3 4 <dependency > <groupId > org.projectlombok</groupId > <artifactId > lombok</artifactId > </dependency >
部门表 :
1 2 3 4 5 6 7 8 9 10 11 12 13 14 package com.wu.pojo;import lombok.AllArgsConstructor;import lombok.Data;import lombok.NoArgsConstructor;@Data @AllArgsConstructor @NoArgsConstructor public class Department { private Integer id; private String departmentName; }
员工表 :
1 2 3 4 5 6 7 8 9 10 11 12 13 14 15 16 17 18 19 20 21 22 23 24 25 26 27 28 package com.wu.pojo;import lombok.AllArgsConstructor;import lombok.Data;import lombok.NoArgsConstructor;import java.util.Date;@Data @NoArgsConstructor public class Employee { private Integer id; private String lastName; private String email; private Integer gender; private Department department; private Date birth; public Employee (Integer id, String lastName, String email, Integer gender, Department department) { this .id = id; this .lastName = lastName; this .email = email; this .gender = gender; this .department = department; this .birth = new Date (); } }
2. 编写dao层(模拟数据) 在主程序同级目录下新建dao包
然后分别编写DepartmentDao和EmployeeDao,并在其中模拟数据库的数据
DepartmentDao****:
1 2 3 4 5 6 7 8 9 10 11 12 13 14 15 16 17 18 19 20 21 22 23 24 25 26 27 28 29 30 31 32 33 34 package com.wu.dao;import com.wu.pojo.Department;import org.springframework.stereotype.Repository;import java.util.Collection;import java.util.HashMap;import java.util.Map;@Repository public class DepartmentDao { private static Map<Integer,Department> departments=null ; static { departments = new HashMap <Integer, Department>(); departments.put(101 ,new Department (101 ,"教学部" )); departments.put(102 ,new Department (102 ,"市场部" )); departments.put(103 ,new Department (103 ,"教研部" )); departments.put(104 ,new Department (104 ,"运营部" )); departments.put(105 ,new Department (105 ,"后勤部" )); } public static Collection<Department> getDepartments () { return departments.values(); } public Department getDepartmentById (Integer id) { return departments.get(id); } }
EmployeeDao:
1 2 3 4 5 6 7 8 9 10 11 12 13 14 15 16 17 18 19 20 21 22 23 24 25 26 27 28 29 30 31 32 33 34 35 36 37 38 39 40 41 42 43 44 45 46 47 48 49 50 51 52 53 54 55 56 57 58 package com.wu.dao;import com.wu.pojo.Department;import com.wu.pojo.Employee;import org.springframework.beans.factory.annotation.Autowired;import org.springframework.stereotype.Repository;import java.util.Collection;import java.util.HashMap;import java.util.Map;@Repository public class EmployeeDao { private static Map<Integer, Employee> employees = null ; @Autowired private DepartmentDao departmentDao; static { employees = new HashMap <Integer, Employee>(); employees.put(1001 , new Employee (1001 , "AA" , "1622840727@qq.com" , 1 , new Department (101 , "教学部" ))); employees.put(1002 , new Employee (1002 , "BB" , "2622840727@qq.com" , 0 , new Department (102 , "市场部" ))); employees.put(1003 , new Employee (1003 , "CC" , "4622840727@qq.com" , 1 , new Department (103 , "教研部" ))); employees.put(1004 , new Employee (1004 , "DD" , "5628440727@qq.com" , 0 , new Department (104 , "运营部" ))); employees.put(1005 , new Employee (1005 , "FF" , "6022840727@qq.com" , 1 , new Department (105 , "后勤部" ))); } private static Integer initId = 1006 ; public void save (Employee employee) { if (employee.getId() == null ) { employee.setId(initId++); } employee.setDepartment(departmentDao.getDepartmentById(employee.getDepartment().getId())); employees.put(employee.getId(), employee); } public Collection<Employee> getALL () { return employees.values(); } public Employee getEmployeeById (Integer id) { return employees.get(id); } public void delete (Integer id) { employees.remove(id); } }
(二)首页实现 在主程序同级目录下新建config包用来存放自己的配置类
在其中新建一个自己的配置类MyMvcConfig,进行视图跳转
1 2 3 4 5 6 7 8 9 10 11 12 13 14 15 16 package com.wu.config;import org.springframework.context.annotation.Configuration;import org.springframework.web.servlet.config.annotation.ViewControllerRegistry;import org.springframework.web.servlet.config.annotation.WebMvcConfigurer;@Configuration public class MyMvcConfig implements WebMvcConfigurer { @Override public void addViewControllers (ViewControllerRegistry registry) { registry.addViewController("/" ).setViewName("index" ); registry.addViewController("/index.html" ).setViewName("index" ); } }
我们启动主程序访问测试一下,访问localhost:8080/或者locahost:8080/index.html
出现以下页面则成功
上述测试可以看到页面有图片没有加载出来,且没有css和js的样式,这就是因为我们html页面中静态资源引入的语法出了问题,在SpringBoot中,推荐使用Thymeleaf作为模板引擎,我们将其中的语法改为Thymeleaf,所有页面的静态资源都需要使用其接管
注意所有html都需要引入Thymeleaf命名空间
1 <html lang ="en" xmlns:th ="http://www.thymeleaf.org" >
然后修改所有页面静态资源的引入,使用@{…} 链接表达式
例如index.html中:
注意 :第一个/代表项目的classpath,也就是这里的resources目录
其他页面亦是如此,再次测试访问,正确显示页面
(三)页面国际化 1. 统一properties编码 首先在IDEA中统一设置properties的编码为UTF-8
2. 编写i18n国际化资源文件 在resources目录下新建一个i18n包,其中放置国际化相关的配置
其中新建三个配置文件,用来配置语言:
login.properties:无语言配置时候生效
login_en_US.properties:英文生效
login_zh_CN.properties:中文生效
命名方式 是下划线的组合:文件名_语言_国家.properties;
以此方式命名,IDEA会帮我们识别这是个国际化配置包,自动绑定在一起转换成如下的模式:
绑定在一起后,我们想要添加更过语言配置,只需要在大的资源包右键添加到该绑定配置文件 即可
此时只需要输入区域名即可创建成功,比如输入en_US,就会自动识别
然后打开英文或者中文语言的配置文件,点击Resource Bundle进入可视化编辑页面
问题:新版本idea找不到Resource Bundle
解决:
idea 2021. 2.3 中使用springboot 国际化 Resource Bundle不显示问题
进入到可视化编辑页面后,点击加号,添加属性,首先新建一个login.tip代表首页中的提示
然后对该提示分别做三种情况的语言配置,在三个对应的输入框输入即可(注意:IDEA新版本可能无法保存,建议直接在配置文件中编写 )
接下来再配置所有要转换语言的变量(注意:IDEA新版本可能无法保存,建议直接在配置文件中编写 )
然后打开三个配置文件的查看其中的文本内容,可以看到已经做好了全部的配置
login.properties
1 2 3 4 5 login.tip =请登录 login.password =密码 login.remember =记住我 login.btn =登录 login.username =用户名
login_en_US.properties
1 2 3 4 5 login.tip =Please sign in login.password =password login.remember =remember me login.btn =login login.username =username
login_zh_CN.properties
1 2 3 4 5 login.tip =请登录 login.password =密码 login.remember =记住我 login.btn =登录 login.username =用户名
3. 配置国际化资源文件名称 在Spring程序中,国际化主要是通过ResourceBundleMessageSource这个类来实现的
Spring Boot通过MessageSourceAutoConfiguration为我们自动配置好了管理国际化资源文件的组件
我们在IDEA中查看以下MessageSourceAutoConfiguration类
1 2 3 4 5 6 7 8 9 10 11 12 13 14 15 16 17 18 19 20 21 22 23 24 25 26 27 28 29 30 31 32 33 34 35 36 @Configuration(proxyBeanMethods = false) @ConditionalOnMissingBean(name = AbstractApplicationContext.MESSAGE_SOURCE_BEAN_NAME, search = SearchStrategy.CURRENT) @AutoConfigureOrder(Ordered.HIGHEST_PRECEDENCE) @Conditional(ResourceBundleCondition.class) @EnableConfigurationProperties public class MessageSourceAutoConfiguration { private static final Resource[] NO_RESOURCES = {}; @Bean @ConfigurationProperties(prefix = "spring.messages") public MessageSourceProperties messageSourceProperties () { return new MessageSourceProperties (); } @Bean public MessageSource messageSource (MessageSourceProperties properties) { ResourceBundleMessageSource messageSource = new ResourceBundleMessageSource (); if (StringUtils.hasText(properties.getBasename())) { messageSource.setBasenames(StringUtils .commaDelimitedListToStringArray(StringUtils.trimAllWhitespace(properties.getBasename()))); } if (properties.getEncoding() != null ) { messageSource.setDefaultEncoding(properties.getEncoding().name()); } messageSource.setFallbackToSystemLocale(properties.isFallbackToSystemLocale()); Duration cacheDuration = properties.getCacheDuration(); if (cacheDuration != null ) { messageSource.setCacheMillis(cacheDuration.toMillis()); } messageSource.setAlwaysUseMessageFormat(properties.isAlwaysUseMessageFormat()); messageSource.setUseCodeAsDefaultMessage(properties.isUseCodeAsDefaultMessage()); return messageSource; } }
主要了解messageSource()这个方法:
1 public MessageSource messageSource (MessageSourceProperties properties) ;
可以看到,它的参数为MessageSourceProperties对象,我们看看这个类
1 2 3 4 5 6 7 8 9 10 11 12 13 14 public class MessageSourceProperties { private String basename = "messages" ; private Charset encoding = StandardCharsets.UTF_8;
类中首先声明了一个属性basename,默认值为messages;
我们翻译其注释:
- 逗号分隔的基名列表(本质上是完全限定的类路径位置)
- 每个都遵循ResourceBundle约定,并轻松支持于斜杠的位置
- 如果不包含包限定符(例如”org.mypackage”),它将从类路径根目录中解析
意思是 :
如果你不在springboot配置文件中指定以.分隔开的国际化资源文件名称的话
它默认会去类路径下找messages.properties作为国际化资源文件
这里我们自定义了国际化资源文件,因此我们需要在SpringBoot配置文件application.properties中加入以下配置指定我们配置文件的名称
1 spring.messages.basename =i18n.login
其中i18n是存放资源的文件夹名,login是资源文件的基本名称。
4. 首页获取显示国际化值 利用#{…} 消息表达式,去首页index.html获取国际化的值
重启项目,访问首页,可以发现已经自动识别为中文
5. 配置国际化组件实现中英文切换 1. 添加中英文切换标签链接 上述实现了登录首页显示为中文,我们在index.html页面中可以看到两个标签
1 2 <a class ="btn btn-sm" > 中文</a > <a class ="btn btn-sm" > English</a >
也就对应着视图中的
那么我们怎么通过这两个标签实现中英文切换呢?
首先在这两个标签上加上跳转链接并带上相应的参数
1 2 3 <a class ="btn btn-sm" th:href ="@{/index.html(l='zh_CN')}" > 中文</a > <a class ="btn btn-sm" th:href ="@{/index.html(l='en_US')}" > English</a >
2. 自定义地区解析器组件 怎么实现我们自定义的地区解析器呢?我们首先来分析一波源码
在Spring中有关于国际化的两个类:
Locale:代表地区,每一个Locale对象都代表了一个特定的地理、政治和文化地区
LocaleResolver:地区解析器
首先搜索WebMvcAutoConfiguration,可以在其中找到关于一个方法localeResolver()
1 2 3 4 5 6 7 8 9 10 11 12 13 @Bean @ConditionalOnMissingBean @ConditionalOnProperty(prefix = "spring.mvc", name = "locale") public LocaleResolver localeResolver () { if (this .mvcProperties.getLocaleResolver() == WebMvcProperties.LocaleResolver.FIXED) { return new FixedLocaleResolver (this .mvcProperties.getLocale()); } AcceptHeaderLocaleResolver localeResolver = new AcceptHeaderLocaleResolver (); localeResolver.setDefaultLocale(this .mvcProperties.getLocale()); return localeResolver; }
该方法就是获取LocaleResolver地区对象解析器:
如果用户配置了则使用用户配置的地区解析器;
如果用户没有配置,则使用默认的地区解析器
我们可以看到默认地区解析器的是AcceptHeaderLocaleResolver对象,我们点入该类查看源码
可以发现它继承了LocaleResolver接口,实现了地区解析
因此我们想要实现上述自定义的国际化资源生效,只需要编写一个自己的地区解析器,继承LocaleResolver接口,重写其方法即可
我们在config包下新建MyLocaleResolver,作为自己的国际化地区解析器
我们在index.html中,编写了对应的请求跳转
如果点击中文按钮,则跳转到/index.html(l=’zh_CN’)页面
如果点击English按钮,则跳转到/index.html(l=’en_US’)页面
因此我们自定义的地区解析器MyLocaleResolver中,需要处理这两个带参数的链接请求
1 2 3 4 5 6 7 8 9 10 11 12 13 14 15 16 17 18 19 20 21 22 23 24 25 26 27 28 29 30 31 package com.wu.config;import org.springframework.cglib.core.Local;import org.springframework.util.StringUtils;import org.springframework.web.servlet.LocaleResolver;import javax.servl et.http.HttpServletRequest;import javax.servlet.http.HttpServletResponse;import java.util.Locale;public class MyLocaleResolver implements LocaleResolver { @Override public Locale resolveLocale (HttpServletRequest request) { String language = request.getParameter("l" ); Locale locale = Locale.getDefault(); if (!StringUtils.isEmpty(language)) { String[] split = language.split("_" ); locale = new Locale (split[0 ], split[1 ]); } return locale; } @Override public void setLocale (HttpServletRequest request, HttpServletResponse response, Locale locale) { } }
为了让我们的区域化信息能够生效,我们需要再配置一下这个组件!在自己的MvcConofig配置类下添加bean;
1 2 3 4 5 @Bean public LocaleResolver localeResolver () { return new MyLocaleResolver (); }
我们重启项目,来访问一下,发现点击按钮可以实现成功切换!
点击中文按钮,跳转到http://localhost:8080/index.html?l=zh_CN,显示为中文
点击English按钮,跳转到http://localhost:8080/index.html?l=en_US,显示为英文
(四)登录功能的实现 登录,也就是当我们点击登录按钮的时候,会进入一个页面,这里进入dashboard页面
因此我们首先在index.html中的表单编写一个提交地址/user/login,并给名称和密码输入框添加name属性为了后面的传参
然后编写对应的controller
在controller包中新建类loginController,处理登录请求
1 2 3 4 5 6 7 8 9 10 11 12 13 14 15 16 17 18 19 20 21 package com.wu.controller;import org.springframework.stereotype.Controller;import org.springframework.ui.Model;import org.springframework.web.bind.annotation.RequestMapping;import org.springframework.web.bind.annotation.RequestParam;@Controller public class LoginController { @RequestMapping("/user/login") public String login (@RequestParam("username") String username, @RequestParam("password") String password, Model model) { if ("xiaowu" .equals(username) && "xiaowu" .equals(password)) return "dashboard" ; else { model.addAttribute("msg" , "用户名或者密码错误" ); return "index" ; } } }
然后我们在index.html首页中加一个标签用来显示controller返回的错误信息
1 2 <p style ="color: red" th:text ="${msg}" th:if ="${not #strings.isEmpty(msg)}" > </p >
我们再测试一下,启动主程序,访问localhost:8080
如果我们输入正确的用户名和密码
则重新跳转到dashboard页面,浏览器url为http://localhost:8080/user/login?username=xiaowu&password=xiaowu
账号密码出错
到此我们的登录功能实现完毕 ,但是有一个很大的问题 ,浏览器的url暴露了用户的用户名和密码,这在实际开发中可是重大的漏洞,泄露了用户信息 ,因此我们需要编写一个映射
我们在自定义的配置类MyMvcConfig中加一句代码
1 registry.addViewController("/main.html" ).setViewName("dashboard" );
也就是访问/main.html页面就跳转到dashboard页面
然后我们稍稍修改一下LoginController,当登录成功时重定向到main.html页面,也就跳转到了dashboard页面
1 2 3 4 5 6 7 8 9 10 11 12 13 14 15 16 17 18 19 20 21 22 package com.wu.controller;import org.springframework.stereotype.Controller;import org.springframework.ui.Model;import org.springframework.web.bind.annotation.RequestMapping;import org.springframework.web.bind.annotation.RequestParam;@Controller public class LoginController { @RequestMapping("/user/login") public String login (@RequestParam("username") String username, @RequestParam("password") String password, Model model) { if ("xiaowu" .equals(username) && "xiaowu" .equals(password)) return "redirect:/main.html" ; else { model.addAttribute("msg" , "用户名或者密码错误" ); return "index" ; } } }
我们再次重启测试,输入正确的用户名和密码登陆成功后,浏览器不再携带泄露信息
第二种方法(也可以用post请求来,不推荐
去index页面给form表单添加post请求
1 2 3 <form class ="form-signin" th:action ="@{/user/login}" method ="post" > //这里面的所有表单标签都需要加上一个name属性 </form >
controller层就不需要用重定向,工具类也可以不用设置视图
1 2 3 4 5 6 7 8 9 10 11 12 13 14 15 @Controller public class LoginController { @RequestMapping("/user/login") public String login (@RequestParam("username") String username, @RequestParam("password") String password, Model model) { if ("xiaowu" .equals(username) && "xiaowu" .equals(password)) return "dashboard" ; else { model.addAttribute("msg" , "用户名或者密码错误" ); return "index" ; } } }
post请求不会暴露地址,但是上面的方法比较推荐
但是这又出现了新的问题 ,无论登不登陆,我们访问localhost/main.html都会跳转到dashboard的页面,这就引入了接下来的拦截器
(五)登录拦截器 为了解决上述遗留的问题,我们需要自定义一个拦截器;
在config目录下,新建一个登录拦截器类LoginHandlerInterceptor
用户登录成功后,后台会得到用户信息;如果没有登录,则不会有任何的用户信息;
我们就可以利用这一点通过拦截器进行拦截 :
当用户登录时将用户信息存入session中,访问页面时首先判断session中有没有用户的信息
如果没有,拦截器进行拦截;
如果有,拦截器放行
因此我们首先在LoginController中当用户登录成功后,存入用户信息到session中
1 2 3 4 5 6 7 8 9 10 11 12 13 14 15 16 17 18 19 20 21 22 23 24 25 package com.wu.controller;import org.springframework.stereotype.Controller;import org.springframework.ui.Model;import org.springframework.web.bind.annotation.RequestMapping;import org.springframework.web.bind.annotation.RequestParam;import javax.servlet.http.HttpSession;@Controller public class LoginController { @RequestMapping("/user/login") public String login (@RequestParam("username") String username, @RequestParam("password") String password, Model model, HttpSession session) { if ("xiaowu" .equals(username) && "xiaowu" .equals(password)) { session.setAttribute("LoginUser" , username); return "redirect:/main.html" ; } else { model.addAttribute("msg" , "用户名或者密码错误" ); return "index" ; } } }
然后再在实现自定义的登录拦截器,继承HandlerInterceptor接口
其中获取存入的session进行判断,如果不为空,则放行;
如果为空,则返回错误消息,并且返回到首页,不放行。
1 2 3 4 5 6 7 8 9 10 11 12 13 14 15 16 17 18 19 20 21 22 23 package com.wu.Interceptor;import org.springframework.web.servlet.HandlerInterceptor;import javax.servlet.http.HttpServletRequest;import javax.servlet.http.HttpServletResponse;public class LoginHandlerInterceptor implements HandlerInterceptor { @Override public boolean preHandle (HttpServletRequest request, HttpServletResponse response, Object handler) throws Exception { Object session = request.getSession().getAttribute("LoginUser" ); if (session == null ) { request.setAttribute("msg" , "权限不够,请先登录" ); request.getRequestDispatcher("/index.html" ).forward(request, response); return false ; } else { return true ; } } }
然后配置到bean中注册,在MyMvcConfig配置类中,重写关于拦截器的方法,添加我们自定义的拦截器,注意屏蔽静态资源及主页以及相关请求的拦截
1 2 3 4 5 6 7 8 @Override public void addInterceptors (InterceptorRegistry registry) { registry.addInterceptor(new LoginHandlerInterceptor ()) .addPathPatterns("/**" ) .excludePathPatterns("/index.html" , "/" , "/user/login" , "/css/**" , "/js/**" , "/img/**" ); }
然后重启主程序进行测试,直接访问http://localhost:8080/main.html
提示权限不够,请先登录,我们登录一下
进入到dashboard页面
如果我们再直接重新访问http://localhost:8080/main.html,也可以直接直接进入到dashboard页面,这是因为session里面存入了用户的信息,拦截器放行通过
(六)展示员工信息——查 1. 实现Customers视图跳转 目标:点击dashboard.html页面中的Customers展示跳转到list.html页面显示所有员工信息
因此,我们首先给dashboard.html页面中Customers部分标签添加href属性,实现点击该标签请求/emps路径跳转到list.html展示所有的员工信息
1 2 3 4 5 6 7 8 9 10 11 12 13 <li class ="nav-item" > <a class ="nav-link" th:href ="@{/emps}" > <svg xmlns ="http://www.w3.org/2000/svg" width ="24" height ="24" viewBox ="0 0 24 24" fill ="none" stroke ="currentColor" stroke-width ="2" stroke-linecap ="round" stroke-linejoin ="round" class ="feather feather-users" > <path d ="M17 21v-2a4 4 0 0 0-4-4H5a4 4 0 0 0-4 4v2" > </path > <circle cx ="9" cy ="7" r ="4" > </circle > <path d ="M23 21v-2a4 4 0 0 0-3-3.87" > </path > <path d ="M16 3.13a4 4 0 0 1 0 7.75" > </path > </svg > Customers </a > </li >
同样修改list.html对应该的代码为上述代码
我们在templates目录下新建一个包emp,用来放所有关于员工信息的页面,我们将list.html页面移入该包中
然后编写请求对应的controller,处理/emps请求,在controller包下,新建一个EmployeeController类
1 2 3 4 5 6 7 8 9 10 11 12 13 14 15 16 17 18 19 20 21 22 23 package com.wu.controller;import com.wu.dao.EmployeeDao;import com.wu.pojo.Employee;import org.springframework.beans.factory.annotation.Autowired;import org.springframework.stereotype.Controller;import org.springframework.ui.Model;import org.springframework.web.bind.annotation.RequestMapping;import java.util.Collection;@Controller public class EmployeeController { @Autowired private EmployeeDao employeeDao; @RequestMapping("/emps") public String list (Model model) { Collection<Employee> employees = employeeDao.getALL(); model.addAttribute("employees" ,employees); return "emp/list" ; } }
然后我们重启主程序进行测试,登录到dashboard页面,再点击Customers,成功跳转到/emps
但是有些问题 :
我们点击了Customers后,它应该处于高亮状态,但是这里点击后还是普通的样子,高亮还是在Dashboard上
list.html和dashboard.html页面的侧边栏和顶部栏是相同的,可以抽取出来
2. 提取页面公共部分 在templates目录下新建一个commons包,其中新建commons.html用来放置公共页面代码
利用th:fragment标签抽取公共部分(顶部导航栏和侧边栏)
1 2 3 4 5 6 7 8 9 10 11 12 13 14 15 16 17 18 19 20 21 22 23 24 25 26 27 28 29 30 31 32 33 34 35 36 37 38 39 40 41 42 43 44 45 46 47 48 49 50 51 52 53 54 55 56 57 58 59 60 61 62 63 64 65 66 67 68 69 70 71 72 73 74 75 76 77 78 79 80 81 82 83 84 85 86 87 88 89 90 91 92 93 94 95 96 97 98 99 100 101 102 103 104 105 106 107 108 109 110 111 112 113 114 115 116 117 118 119 120 121 122 123 124 125 126 127 128 129 130 131 132 133 134 135 136 137 138 139 140 141 142 143 144 145 146 147 148 149 150 151 152 153 154 155 156 157 158 159 160 161 162 163 164 165 166 <!DOCTYPE html > <html lang ="en" xmlns:th ="http://www.thymeleaf.org" > <nav class ="navbar navbar-dark sticky-top bg-dark flex-md-nowrap p-0" th:fragment ="topbar" > <a class ="navbar-brand col-sm-3 col-md-2 mr-0" href ="http://getbootstrap.com/docs/4.0/examples/dashboard/#" > Company name</a > <input class ="form-control form-control-dark w-100" type ="text" placeholder ="Search" aria-label ="Search" > <ul class ="navbar-nav px-3" > <li class ="nav-item text-nowrap" > <a class ="nav-link" href ="http://getbootstrap.com/docs/4.0/examples/dashboard/#" > Sign out</a > </li > </ul > </nav > <nav class ="col-md-2 d-none d-md-block bg-light sidebar" th:fragment ="siderbar" > <div class ="sidebar-sticky" > <ul class ="nav flex-column" > <li class ="nav-item" > <a class ="nav-link active" href ="http://getbootstrap.com/docs/4.0/examples/dashboard/#" > <svg xmlns ="http://www.w3.org/2000/svg" width ="24" height ="24" viewBox ="0 0 24 24" fill ="none" stroke ="currentColor" stroke-width ="2" stroke-linecap ="round" stroke-linejoin ="round" class ="feather feather-home" > <path d ="M3 9l9-7 9 7v11a2 2 0 0 1-2 2H5a2 2 0 0 1-2-2z" > </path > <polyline points ="9 22 9 12 15 12 15 22" > </polyline > </svg > Dashboard <span class ="sr-only" > (current)</span > </a > </li > <li class ="nav-item" > <a class ="nav-link" href ="http://getbootstrap.com/docs/4.0/examples/dashboard/#" > <svg xmlns ="http://www.w3.org/2000/svg" width ="24" height ="24" viewBox ="0 0 24 24" fill ="none" stroke ="currentColor" stroke-width ="2" stroke-linecap ="round" stroke-linejoin ="round" class ="feather feather-file" > <path d ="M13 2H6a2 2 0 0 0-2 2v16a2 2 0 0 0 2 2h12a2 2 0 0 0 2-2V9z" > </path > <polyline points ="13 2 13 9 20 9" > </polyline > </svg > Orders </a > </li > <li class ="nav-item" > <a class ="nav-link" href ="http://getbootstrap.com/docs/4.0/examples/dashboard/#" > <svg xmlns ="http://www.w3.org/2000/svg" width ="24" height ="24" viewBox ="0 0 24 24" fill ="none" stroke ="currentColor" stroke-width ="2" stroke-linecap ="round" stroke-linejoin ="round" class ="feather feather-shopping-cart" > <circle cx ="9" cy ="21" r ="1" > </circle > <circle cx ="20" cy ="21" r ="1" > </circle > <path d ="M1 1h4l2.68 13.39a2 2 0 0 0 2 1.61h9.72a2 2 0 0 0 2-1.61L23 6H6" > </path > </svg > Products </a > </li > <li class ="nav-item" > <a class ="nav-link" th:href ="@{/emps}" > <svg xmlns ="http://www.w3.org/2000/svg" width ="24" height ="24" viewBox ="0 0 24 24" fill ="none" stroke ="currentColor" stroke-width ="2" stroke-linecap ="round" stroke-linejoin ="round" class ="feather feather-users" > <path d ="M17 21v-2a4 4 0 0 0-4-4H5a4 4 0 0 0-4 4v2" > </path > <circle cx ="9" cy ="7" r ="4" > </circle > <path d ="M23 21v-2a4 4 0 0 0-3-3.87" > </path > <path d ="M16 3.13a4 4 0 0 1 0 7.75" > </path > </svg > Customers </a > </li > <li class ="nav-item" > <a class ="nav-link" href ="http://getbootstrap.com/docs/4.0/examples/dashboard/#" > <svg xmlns ="http://www.w3.org/2000/svg" width ="24" height ="24" viewBox ="0 0 24 24" fill ="none" stroke ="currentColor" stroke-width ="2" stroke-linecap ="round" stroke-linejoin ="round" class ="feather feather-bar-chart-2" > <line x1 ="18" y1 ="20" x2 ="18" y2 ="10" > </line > <line x1 ="12" y1 ="20" x2 ="12" y2 ="4" > </line > <line x1 ="6" y1 ="20" x2 ="6" y2 ="14" > </line > </svg > Reports </a > </li > <li class ="nav-item" > <a class ="nav-link" href ="http://getbootstrap.com/docs/4.0/examples/dashboard/#" > <svg xmlns ="http://www.w3.org/2000/svg" width ="24" height ="24" viewBox ="0 0 24 24" fill ="none" stroke ="currentColor" stroke-width ="2" stroke-linecap ="round" stroke-linejoin ="round" class ="feather feather-layers" > <polygon points ="12 2 2 7 12 12 22 7 12 2" > </polygon > <polyline points ="2 17 12 22 22 17" > </polyline > <polyline points ="2 12 12 17 22 12" > </polyline > </svg > Integrations </a > </li > </ul > <h6 class ="sidebar-heading d-flex justify-content-between align-items-center px-3 mt-4 mb-1 text-muted" > <span > Saved reports</span > <a class ="d-flex align-items-center text-muted" href ="http://getbootstrap.com/docs/4.0/examples/dashboard/#" > <svg xmlns ="http://www.w3.org/2000/svg" width ="24" height ="24" viewBox ="0 0 24 24" fill ="none" stroke ="currentColor" stroke-width ="2" stroke-linecap ="round" stroke-linejoin ="round" class ="feather feather-plus-circle" > <circle cx ="12" cy ="12" r ="10" > </circle > <line x1 ="12" y1 ="8" x2 ="12" y2 ="16" > </line > <line x1 ="8" y1 ="12" x2 ="16" y2 ="12" > </line > </svg > </a > </h6 > <ul class ="nav flex-column mb-2" > <li class ="nav-item" > <a class ="nav-link" href ="http://getbootstrap.com/docs/4.0/examples/dashboard/#" > <svg xmlns ="http://www.w3.org/2000/svg" width ="24" height ="24" viewBox ="0 0 24 24" fill ="none" stroke ="currentColor" stroke-width ="2" stroke-linecap ="round" stroke-linejoin ="round" class ="feather feather-file-text" > <path d ="M14 2H6a2 2 0 0 0-2 2v16a2 2 0 0 0 2 2h12a2 2 0 0 0 2-2V8z" > </path > <polyline points ="14 2 14 8 20 8" > </polyline > <line x1 ="16" y1 ="13" x2 ="8" y2 ="13" > </line > <line x1 ="16" y1 ="17" x2 ="8" y2 ="17" > </line > <polyline points ="10 9 9 9 8 9" > </polyline > </svg > Current month </a > </li > <li class ="nav-item" > <a class ="nav-link" href ="http://getbootstrap.com/docs/4.0/examples/dashboard/#" > <svg xmlns ="http://www.w3.org/2000/svg" width ="24" height ="24" viewBox ="0 0 24 24" fill ="none" stroke ="currentColor" stroke-width ="2" stroke-linecap ="round" stroke-linejoin ="round" class ="feather feather-file-text" > <path d ="M14 2H6a2 2 0 0 0-2 2v16a2 2 0 0 0 2 2h12a2 2 0 0 0 2-2V8z" > </path > <polyline points ="14 2 14 8 20 8" > </polyline > <line x1 ="16" y1 ="13" x2 ="8" y2 ="13" > </line > <line x1 ="16" y1 ="17" x2 ="8" y2 ="17" > </line > <polyline points ="10 9 9 9 8 9" > </polyline > </svg > Last quarter </a > </li > <li class ="nav-item" > <a class ="nav-link" href ="http://getbootstrap.com/docs/4.0/examples/dashboard/#" > <svg xmlns ="http://www.w3.org/2000/svg" width ="24" height ="24" viewBox ="0 0 24 24" fill ="none" stroke ="currentColor" stroke-width ="2" stroke-linecap ="round" stroke-linejoin ="round" class ="feather feather-file-text" > <path d ="M14 2H6a2 2 0 0 0-2 2v16a2 2 0 0 0 2 2h12a2 2 0 0 0 2-2V8z" > </path > <polyline points ="14 2 14 8 20 8" > </polyline > <line x1 ="16" y1 ="13" x2 ="8" y2 ="13" > </line > <line x1 ="16" y1 ="17" x2 ="8" y2 ="17" > </line > <polyline points ="10 9 9 9 8 9" > </polyline > </svg > Social engagement </a > </li > <li class ="nav-item" > <a class ="nav-link" href ="http://getbootstrap.com/docs/4.0/examples/dashboard/#" > <svg xmlns ="http://www.w3.org/2000/svg" width ="24" height ="24" viewBox ="0 0 24 24" fill ="none" stroke ="currentColor" stroke-width ="2" stroke-linecap ="round" stroke-linejoin ="round" class ="feather feather-file-text" > <path d ="M14 2H6a2 2 0 0 0-2 2v16a2 2 0 0 0 2 2h12a2 2 0 0 0 2-2V8z" > </path > <polyline points ="14 2 14 8 20 8" > </polyline > <line x1 ="16" y1 ="13" x2 ="8" y2 ="13" > </line > <line x1 ="16" y1 ="17" x2 ="8" y2 ="17" > </line > <polyline points ="10 9 9 9 8 9" > </polyline > </svg > Year-end sale </a > </li > </ul > </div > </nav > </html >
然后删除dashboard.html和list.html中顶部导航栏和侧边栏的代码
我们再次重启主程序测试一下,登陆成功后,可以看到已经没有了顶部导航栏和侧边栏
这是因为我们删除了公共部分,还没有引入,我们分别在dashboard.html和list.html删除的部分插入提取出来的公共部分topbar和sidebar
再次重启主程序进行测试,登陆成功后,成功看到侧边栏和顶部栏,代表我们插入成功
3. 点击高亮处理 在commons.html,页面中,使高亮的代码是class=”nav-link active”属性
我们可以传递参数判断点击了哪个标签实现相应的高亮
首先在dashboard.html的侧边栏标签传递参数active为dashboard.html
同样在list.html的侧边栏标签传递参数active为list.html
然后我们在公共页面commons.html相应标签部分利用thymeleaf 接收参数active,利用三元运算符判断决定是否高亮
再次重启主程序测试,登录成功后,首先Dashboard高亮
再点击Customers,Customers高亮,成功
4. 显示员工信息 修改list.html页面,显示我们自己的数据值
修改完成后,重启主程序,登录完成后查看所有员工信息,成功显示
接下来修改一下性别的显示和date的显示,并添加编辑和删除两个标签,为后续做准备
1 2 3 4 5 6 7 8 9 10 11 12 13 14 15 16 17 18 19 20 21 22 23 24 25 <thead > <tr > <th > id</th > <th > lastName</th > <th > email</th > <th > gender</th > <th > department</th > <th > birth</th > <th > 操作</th > </tr > </thead > <tbody > <tr th:each ="emp:${emps}" > <td th:text ="${emp.getId()}" > </td > <td th:text ="${emp.getLastName()}" > </td > <td th:text ="${emp.getEmail()}" > </td > <td th:text ="${emp.getGender()==0?'女':'男'}" > </td > <td th:text ="${emp.getDepartment().getDepartmentName()}" > </td > <td th:text ="${#dates.format(emp.getBirth(),'yyyy-MM-dd HH:mm:ss')}" > </td > <td > <a class ="btn btn-sm btn-primary" > 编辑</a > <a class ="btn btn-sm btn-danger" > 删除</a > </td > </tr > </tbody >
再次重启主程序测试,成功
(七)增加员工实现——增 1. list页面增加添加员工按钮 首先在list.html页面增添一个增加员工按钮,点击该按钮时发起一个请求/add
然后编写对应的controller,处理点击添加员工的请求
这里通过get方式提交请求,在EmployeeController中添加一个方法add用来处理list页面点击提交按钮的操作,返回到add.html添加员工页面,我们即将创建
1 2 3 4 5 6 7 @GetMapping("/add") public String add (Model model) { Collection<Department> departments = DepartmentDao.getDepartments(); model.addAttribute("departments" ,departments); return "emp/add" ; }
2. 创建添加员工页面add 在templates/emp下新建一个add.html
我们复制list.html中的内容,修改其中表格为:
1 2 3 4 5 6 7 8 9 10 11 12 13 14 15 16 17 18 19 20 21 22 23 24 25 26 27 28 29 30 31 32 33 34 <form > <div class ="form-group" > <label > LastName</label > <input type ="text" name ="lastName" class ="form-control" placeholder ="lastname:zsr" > </div > <div class ="form-group" > <label > Email</label > <input type ="email" name ="email" class ="form-control" placeholder ="email:xxxxx@qq.com" > </div > <div class ="form-group" > <label > Gender</label > <br /> <div class ="form-check form-check-inline" > <input class ="form-check-input" type ="radio" name ="gender" value ="1" > <label class ="form-check-label" > 男</label > </div > <div class ="form-check form-check-inline" > <input class ="form-check-input" type ="radio" name ="gender" value ="0" > <label class ="form-check-label" > 女</label > </div > </div > <div class ="form-group" > <label > department</label > <select class ="form-control" name ="department.id" > <option th:each ="department:${departments}" th:text ="${department.getDepartmentName()}" th:value ="${department.getId()}" > </option > </select > </div > <div class ="form-group" > <label > Birth</label > <input type ="text" name ="birth" class ="form-control" placeholder ="birth:yyyy/MM/dd" > </div > <button type ="submit" class ="btn btn-primary" > 添加</button > </form >
我们重启主程序看看
点击添加员工,成功跳转到add.html页面
下拉框中的内容不应该是1、2、3、4、5;应该是所有的部门名,我们遍历得到
重启测试,成功显示所有部门
到此,添加员工页面编写完成
3. add页面添加员工请求 在add.html页面,当我们填写完信息,点击添加按钮,应该完成添加返回到list页面,展示新的员工信息;因此在add.html点击添加按钮的一瞬间,我们同样发起一个请求/add,与上述提交按钮发出的请求路径一样,但这里发出的是post请求
然后编写对应的controller,同样在EmployeeController中添加一个方法addEmp用来处理点击添加按钮的操作
1 2 3 4 5 6 @PostMapping("/add") public String addEmp (Employee employee) { System.out.println(employee); employeeDao.save(employee); return "redirect:/emps" ; }
我们重启主程序,进行测试,进入添加页面,填写相关信息,注意日期格式默认为yyyy/MM/dd
然后点击添加按钮,成功实现添加员工
(八)修改员工信息——改 1. list页面编辑按钮增添请求
当我们点击编辑标签时,应该跳转到编辑页面edit.html(我们即将创建)进行编辑
因此首先将list.html页面的编辑标签添加href属性,实现点击请求/edit/id号到编辑页面
1 <a class ="btn btn-sm btn-primary" th:href ="@{/edit/{id}(id=${emp.getId()})}" > 编辑</a >
然后编写对应的controller,在EmployeeController中添加一个方法edit用来处理list页面点击编辑按钮的操作,返回到edit.html编辑员工页面,我们即将创建
1 2 3 4 5 6 7 8 9 10 11 @RequestMapping("/edit/{id}") public String edit (@PathVariable("id") int id, Model model) { Employee employeeByID = employeeDao.getEmployeeById(id); model.addAttribute("empByID" , employeeByID); Collection<Department> departments = DepartmentDao.getDepartments(); model.addAttribute("departments" , departments); return "/emp/edit" ; }
2. 创建编辑员工页面edit 在templates/emp下新建一个edit.html
复制add.html中的代码,稍作修改
1 2 3 4 5 6 7 8 9 10 11 12 13 14 15 16 17 18 19 20 21 22 23 24 25 26 27 28 29 30 31 32 33 34 35 36 37 38 39 40 41 42 43 44 45 <main role ="main" class ="col-md-9 ml-sm-auto col-lg-10 pt-3 px-4" > <form th:action ="@{/edit}" method ="post" > <input type ="hidden" name ="id" th:value ="${empByID.getId()}" > <div class ="form-group" > <label > LastName</label > <input th:value ="${empByID.getLastName()}" type ="text" name ="lastName" class ="form-control" placeholder ="lastname:zsr" > </div > <div class ="form-group" > <label > Email</label > <input th:value ="${empByID.getEmail()}" type ="email" name ="email" class ="form-control" placeholder ="email:xxxxx@qq.com" > </div > <div class ="form-group" > <label > Gender</label > <br /> <div class ="form-check form-check-inline" > <input th:checked ="${empByID.getGender()==1}" class ="form-check-input" type ="radio" name ="gender" value ="1" > <label class ="form-check-label" > 男</label > </div > <div class ="form-check form-check-inline" > <input th:checked ="${empByID.getGender()==0}" class ="form-check-input" type ="radio" name ="gender" value ="0" > <label class ="form-check-label" > 女</label > </div > </div > <div class ="form-group" > <label > department</label > <select class ="form-control" name ="department.id" > <option th:selected ="${department.getId()==empByID.department.getId()}" th:each ="department:${departments}" th:text ="${department.getDepartmentName()}" th:value ="${department.getId()}" > </option > </select > </div > <div class ="form-group" > <label > Birth</label > <input th:value ="${#dates.format(empByID.getBirth(),'yyyy/MM/dd')}" type ="text" name ="birth" class ="form-control" placeholder ="birth:yy/MM/dd" > </div > <button type ="submit" class ="btn btn-primary" > 修改</button > </form > </main >
启动主程序测试,点击编辑1号用户
成功跳转到edit.html,且所选用户信息正确
但是日期的格式不太正确,我们规定一下显示的日期格式
1 2 <input th:value ="${#dates.format(empByID.getDate(),'yyyy/MM/dd')}" type ="text" name ="birth" class ="form-control" placeholder ="birth:yy/MM/dd" >
设置springboot的默认时间格式
1 2 spring.mvc.format.date =yyyy-MM-dd
3. edit页面编辑完成提交请求 在edit.html点击修改按钮的一瞬间,我们需要返回到list页面,更新员工信息,因此我们需要添加href属性,实现点击按钮时发起一个请求/edit
然后编写对应的controller,处理点击修改按钮的请求
同样在EmployeeController中添加一个方法EditEmp用来处理edit页面点击添加的操作
1 2 3 4 5 @PostMapping("/edit") public String EditEmp (Employee employee) { employeeDao.save(employee); return "redirect:/emps" ; }
然后指定修改人的id
1 <input type ="hidden" name ="id" th:value ="${empByID.getId()}" >
重启测试,同样修改1号用户名称为xiaowu
然后点击修改
成功修改并返回到list.html
(九)删除员工信息——删
当我们点击删除标签时,应该发起一个请求,删除指定的用户,然后重新返回到list页面显示员工数据
1 <a class ="btn btn-sm btn-success" th:href ="@{/delete/{id}(id=${emp.getId()})}" > 删除</a >
然后编写对应的controller,处理点击删除按钮的请求,删除指定员工,重定向到/emps请求,更新员工信息
1 2 3 4 5 @GetMapping("/delete/{id}") public String delete (@PathVariable("id") Integer id) { employeeDao.delete(id); return "redirect:/emps" ; }
重启测试,点击删除按钮即可删除指定员工
(十)404页面定制 只需要在templates目录下新建一个error包,然后将404.html放入其中,报错SpringBoot就会自动找到这个页面
我们可以启动程序测试,随便访问一个不存在的页面
出现的404页面即是我们自己的404.html
(十一)注销操作 在我们提取出来的公共commons页面,顶部导航栏处中的标签添加href属性,实现点击发起请求/user/logout
然后编写对应的controller,处理点击注销标签的请求,在LoginController中编写对应的方法,清除session,并重定向到首页
1 2 3 4 5 @RequestMapping("/user/logout") public String logout (HttpSession session) { session.invalidate(); return "redirect:/index.html" ; }
重启测试,登录成功后,点击Sign out即可退出到首页
发现回到登录页面
bug: 当我们登录进去进入主页面的时候,会发现我们的主页的统计表没有显示出来
解决方案
原因:通过控制台发现我们找不到对应的js文件
纠正:
修改adshaboard.html 用tyh来获取我们样式资源
但是目前还有这问题(问题不大)
DevTools failed to load source map: Could not load content for http://localhost:8080/css/bootstrap.min.css.map : HTTP 错误: 状态代码 404,net::ERR_HTTP_RESPONSE_CODE_FAILURE
自定义starter https://mp.weixin.qq.com/s/2eB2uT088BvzaqRULezdsw
整合JDBC SpringData简介 对于数据访问层,无论是 SQL(关系型数据库) 还是 NOSQL(非关系型数据库),Spring Boot 底层都是采用 Spring Data 的方式进行统一处理。
Spring Boot 底层都是采用 Spring Data 的方式进行统一处理各种数据库,Spring Data 也是 Spring 中与 Spring Boot、Spring Cloud 等齐名的知名项目。
Sping Data 官网:https://spring.io/projects/spring-data
数据库相关的启动器 :可以参考官方文档:
https://docs.spring.io/spring-boot/docs/2.2.5.RELEASE/reference/htmlsingle/#using-boot-starter
参数 rl****数据库的jdbc连接地址。一般为连接oracle/mysql。示例如下: mysql : jdbc:mysql://ip:port/dbname?option1&option2&…oracle : jdbc:oracle:thin:@ip:port:oracle_sidusername登录数据库的用户名password登录数据库的用户密码initialSize启动程序时,在连接池中初始化多少个连接10-50已足够maxActive连接池中最多支持多少个活动会话maxWait程序向连接池中请求连接时,超过maxWait的值后,认为本次请求失败,即连接池100没有可用连接,单位毫秒,设置-1时表示无限等待minEvictableIdleTimeMillis池中某个连接的空闲时长达到 N 毫秒后, 连接池在下次检查空闲连接时,将见说明部分回收该连接,要小于防火墙超时设置net.netfilter.nf_conntrack_tcp_timeout_established的设置timeBetweenEvictionRunsMillis检查空闲连接的频率,单位毫秒, 非正整数时表示不进行检查keepAlive程序没有close连接且空闲时长超过 minEvictableIdleTimeMillis,则会执true行validationQuery指定的SQL,以保证该程序连接不会池kill掉,其范围不超过minIdle指定的连接个数。minIdle回收空闲连接时,将保证至少有minIdle个连接.与initialSize相同removeAbandoned要求程序从池中get到连接后, N 秒后必须close,否则druid 会强制回收该false,当发现程序有未连接,不管该连接中是活动还是空闲, 以防止进程不会进行close而霸占连接。正常close连接时设置为trueremoveAbandonedTimeout设置druid 强制回收连接的时限,当程序从池中get到连接开始算起,超过此应大于业务运行最长时间值后,druid将强制回收该连接,单位秒。logAbandoned当druid强制回收连接后,是否将stack trace 记录到日志中申请 连接时,进行连接有效性检查(低效,影响性能)falsetestOnReturn程序 返还 连接时,进行连接有效性检查(低效,影响性能)falsepoolPreparedStatements缓存通过以下两个方法发起的SQL:truepublic PreparedStatement prepareStatement(String sql) public PreparedStatement prepareStatement(String sql,int resultSetType, int resultSetConcurrency)maxPoolPrepareStatementPerConnectionSize每个连接最多缓存多少个SQL20filters这里配置的是插件,常用的插件有:stat,wall,slf4j监控统计: filter:stat日志监控: filter:log4j 或者 slf4j防御SQL注入: filter:wall连接属性。比如设置一些连接池统计方面的配置。connectProperties连接属性。比如设置一些连接池统计方面的配置。druid.stat.mergeSql=true;druid.stat.slowSqlMillis=5000比如设置一些数据库连接属性:
写配置JDBC文件,application.xml 1 2 3 4 5 6 spring: datasource: username: root password: root url: jdbc:mysql://localhost:3306/mybatis?useSSL=true&userUniceode=true&characterEncoding=utf8 driver-class-name: com.mysql.cj.jdbc.Driver
测试
1 2 3 4 5 6 7 8 9 10 11 12 13 14 15 16 17 18 19 20 21 22 23 24 25 26 27 28 29 30 31 32 package com.wu.springboot04date;import org.junit.jupiter.api.Test;import org.springframework.beans.factory.annotation.Autowired;import org.springframework.boot.test.context.SpringBootTest;import javax.sql.DataSource;import java.sql.Connection;import java.sql.SQLException;@SpringBootTest class SpringBoot04DateApplicationTests { @Autowired(required = false) DataSource dataSource; @Test void contextLoads () throws SQLException { System.out.println(dataSource.getClass()); Connection connection = dataSource.getConnection(); System.out.println(connection); connection.close(); } }
我们来全局搜索一下,找到数据源的所有自动配置都在 :DataSourceAutoConfiguration文件:
1 2 3 4 5 6 7 @Conditional({DataSourceAutoConfiguration.PooledDataSourceCondition.class}) @ConditionalOnMissingBean({DataSource.class, XADataSource.class}) @Import({Hikari.class, Tomcat.class, Dbcp2.class, OracleUcp.class, Generic.class, DataSourceJmxConfiguration.class}) protected static class PooledDataSourceConfiguration { protected PooledDataSourceConfiguration () { } }
这里导入的类都在 DataSourceConfiguration 配置类下,可以看出 Spring Boot 2.2.5 默认使用HikariDataSource 数据源,而以前版本,如 Spring Boot 1.5 默认使用 org.apache.tomcat.jdbc.pool.DataSource 作为数据源;HikariDataSource 号称 Java WEB 当前速度最快的数据源,相比于传统的 C3P0 、DBCP、Tomcat jdbc 等连接池更加优秀;
可以使用 spring.datasource.type 指定自定义的数据源类型,值为 要使用的连接池实现的完全限定名。 关于数据源我们并不做介绍,有了数据库连接,显然就可以 CRUD 操作数据库了。但是我们需要先了解一个对象 JdbcTemplate
JDBCTemplate 1、有了数据源(com.zaxxer.hikari.HikariDataSource),然后可以拿到数据库连接(java.sql.Connection),有了连接,就可以使用原生的 JDBC 语句来操作数据库;2、即使不使用第三方第数据库操作框架,如 MyBatis等,Spring 本身也对原生的JDBC 做了轻量级的封装,即JdbcTemplate。
3、数据库操作的所有 CRUD 方法都在 JdbcTemplate 中。
4、Spring Boot 不仅提供了默认的数据源,同时默认已经配置好了 JdbcTemplate 放在了容器中,程序员只需自己注入即可使用
5、JdbcTemplate 的自动配置是依赖 org.springframework.boot.autoconfigure.jdbc 包下的 JdbcTemplateConfiguration 类
JdbcTemplate主要提供以下几类方法:
execute方法:可以用于执行任何SQL语句,一般用于执行DDL语句;
update方法及batchUpdate方法:update方法用于执行新增、修改、删除等语句;batchUpdate方法用于执行批处理相关语句;
query方法及queryForXXX方法:用于执行查询相关语句;
call方法:用于执行存储过程、函数相关语句。
测试CRUD 1 2 3 4 5 6 7 8 9 10 11 12 13 14 15 16 17 18 19 20 21 22 23 24 25 26 27 28 29 30 31 32 33 34 35 36 37 38 39 40 41 42 43 44 45 46 47 48 49 50 51 package com.wu.springboot04date.controller;import org.springframework.beans.factory.annotation.Autowired;import org.springframework.jdbc.core.JdbcTemplate;import org.springframework.web.bind.annotation.GetMapping;import org.springframework.web.bind.annotation.PathVariable;import org.springframework.web.bind.annotation.RestController;import java.util.List;import java.util.Map;@RestController public class JDBCController { @Autowired JdbcTemplate jdbcTemplate; @GetMapping("/userList") public List<Map<String,Object>> userList () { String sql = "select * from user" ; List<Map<String,Object>> List_map= jdbcTemplate.queryForList(sql); return List_map; } @GetMapping("/ADD") public String addUser () { String sql = "insert into user(id,name,pwd) values(6,'xioa','1234567')" ; jdbcTemplate.update(sql); return "update-ok" ; } @GetMapping("/update/{id}") public String update (@PathVariable("id") int id) { String sql = "update user set name = ? ,pwd= ?where id =" +id; Object[] objects = new Object [2 ]; objects[0 ] = "qq" ; objects[1 ] = "12345678" ; jdbcTemplate.update(sql,objects); return "update-ok2" ; } @GetMapping("/delete/{id}") public String delete (@PathVariable("id") int id) { String sql = "delete from user where id = ?" ; jdbcTemplate.update(sql,id); return "delet-ok" ; } }
集成Druid Druid简介 Java程序很大一部分要操作数据库,为了提高性能操作数据库的时候,又不得不使用数据库连接池。
Druid 是阿里巴巴开源平台上一个数据库连接池实现,结合了 C3P0、DBCP 等 DB 池的优点,同时加入了日志监控。
Druid 可以很好的监控 DB 池连接和 SQL 的执行情况,天生就是针对监控而生的 DB 连接池。
Druid已经在阿里巴巴部署了超过600个应用,经过一年多生产环境大规模部署的严苛考验。
Spring Boot 2.0 以上默认使用 Hikari 数据源,可以说 Hikari 与 Driud 都是当前 Java Web 上最优秀的数据源,我们来重点介绍 Spring Boot 如何集成 Druid 数据源,如何实现数据库监控。
Github地址:https://github.com/alibaba/druid/
com.alibaba.druid.pool.DruidDataSource 基本配置参数如下:
参数详解 DruidDataSource的使用、配置
https://mp.weixin.qq.com/s/wVAGOP1JdXZi5DMEsX1Aug
配置数据源 1、添加上 Druid 数据源依赖。
1 2 3 4 5 <dependency > <groupId > com.alibaba</groupId > <artifactId > druid</artifactId > <version > 1.1.23</version > </dependency >
2、去配置Druid,配置自定义的数据源
1 2 3 4 5 6 7 spring: datasource: username: root password: root url: jdbc:mysql://localhost:3306/mybatis?useSSL=true&userUniceode=true&characterEncoding=utf8 driver-class-name: com.mysql.cj.jdbc.Driver type: com.alibaba.druid.pool.DruidDataSource
3、接下来就可以设置数据源连接初始化大小、最大连接数、等待时间、最小连接数 等设置项;可以查看源码
1 2 3 4 5 6 7 8 9 10 11 12 13 14 15 16 17 18 19 20 21 22 initialSize: 5 minIdle: 5 maxActive: 20 maxWait: 60000 timeBetweenEvictionRunsMillis: 60000 minEvictableIdleTimeMillis: 300000 validationQuery: SELECT 1 FROM DUAL testWhileIdle: true testOnBorrow: false testOnReturn: false poolPreparedStatements: true filters: commons-log.connection-logger-name: stat,wall,log4j maxPoolPreparedStatementPerConnectionSize: 20 useGlobalDataSourceStat: true connectionProperties: druid.stat.mergeSql=true;druid.stat.slowSqlMillis=500
4、因为Druid中包含log4j所以需要导入依赖
1 2 3 4 5 <dependency > <groupId > log4j</groupId > <artifactId > log4j</artifactId > <version > 1.2.17</version > </dependency >
5、现在需要程序员自己为 DruidDataSource 绑定全局配置文件中的参数,再添加到容器中,而不再使用 Spring Boot 的自动生成了;我们需要 自己添加 DruidDataSource 组件到容器中,并绑定属性
1 2 3 4 5 6 7 8 public class DruidConfig { @Bean @ConfigurationProperties(prefix = "spring.datasource") public DataSource druidDateSource () { return new DruidDataSource (); } }
6、Druid具有看监控功能,可以方便用户在web端看见后台的操作,配置后台监控和过滤器
1 2 3 4 5 6 7 8 9 10 11 12 13 14 15 16 17 18 19 20 21 22 23 24 25 26 27 28 29 30 31 32 33 34 35 36 37 38 39 40 41 42 43 44 45 46 47 48 49 50 51 52 53 54 55 56 package com.wu.springboot04date.config;import com.alibaba.druid.pool.DruidDataSource;import com.alibaba.druid.support.http.StatViewServlet;import com.alibaba.druid.support.http.WebStatFilter;import org.springframework.boot.context.properties.ConfigurationProperties;import org.springframework.boot.web.servlet.FilterRegistrationBean;import org.springframework.boot.web.servlet.ServletRegistrationBean;import org.springframework.context.annotation.Bean;import org.springframework.context.annotation.Configuration;import javax.sql.DataSource;import java.io.File;import java.util.HashMap;@Configuration public class DruidConfig { @Bean @ConfigurationProperties(prefix = "spring.datasource") public DataSource druidDateSource () { return new DruidDataSource (); } @Bean public ServletRegistrationBean statViewServlet () { ServletRegistrationBean<StatViewServlet> bean = new ServletRegistrationBean <>(new StatViewServlet (), "/druid/*" ); HashMap<String,String> initParameters = new HashMap <>(); initParameters.put("loginUsername" ,"admin" ); initParameters.put("loginPassword" ,"123456" ); initParameters.put("allow" ,"" ); bean.setInitParameters(initParameters); return bean; } @Bean public FilterRegistrationBean webServletFilter () { FilterRegistrationBean bean = new FilterRegistrationBean (); bean.setFilter(new WebStatFilter ()); HashMap<String,String> map = new HashMap <>(); map.put("exclusions" ,"*.js,*.css,/druid/*" ); bean.setInitParameters(map); return bean; } }
整合Mybatis 官方文档:http://mybatis.org/spring-boot-starter/mybatis-spring-boot-autoconfigure/
Maven仓库地址:Maven Repository: org.mybatis.spring.boot » mybatis-spring-boot-starter » 2.1.3 (mvnrepository.com)
测试 1.导入依赖 1 2 3 4 5 6 <dependency > <groupId > org.mybatis.spring.boot</groupId > <artifactId > mybatis-spring-boot-starter</artifactId > <version > 2.1.3</version > </dependency >
2.连接数据库 1 2 3 4 spring.datasource.username =root spring.datasource.password =root spring.datasource.url =jdbc:mysql://localhost:3306/mybatis?userUnicode=true&useSSL=true&characterEncoding=utf8 spring.datasource.driver-class-name =com.mysql.cj.jdbc.Driver
3.测试是否连接成功 1 2 3 4 5 6 7 8 9 10 11 12 13 14 15 16 17 18 19 20 package com.wu.springboot05mybatis;import org.junit.jupiter.api.Test;import org.springframework.beans.factory.annotation.Autowired;import org.springframework.boot.test.context.SpringBootTest;import javax.sql.DataSource;import java.sql.SQLException;@SpringBootTest class SpringBoot05MybatisApplicationTests { @Autowired DataSource dataSource; @Test void contextLoads () throws SQLException { System.out.println(dataSource.getClass()); System.out.println(dataSource.getConnection()); } }
4.导入lombok 1 2 3 4 <dependency > <groupId > org.projectlombok</groupId > <artifactId > lombok</artifactId > </dependency >
5.实体类 1 2 3 4 5 6 7 8 9 10 11 12 13 14 package com.wu.springboot05mybatis.pojo;import lombok.AllArgsConstructor;import lombok.Data;import lombok.NoArgsConstructor;@AllArgsConstructor @NoArgsConstructor @Data public class User { private Integer id; private String name; private String pwd; }
6.mapper 1 2 3 4 5 6 7 8 9 10 11 12 13 14 15 16 17 18 19 20 21 22 23 24 package com.wu.springboot05mybatis.mapper;import com.wu.springboot05mybatis.pojo.User;import org.apache.ibatis.annotations.Mapper;import org.springframework.stereotype.Repository;import java.util.List;@Mapper @Repository public interface UserMapper { List<User> queryUserList () ; User queryUserById (int id) ; int updateUser (User user) ; int addUser (User user) ; int deleteUser (int id) ; }
7.mapper.xml 1 2 3 4 5 6 7 8 9 10 11 12 13 14 15 16 17 18 19 20 21 22 23 24 25 26 <?xml version="1.0" encoding="UTF-8" ?> <!DOCTYPE mapper PUBLIC "-//mybatis.org//DTD Mapper 3.0//EN" "http://mybatis.org/dtd/mybatis-3-mapper.dtd" > <mapper namespace ="com.wu.springboot05mybatis.mapper.UserMapper" > <select id ="queryUserList" resultType ="User" > select * from user </select > <select id ="queryUserById" parameterType ="int" resultType ="User" > select * from user where id = #{id} </select > <update id ="updateUser" parameterType ="User" > update user set name=#{name},pwd=#{pwd} where id = #{id} </update > <insert id ="addUser" parameterType ="User" > insert into user(id,name,pwd) values (#{id},#{name},#{pwd}) </insert > <delete id ="deleteUser" parameterType ="int" > delete from user where id = #{id} </delete > </mapper >
8.整合mybatis,让spring可以识别mappper 1 2 3 4 5 6 7 8 9 spring.datasource.username =root spring.datasource.password =root spring.datasource.url =jdbc:mysql://localhost:3306/mybatis?userUnicode=true&useSSL=true&characterEncoding=utf8 spring.datasource.driver-class-name =com.mysql.cj.jdbc.Driver mybatis.type-aliases-package =com.wu.springboot05mybatis.pojo mybatis.mapper-locations =classpath:mybatis/mapper/*.xml
9.编写controller测试 1 2 3 4 5 6 7 8 9 10 11 12 13 14 15 16 17 18 19 20 21 22 23 24 25 26 27 28 29 30 31 32 33 34 35 36 37 38 39 40 41 package com.wu.controller;import com.wu.mapper.UserMapper;import com.wu.pojo.User;import org.springframework.beans.factory.annotation.Autowired;import org.springframework.web.bind.annotation.GetMapping;import org.springframework.web.bind.annotation.PathVariable;import org.springframework.web.bind.annotation.RestController;import java.util.List;@RestController public class UserController { @Autowired private UserMapper userMapper; @GetMapping("/query") public List<User> queryUserList () { List<User> users = userMapper.queryUserList(); for (User user : users){ System.out.println(user); } return users; } @GetMapping("/ById/{id}") public User queryUserById (@PathVariable("id") int id) { User user = userMapper.queryUserById(id); System.out.println(user); return user; } @GetMapping("/update") public String updateUser () { User user = new User (4 ,"xiaowu" ,"xiaowu" ); if (userMapper.updateUser(user)!=0 ){ return "ok" ; } return "false" ; } }
SpringSecurity https://mp.weixin.qq.com/s/FLdC-24_pP8l5D-i7kEwcg
shiro、SpringSecurity:很像,除了类不一样
首先导入需要的静态资源:
链接:https://pan.baidu.com/s/1oB9-VKrN4tzh61MtdW5Dow
1 简介
SpringSecurity是Springboot底层安全模块默认的技术选型,它可以实现强大的Web安全机制,只需要少数的spring-boot–spring-security依赖,进行少量的配置,就可以实现
SpringBoot中的SpringSecurity依赖:
功能权限、访问权限、菜单权限…,我们使用过滤器,拦截器需要写大量的原生代码,这样很不方便
所以在网址设计之初,就应该考虑到权限验证的安全问题,其中Shiro、SpringSecurity使用很多
2.导入依赖 1 2 3 4 5 6 7 8 9 10 <dependency > <groupId > org.springframework.boot</groupId > <artifactId > spring-boot-starter-security</artifactId > </dependency > <dependency > <groupId > org.springframework.boot</groupId > <artifactId > spring-boot-starter-thymeleaf</artifactId > </dependency >
记住几个类 :
WebSecurityConfigurerAdapter:自定义Security策略
AuthenticationManagerBuilder:自定义认证策略
@EnableWebSecurity:开启WebSecurity模式
两个单词:en是认证,or是权限
认证方式:Authentication
权限:Authorization
1 2 3 4 5 6 7 8 9 10 11 12 13 package com.wu.config;import org.springframework.security.config.annotation.web.builders.HttpSecurity;import org.springframework.security.config.annotation.web.configuration.EnableWebSecurity;import org.springframework.security.config.annotation.web.configuration.WebSecurityConfigurerAdapter;@EnableWebSecurity public class SecurityConfig extends WebSecurityConfigurerAdapter { @Override protected void configure (HttpSecurity http) throws Exception { super .configure(http); } }
4.配置Controller层 1 2 3 4 5 6 7 8 9 10 11 12 13 14 15 16 17 18 19 20 21 22 23 24 25 26 27 28 29 30 31 32 33 34 package com.wu.controller;import org.springframework.stereotype.Controller;import org.springframework.web.bind.annotation.PathVariable;import org.springframework.web.bind.annotation.RequestMapping;@Controller public class RouterController { @RequestMapping({"/","/index"}) public String index () { return "index" ; } @RequestMapping("/toLogin") public String toLogin () { return "views/login" ; } @RequestMapping("/level1/{id}") public String level (@PathVariable("id") int id) { return "views/level1/" +id; } @RequestMapping("/level2/{id}") public String level2 (@PathVariable("id") int id) { return "views/level2/" +id; } @RequestMapping("/level3/{id}") public String level3 (@PathVariable("id") int id) { return "views/level3/" +id; } }
5.认证和授权 1.授权 1 2 3 4 5 6 7 8 9 10 11 12 13 @EnableWebSecurity public class SecurityConfig extends WebSecurityConfigurerAdapter { @Override protected void configure (HttpSecurity http) throws Exception { http.authorizeRequests().antMatchers("/" ).permitAll() .antMatchers("/level1/**" ).hasRole("vip1" ) .antMatchers("/level2/**" ).hasRole("vip2" ) .antMatchers("/level3/**" ).hasRole("vip3" ); }
测试一下:发现除了首页都进不去了!因为我们目前没有登录的角色,因为请求需要登录的角色拥有对应的权限才可以!
在configure()方法中加入以下配置,开启自动配置的登录功能!
测试发现没有权限的时候,会跳转到登录的页面:
2.认证 查看刚才登录页的注释信息;
我们可以定义认证规则,重写configure(AuthenticationManagerBuilder auth)方法
也可以去jdbc中去取
1 2 3 4 5 6 7 8 9 10 11 12 @Override protected void configure (AuthenticationManagerBuilder auth) throws Exception { auth.inMemoryAuthentication() .withUser("xiaowu" ).password("xiaowu" ).roles("vip2" ,"vip3" ) .and() .withUser("root" ).password("root" ).roles("vip1" ,"vip2" ,"vip3" ) .and() .withUser("guest" ).password("123456" ).roles("vip1" ); }
测试,我们可以使用这些账号登录进行测试!发现会报错!
原因,我们要将前端传过来的密码进行某种方式加密,否则就无法登录,修改代码
1 2 3 4 5 6 7 8 9 10 11 12 13 @Override protected void configure (AuthenticationManagerBuilder auth) throws Exception { auth.inMemoryAuthentication().passwordEncoder(new BCryptPasswordEncoder ()) .withUser("xiaowu" ).password(new BCryptPasswordEncoder ().encode("xiaowu" )).roles("vip2" ,"vip3" ) .and() .withUser("root" ).password(new BCryptPasswordEncoder ().encode("root" )).roles("vip1" ,"vip2" ,"vip3" ) .and() .withUser("guest" ).password(new BCryptPasswordEncoder ().encode("123456" )).roles("vip1" ); }
写一个类继承WebSecurityConfigurerAdapter,使用@EnableWebSecurity开启web安全服务
地址授权:使用HttpSecurity security
账户认证和给予权限:使用AuthenticationManagerBuilder builder
SpringSecurity5 以后默认需要密码加密方式,推荐使用passwordEncoder(new BCryptPasswordEncoder())
6.注销以及控制权限 1. 定制登录
开启登录功能:formLogin(),Springboot默认自带一个登录页/login定制看下面
现在这个登录页面都是spring security 默认的,怎么样可以使用我们自己写的Login界面呢?
1、在刚才的登录页配置后面指定 loginpage()
1 2 http.formLogin().loginPage("/toLogin" );
2、然后index页面的登录地址绑定我们controller地址
1 2 3 <a class ="item" th:href ="@{/toLogin}" > <i class ="address card icon" > </i > 登录 </a >
3、我们登录,需要将这些信息发送到哪里,我们也需要配置,login.html 配置提交请求及方式,方式必须为post:
1 2 //刚好对应 http.formLogin().loginPage("/toLogin"); <form th:action ="@{/toLogin}" method ="post" >
图示解析:
4、这个请求提交上来,我们还需要验证处理,怎么做呢?我们可以查看formLogin()方法的源码!我们配置接收登录的用户名和密码的参数!
例子:比如下列就会出现报错:
这时就需要去config中设置一下,将对应的字段进行连接
1 http.formLogin().usernameParameter("name" ).passwordParameter("pwd" ).loginPage("/toLogin" );
5、如果我们前端表单请求地址为自定义
添加loginProcessingUrl()方法
1 2 http.formLogin().loginPage("/toLogin" ).loginProcessingUrl("/xiaowu" ).usernameParameter("name" ).passwordParameter("pwd" );
注意:
1、看源码就可以知道,loginPage的默认值是(“/login”),而loginProcessingUrl的默认值是loginPage的值
2、loginPage()和loginProcessingUrl()其中一个和前端表单地址一致都可以实现
举个例子:
http.formLogin().loginPage(“/toLogin”)和前端地址一样,成功
http.formLogin().loginProcessingUrl(“/toLogin”) 也一样成功
3、//loginPage(“/toLogin”):指定了登录页面的路径为 “/toLogin”,即用户访问该路径时会显示登录页面。
//loginProcessingUrl(“/login”):指定了登录表单提交的 URL 为 “/login”,即用户在登录表单中输入用户名和密码后,提交表单时会发送 POST 请求到该 URL 进行登录处理。
4、如果两个方法都写了的话,那么前端请求地址要和loginProcessingUrl地址一样,否则会404找不到,因为loginProcessingUrl是专门处理表单请求的,而此时loginPage作用不大了(除非有多个登录请求,这样可以指定是哪个)
5、为什么我们登录页面的地址不会走controller层,而是跑到SecurityConfig类里?
这是因为 Spring Security 是一个基于过滤器(Filter)的安全框架,它通过拦截请求并进行安全验证来保护应用程序。
6、在登录页增加记住我的选择框
1 2 3 4 <div class ="field" > <input type ="checkbox" name ="remember" > 记住我 </div > http.rememberMe().rememberMeParameter("remember");
2. 注销
springboot自带注销页:/logout
注销成功后跳转到/控制器
1.开启自动配置的注销的功能
1 2 3 4 5 6 7 @Override protected void configure (HttpSecurity http) throws Exception { http.logout(); }
2.我们在前端,增加一个注销的按钮,index.html 导航栏中
1 2 3 <a class ="item" th:href ="@{/logout}" > <i class ="sign-out icon" > </i > 注销 </a >
我们可以去测试一下,登录成功后点击注销,发现注销完毕会跳转到登录页面!
但是,我们想让他注销成功后,依旧可以跳转到首页,该怎么处理呢?
1 2 http.logout().logoutSuccessUrl("/" );
测试,注销完毕后,发现跳转到首页OK
3. 记住我
现在的情况,我们只要登录之后,关闭浏览器,再登录,就会让我们重新登录,但是很多网站的情况,就是有一个记住密码的功能,这个该如何实现呢?很简单
1、开启记住我功能
1 2 3 4 5 6 7 @Override protected void configure (HttpSecurity http) throws Exception { http.rememberMe(); }
2、我们再次启动项目测试一下,发现登录页多了一个记住我功能,我们登录之后关闭 浏览器,然后重新打开浏览器访问,发现用户依旧存在!
实现原理在浏览器加了cookie
我们可以查看浏览器的cookie
3、我们点击注销的时候,可以发现,spring security 帮我们自动删除了这个 cookie
4、结论:登录成功后,将cookie发送给浏览器保存,以后登录带上这个cookie,只要通过检查就可以免登录了。如果点击注销,则会删除这个cookie,具体的原理我们在JavaWeb阶段都讲过了,这里就不在多说了!
4. 登录用户权限显示页面 我们现在又来一个需求:用户没有登录的时候,导航栏上只显示登录按钮,用户登录之后,导航栏可以显示登录的用户信息及注销按钮!还有就是,比如xiaowu这个用户,它只有 vip2,vip3功能,那么登录则只显示这两个功能,而vip1的功能菜单不显示!这个就是真实的网站情况了!该如何做呢?
我们需要结合thymeleaf中的一些功能
1 2 <div sec:authorize ="!isAuthenticated()" > 未登录显示<div sec:authorize ="isAuthenticated()" > 以登陆显示
导入thymeleaf和security结合的Maven依赖:
1 2 3 4 5 6 <dependency > <groupId > org.thymeleaf.extras</groupId > <artifactId > thymeleaf-extras-springsecurity5</artifactId > <version > 3.0.4.RELEASE</version > </dependency >
修改我们的 前端页面
导入命名空间
1 xmlns:sec="http://www.thymeleaf.org/thymeleaf-extras-springsecurity5"
修改导航栏,增加认证判断
1 2 3 4 5 6 7 8 9 10 11 12 13 14 15 16 17 18 19 20 21 22 23 24 <div class ="right menu" > <div sec:authorize ="!isAuthenticated()" > <a class ="item" th:href ="@{/toLogin}" > <i class ="address card icon" > </i > 登录 </a > </div > <div sec:authorize ="isAuthenticated()" > <a class ="item" th:href ="@{/logout}" > 用户名:<span sec:authentication ="name" > </span > 角色:<span sec:authentication ="principal.authorities" > </span > </a > </div > <div sec:authorize ="isAuthenticated()" > <a class ="item" th:href ="@{/logout}" > <i class ="sign-out icon" > </i > 注销 </a > </div > </div >
重启测试,我们可以登录试试看,登录成功后确实,显示了我们想要的页面;
如果注销404了,就是因为它默认防止csrf跨站请求伪造,因为会产生安全问题,我们可以将请求改为post表单提交,或者在spring security中关闭csrf功能;我们试试:在 配置中增加 http.csrf().disable();
到目前为止已近实现了权限的访问资源不同,接下来还想实现对不同用户的页面显示内容不同:
1 关键代码:sec:authorize="hasRole()" //判断当前的权限是否有这个权限直接加在想要设置权限的标签内即可
问题****:我们因为设置了权限,所以在未登录的情况下主页面是没有内容,必须登录,但是因为我们设置了登录去的是我们自己的login页面(之前的登录是在点击没有权限的页面自己跳转的)的tologin方法默认提交方法是
@{/usr/login},改成 **@{/login}**就行
方法二:我们也可以直接在地址栏输入/login也能进
笔记顺序:注销—>当前小结—>记住我—>定制登录页面
整合Shiro 概述 简介 shiro官网:http://shiro.apache.org/,用Idea观看官方Quickstart源码,配置运行一遍
核心三大对象:用户Subject, 管理用户SecurityManager, 连接数据Realms
Subject:即“当前操作用户”。但是,在Shiro中,Subject这一概念并不仅仅指人,也可以是第三方进程、后台帐户(Daemon Account)或其他类似事物。它仅仅意味着“当前跟软件交互的东西”。
SecurityManager:它是Shiro框架的核心,典型的Facade模式,Shiro通过SecurityManager来管理内部组件实例,并通过它来提供安全管理的各种服务。
Realm: Realm充当了Shiro与应用安全数据间的“桥梁”或者“连接器”。也就是说,当对用户执行认证(登录)和授权(访问控制)验证时,Shiro会从应用配置的Realm中查找用户及其权限信息。从这个意义上讲,Realm实质上是一个安全相关的DAO:它封装了数据源的连接细节,并在需要时将相关数据提供给Shiro。当配置Shiro时,你必须至少指定一个Realm,用于认证和(或)授权。配置多个Realm是可以的,但是至少需要一个。
功能
Authentication:身份认证/登录,验证用户是不是拥有相应的身份;
Authorization:授权,即权限验证,验证某个已认证的用户是否拥有某个权限;即判断用户是否能做事情,常见的如:验证某个用户是否拥有某个角色。或者细粒度的验证某个用户对某个资源是否具有某个权限;
Session Manager:会话管理,即用户登录后就是一次会话,在没有退出之前,它的所有信息都在会话中;会话可以是普通JavaSE环境的,也可以是如Web环境的;
Cryptography:加密,保护数据的安全性,如密码加密存储到数据库,而不是明文存储;
Web Support:Web支持,可以非常容易的集成到Web环境;
Caching:缓存,比如用户登录后,其用户信息、拥有的角色/权限不必每次去查,这样可以提高效率;
Concurrency:shiro支持多线程应用的并发验证,即如在一个线程中开启另一个线程,能把权限自动传播过去;
Testing:提供测试支持;
Run As:允许一个用户假装为另一个用户(如果他们允许)的身份进行访问;
Remember Me:记住我,这个是非常常见的功能,即一次登录后,下次再来的话不用登录了。
从外部看
应用代码直接交互的对象是Subject,也就是说Shiro的对外API核心就是Subject;其每个API的含义:
Subject:主体,代表了当前“用户”,这个用户不一定是一个具体的人,与当前应用交互的任何东西都是Subject,如网络爬虫,机器人等;即一个抽象概念;所有Subject都绑定到SecurityManager,与Subject的所有交互都会委托给SecurityManager;可以把Subject认为是一个门面;SecurityManager才是实际的执行者;
SecurityManager:安全管理器;即所有与安全有关的操作都会与SecurityManager交互;且它管理着所有Subject;可以看出它是Shiro的核心,它负责与后边介绍的其他组件进行交互,如果学习过SpringMVC,你可以把它看成DispatcherServlet前端控制器;
Realm:域,Shiro从从Realm获取安全数据(如用户、角色、权限),就是说SecurityManager要验证用户身份,那么它需要从Realm获取相应的用户进行比较以确定用户身份是否合法;也需要从Realm得到用户相应的角色/权限进行验证用户是否能进行操作;可以把Realm看成DataSource,即安全数据源。
也就是说对于我们而言,最简单的一个Shiro应用:
应用代码通过Subject来进行认证和授权,而Subject又委托给SecurityManager;
我们需要给Shiro的SecurityManager注入Realm,从而让SecurityManager能得到合法的用户及其权限进行判断。
从以上也可以看出,Shiro不提供维护用户/权限,而是通过Realm让开发人员自己注入
外部架构
Subject:主体,可以看到主体可以是任何可以与应用交互的“用户”;
SecurityManager:相当于SpringMVC中的DispatcherServlet或者Struts2中的FilterDispatcher;是Shiro的心脏;所有具体的交互都通过SecurityManager进行控制;它管理着所有Subject、且负责进行认证和授权、及会话、缓存的管理。
Authenticator:认证器,负责主体认证的,这是一个扩展点,如果用户觉得Shiro默认的不好,可以自定义实现;其需要认证策略(Authentication Strategy),即什么情况下算用户认证通过了;
Authrizer:授权器,或者访问控制器,用来决定主体是否有权限进行相应的操作;即控制着用户能访问应用中的哪些功能;
Realm:可以有1个或多个Realm,可以认为是安全实体数据源,即用于获取安全实体的;可以是JDBC实现,也可以是LDAP实现,或者内存实现等等;由用户提供;注意:Shiro不知道你的用户/权限存储在哪及以何种格式存储;所以我们一般在应用中都需要实现自己的Realm;
SessionManager:如果写过Servlet就应该知道Session的概念,Session呢需要有人去管理它的生命周期,这个组件就是SessionManager;而Shiro并不仅仅可以用在Web环境,也可以用在如普通的JavaSE环境、EJB等环境;所有呢,Shiro就抽象了一个自己的Session来管理主体与应用之间交互的数据;这样的话,比如我们在Web环境用,刚开始是一台Web服务器;接着又上了台EJB服务器;这时想把两台服务器的会话数据放到一个地方,这个时候就可以实现自己的分布式会话(如把数据放到Memcached服务器);
SessionDAO:DAO大家都用过,数据访问对象,用于会话的CRUD,比如我们想把Session保存到数据库,那么可以实现自己的SessionDAO,通过如JDBC写到数据库;比如想把Session放到Memcached中,可以实现自己的Memcached SessionDAO;另外SessionDAO中可以使用Cache进行缓存,以提高性能;
CacheManager:缓存控制器,来管理如用户、角色、权限等的缓存的;因为这些数据基本上很少去改变,放到缓存中后可以提高访问的性能
Cryptography:密码模块,Shiro提高了一些常见的加密组件用于如密码加密/解密的
认证流程
用户 提交 身份信息、凭证信息 封装成 令牌 交由 安全管理器 认证
quickstart(快速入门) 将案例拷贝:
按照官网提示找到 快速入门案例
GitHub地址:shiro/samples/quickstart/
从GitHub 的文件中可以看出这个快速入门案例是一个 Maven 项目
1.新建一个 Maven 工程,删除其 src 目录,将其作为父工程
2.在父工程中新建一个 Maven 模块
1.导入依赖
1 2 3 4 5 6 7 8 9 10 11 12 13 14 15 16 17 18 19 20 21 22 23 24 25 26 <dependency > <groupId > org.apache.shiro</groupId > <artifactId > shiro-core</artifactId > <version > 1.4.1</version > </dependency > <dependency > <groupId > org.slf4j</groupId > <artifactId > jcl-over-slf4j</artifactId > <version > 1.7.21</version > </dependency > <dependency > <groupId > org.slf4j</groupId > <artifactId > slf4j-log4j12</artifactId > <version > 1.7.21</version > </dependency > <dependency > <groupId > log4j</groupId > <artifactId > log4j</artifactId > <version > 1.2.17</version > </dependency >
2.配饰shiro.ini
1 2 3 4 5 6 7 8 9 10 11 12 13 14 15 16 17 18 19 20 21 22 23 24 25 26 27 [users] root = secret, admin guest = guest, guest presidentskroob = 12345, president darkhelmet = ludicrousspeed, darklord, schwartz lonestarr = vespa, goodguy, schwartz [roles] admin = * schwartz = lightsaber:* goodguy = winnebago:drive:eagle5
ok需要下载ini插件,如果在setting中无法下载,就去官网下载对应版本的然后导入
[解决IDEA无法使用.ini文件](https://blog.csdn.net/qq_43521797/article/details/115473267#:~:text=解决 1.下载 ini4Idea 插件,使IDEA支持 ini,文件 设置:File—-settings—-plugins—-搜索 Ini 安装完成重启即可! 2.如果重启后还不好使,需要手动添加一下!)
ini插件安装和配置
3.log4j
1 2 3 4 5 6 7 8 9 10 11 12 13 14 15 16 17 18 log4j.rootLogger =INFO, stdout log4j.appender.stdout =org.apache.log4j.ConsoleAppender log4j.appender.stdout.layout =org.apache.log4j.PatternLayout log4j.appender.stdout.layout.ConversionPattern =%d %p [%c] - %m %n log4j.logger.org.apache =WARN log4j.logger.org.springframework =WARN log4j.logger.org.apache.shiro =INFO log4j.logger.org.apache.shiro.util.ThreadContext =WARN log4j.logger.org.apache.shiro.cache.ehcache.EhCache =WARN
4.quickstart
1 2 3 4 5 6 7 8 9 10 11 12 13 14 15 16 17 18 19 20 21 22 23 24 25 26 27 28 29 30 31 32 33 34 35 36 37 38 39 40 41 42 43 44 45 46 47 48 49 50 51 52 53 54 55 56 57 58 59 60 61 62 63 64 65 66 67 68 69 70 71 72 73 74 75 76 77 78 79 80 81 82 83 84 85 86 87 88 89 90 91 92 93 94 95 96 97 98 99 100 101 102 103 104 105 106 107 108 109 110 import org.apache.shiro.SecurityUtils;import org.apache.shiro.authc.*;import org.apache.shiro.config.IniSecurityManagerFactory;import org.apache.shiro.mgt.DefaultSecurityManager;import org.apache.shiro.realm.text.IniRealm;import org.apache.shiro.session.Session;import org.apache.shiro.subject.Subject;import org.apache.shiro.util.Factory;import org.slf4j.Logger;import org.slf4j.LoggerFactory;public class Quickstart { private static final transient Logger log = LoggerFactory.getLogger(Quickstart.class); public static void main (String[] args) { DefaultSecurityManager defaultSecurityManager=new DefaultSecurityManager (); IniRealm iniRealm=new IniRealm ("classpath:shiro.ini" ); defaultSecurityManager.setRealm(iniRealm); SecurityUtils.setSecurityManager(defaultSecurityManager); Subject currentUser = SecurityUtils.getSubject(); Session session = currentUser.getSession(); session.setAttribute("someKey" , "aValue" ); String value = (String) session.getAttribute("someKey" ); if (value.equals("aValue" )) { log.info("Retrieved the correct value! [" + value + "]" ); } if (!currentUser.isAuthenticated()) { UsernamePasswordToken token = new UsernamePasswordToken ("lonestarr" , "vespa" ); token.setRememberMe(true ); try { currentUser.login(token); } catch (UnknownAccountException uae) { log.info("There is no user with username of " + token.getPrincipal()); } catch (IncorrectCredentialsException ice) { log.info("Password for account " + token.getPrincipal() + " was incorrect!" ); } catch (LockedAccountException lae) { log.info("The account for username " + token.getPrincipal() + " is locked. " + "Please contact your administrator to unlock it." ); } catch (AuthenticationException ae) { } } log.info("User [" + currentUser.getPrincipal() + "] logged in successfully." ); if (currentUser.hasRole("schwartz" )) { log.info("May the Schwartz be with you!" ); } else { log.info("Hello, mere mortal." ); } if (currentUser.isPermitted("lightsaber:wield" )) { log.info("You may use a lightsaber ring. Use it wisely." ); } else { log.info("Sorry, lightsaber rings are for schwartz masters only." ); } if (currentUser.isPermitted("winnebago:drive:eagle5" )) { log.info("You are permitted to 'drive' the winnebago with license plate (id) 'eagle5'. " + "Here are the keys - have fun!" ); } else { log.info("Sorry, you aren't allowed to drive the 'eagle5' winnebago!" ); } currentUser.logout(); System.exit(0 ); } }
问题:
解决方案:
执行一下main方法:
Spring Secutrity也有的方法
1 2 3 4 5 6 7 8 9 10 11 12 13 14 Subject currentUser = SecurityUtils.getSubject();Session session = currentUser.getSession();currentUser.isAuthenticated() currentUser.getPrincipal() currentUser.hasRole("schwartz" ) currentUser.isPermitted("lightsaber:wield" ) currentUser.logout();
SpringBoot集成
在刚刚的父项目中新建一个 springboot 模块
导入 SpringBoot 和 Shiro 整合包的依赖
1 2 3 4 5 6 7 <dependency > <groupId > org.apache.shiro</groupId > <artifactId > shiro-spring-boot-web-starter</artifactId > <version > 1.6.0</version > </dependency >
下面是编写配置文件
Shiro 三大要素
subject -> ShiroFilterFactoryBean —-当前用户
securityManager -> DefaultWebSecurityManager —-管理所有用户
Realm
实际操作中对象创建的顺序 : realm -> securityManager -> subject —-连接数据
3.创建config文件,编写UserRealm.java继承AuthorizingRealm并实现方法
1 2 3 4 5 6 7 8 9 10 11 12 13 14 15 16 17 public class UserRealm extends AuthorizingRealm { @Override protected AuthorizationInfo doGetAuthorizationInfo (PrincipalCollection principalCollection) { System.out.println("执行了授权方法" ); return null ; } @Override protected AuthenticationInfo doGetAuthenticationInfo (AuthenticationToken authenticationToken) throws AuthenticationException { System.out.println("执行了认证方法" ); return null ; } }
可以两个方法的功能主要实现了授权和认证,我们添加两个输出一会看看效果
4.在Config文件夹下编写ShiroConfig.java文件,将三大Bean注入到spring中
①根据前面提供的顺序,先编写realm类:
1 2 3 4 5 @Bean(name = "userRealm") public UserRealm userRealm () { return new UserRealm (); }
②创建用户管理,这里需要用到前面创建的realm,因此在realm之后进行编写
1 2 3 4 5 6 7 8 9 @Bean public DefaultWebSecurityManager defaultWebSecurityManager (@Qualifier("userRealm") UserRealm userRealm) { DefaultWebSecurityManager securityManager = new DefaultWebSecurityManager (); securityManager.setRealm(userRealm); return securityManager; }
图示解析:
③创建subject,需要传入一个securityManager,因此最后进行编写(是不是很像套娃)
1 2 3 4 5 6 7 8 @Bean public ShiroFilterFactoryBean shiroFilterFactoryBean (@Qualifier("defaultWebSecurityManager") DefaultWebSecurityManager securityManager) { ShiroFilterFactoryBean subject = new ShiroFilterFactoryBean (); bean.setSecurityManager(securityManager); return subject; }
搭建简单测试环境
新建一个登录页面
新建一个首页
新建一个增加用户页面
新建一个删除用户页面
编写对应的 Controller
实现登录拦截 1 2 3 4 5 6 7 8 9 10 11 12 13 14 15 16 17 18 19 20 21 22 23 24 25 26 @Bean public ShiroFilterFactoryBean shiroFilterFactoryBean (@Qualifier("defaultWebSecurityManager") DefaultWebSecurityManager securityManager) { ShiroFilterFactoryBean bean = new ShiroFilterFactoryBean (); bean.setSecurityManager(securityManager); Map<String, String> filterMap =new LinkedHashMap <String,String>(); filterMap.put("/user/add" ,"anon" ); filterMap.put("/user/update" ,"authc" ); bean.setLoginUrl("/toLogin" ); bean.setFilterChainDefinitionMap(filterMap); return bean; }
图示解析:
当然在拦截请求中也支持通配符:如拦截指定/user下的所有请求:/user/*
实现用户认证 实现用户认证需要去realm类的认证方法中去配置
这里我们先把用户名和密码写死,实际中是要去数据库中去取的
去到UserRealm.java中
1 2 3 4 5 6 7 8 9 10 11 12 13 14 @Override protected AuthenticationInfo doGetAuthenticationInfo (AuthenticationToken token) throws AuthenticationException { System.out.println("执行了认证方法" ); String name="xiaowu" ; String password="xiaowu" ; UsernamePasswordToken userToken = (UsernamePasswordToken)token; if (!userToken.getUsername().equals(name)){ return null ; } return new SimpleAuthenticationInfo ("" ,password,"" ); }
编写Controller中的登录方法:
1 2 3 4 5 6 7 8 9 10 11 12 13 14 15 16 17 18 @RequestMapping("/login") public String login (@RequestParam("username") String username,@RequestParam("password") String password,Model model) { Subject subject = SecurityUtils.getSubject(); UsernamePasswordToken token = new UsernamePasswordToken (username, password); try { subject.login(token); return "index" ; } catch (UnknownAccountException e) { model.addAttribute("msg" , "用户名错误" ); return "login" ; } catch (IncorrectCredentialsException e) { model.addAttribute("msg" , "密码错误" ); return "login" ; } }
图示解析:
Shiro整合Mybatis 1.首先导入需要的所有的mavem依赖
①mysql-connect ②druid ③log4j ④mybtis-spring-boot-starter
1 2 3 4 5 6 7 8 9 10 11 12 13 14 15 16 17 18 19 20 21 <dependency > <groupId > org.mybatis.spring.boot</groupId > <artifactId > mybatis-spring-boot-starter</artifactId > <version > 2.1.1</version > </dependency > <dependency > <groupId > mysql</groupId > <artifactId > mysql-connector-java</artifactId > <version > 8.0.22</version > </dependency > <dependency > <groupId > com.alibaba</groupId > <artifactId > druid</artifactId > <version > 1.1.21</version > </dependency > <dependency > <groupId > log4j</groupId > <artifactId > log4j</artifactId > <version > 1.2.17</version > </dependency >
2.编写配置文件application.properties或者application.yaml
3.编写guo文件下的pojo,controller,service,mapper文件夹参考前面的springboot整合mybatis代码哦!
整合完毕的文件目录:
在mapper中添加了一个queryUserByName的方法:
整合完毕后先去测试类中进行测试:
测试结果:
ok到目前为止整合完毕,没有问题,业务都是正常的接下来去之前的用户认证把之前写死的用户改为数据库中的用户
1 2 3 4 5 6 7 8 9 10 11 12 13 @Override protected AuthenticationInfo doGetAuthenticationInfo (AuthenticationToken token) throws AuthenticationException { System.out.println("执行了认证方法" ); UsernamePasswordToken userToken = (UsernamePasswordToken)token; User user = userService.queryUserByName(userToken.getUsername()); if (user==null ){ return null ; } return new SimpleAuthenticationInfo ("" ,user.getPwd(),"" ); }
授权功能的实现 去到ShiroConfig.java中,添加代码,注意要添加在(顺序)
1 filterMap.put("/user/add" ,"perms[user:add]" );
之后我们执行一下发现登陆后add标签也无权访问
当然正常的是要访问无权限页面的
接下来我们去UserRealm中给添加权限,注意不要导错类SimpleAuthorizationInfo
1 2 3 4 5 6 7 8 9 10 @Override protected AuthorizationInfo doGetAuthorizationInfo (PrincipalCollection principalCollection) { System.out.println("执行了授权方法" ); SimpleAuthorizationInfo info = new SimpleAuthorizationInfo (); info.addStringPermission("user:add" ); return info; }
诶,接下来所有用户就都有这个权限了
但是不想让所有用户都有某个权限要怎么实现呢?
首先先去数据表中添加一个权限字段
紧接着去pojo中添加字段,再去手动添加一些用户的权限
ok数据层完毕,接下来要思考,我们想要获取到用户的权限,但是获取用户是在刚刚认证中通过userservice获取的,
想到了两个:①session ②用户当前对象的属性来取get方法或(点属性)
我们在认证中,最后new了一个SimpleAuthenticationInfo的当前认证对象,之前里面要传递三个参数分别为:(资源,密码,realmName)
我们把获取到的user传入到资源中去。
1 return new SimpleAuthenticationInfo (user,user.getPwd(),"" );
这样一来,user这个资源就传递到了当前用户subject整体资源中,通过当前subject获取资源来获取到这个user
所以在授权的功能中要先获取subject当前用户
1 Subject subject = SecurityUtils.getSubject();
然后通过subject获取到资源
1 User currentUser = (User) subject.getPrincipal();
再给当前用户添加user中对应的权限名,注意方法名是addStringPermission权限
1 info.addStringPermission(currentUser.getPerms());
最后返回当前权限info
整体授权代码:
1 2 3 4 5 6 7 8 9 10 11 12 13 14 15 @Override protected AuthorizationInfo doGetAuthorizationInfo (PrincipalCollection principalCollection) { System.out.println("执行了授权方法" ); SimpleAuthorizationInfo info = new SimpleAuthorizationInfo (); Subject subject = SecurityUtils.getSubject(); User currentUser = (User) subject.getPrincipal(); info.addStringPermission(currentUser.getPerms()); return info; }
退出功能就和之前security的logout一样,设置一下退出的路径就可
好现在基本需求都完了,但是想和之前security一样实现没有权限的就不要显示,就需要和thymeleaf结合
Shiro和thymeleaf整合 首先要导入shrio和thymeleaf结合的依赖
1 2 3 4 5 6 <dependency > <groupId > com.github.theborakompanioni</groupId > <artifactId > thymeleaf-extras-shiro</artifactId > <version > 2.0.0</version > </dependency >
ok接下来就要去前端页面编写标签了,之前在security中用到的是sec,这里用的shiro,当然也要导入命名空间
下面是spring-security的命名空间
1 xmlns:sec="http://www.thymeleaf.org/thymeleaf-extras-springsecurity5"
shiro的:
1 xmlns:shiro="http://www.thymeleaf.org/thymeleaf-extras-shiro"
前端代码:
1 2 3 4 5 6 7 8 9 10 <p th:text ="${msg}" > </p > <hr > <a > <a th:href ="@{/toLogin}" > 登录</a > <div shiro:hasPermission ="user:add" > <a th:href ="@{/user/add}" > add</a > </div > <div shiro:hasPermission ="user:update" > <a th:href ="@{/user/update}" > update</a > </div >
解释一下就是判断一下当前的用户是否有当前的权限,如果有则显示,没有不显示
登录按钮无权限时显示:
1 2 3 4 5 6 7 8 9 <div shiro:notAuthenticated > <a th:href ="@{/toLogin}" > 登录</a > </div > <shiro:guest > <a th:href ="@{/toLogin}" > 登录</a > </shiro:guest >
整合全部代码 1.导入依赖 1 2 3 4 5 6 7 8 9 10 11 12 13 14 15 16 17 18 19 20 21 22 23 24 25 26 27 28 29 30 31 32 33 34 35 36 37 38 39 40 41 42 43 44 45 46 47 48 49 50 51 52 53 54 55 56 57 58 59 60 61 62 63 64 65 66 <dependencies > <dependency > <groupId > mysql</groupId > <artifactId > mysql-connector-java</artifactId > </dependency > <dependency > <groupId > log4j</groupId > <artifactId > log4j</artifactId > <version > 1.2.17</version > </dependency > <dependency > <groupId > com.alibaba</groupId > <artifactId > druid</artifactId > <version > 1.2.16</version > </dependency > <dependency > <groupId > org.mybatis.spring.boot</groupId > <artifactId > mybatis-spring-boot-starter</artifactId > <version > 2.1.4</version > </dependency > <dependency > <groupId > org.projectlombok</groupId > <artifactId > lombok</artifactId > <version > 1.18.24</version > </dependency > <dependency > <groupId > com.github.theborakompanioni</groupId > <artifactId > thymeleaf-extras-shiro</artifactId > <version > 2.0.0</version > </dependency > <dependency > <groupId > org.apache.shiro</groupId > <artifactId > shiro-spring</artifactId > <version > 1.4.1</version > </dependency > <dependency > <groupId > org.springframework.boot</groupId > <artifactId > spring-boot-starter-thymeleaf</artifactId > </dependency > <dependency > <groupId > org.springframework.boot</groupId > <artifactId > spring-boot-starter-web</artifactId > </dependency > <dependency > <groupId > org.springframework.boot</groupId > <artifactId > spring-boot-starter-test</artifactId > <scope > test</scope > </dependency > </dependencies >
2.编写配置文件application 1 2 3 4 5 6 7 8 9 10 11 12 13 14 15 16 17 18 19 20 21 22 23 24 25 26 27 28 29 30 31 32 33 34 35 spring: datasource: username: root password: root url: jdbc:mysql://localhost:3306/mybatis?useSSL=true&userUniceode=true&characterEncoding=utf8 driver-class-name: com.mysql.cj.jdbc.Driver type: com.alibaba.druid.pool.DruidDataSource initialSize: 5 minIdle: 5 maxActive: 20 maxWait: 60000 timeBetweenEvictionRunsMillis: 60000 minEvictableIdleTimeMillis: 300000 validationQuery: SELECT 1 FROM DUAL testWhileIdle: true testOnBorrow: false testOnReturn: false poolPreparedStatements: true filters: commons-log.connection-logger-name: stat,wall,log4j maxPoolPreparedStatementPerConnectionSize: 20 useGlobalDataSourceStat: true connectionProperties: druid.stat.mergeSql=true;druid.stat.slowSqlMillis=500 mybatis: mapper-locations: classpath:mapper/*.xml type-aliases-package: com.wu.pojo
3.连接数据库后编写实体类 1 2 3 4 5 6 7 8 9 10 11 12 13 14 15 16 package com.wu.pojo;import lombok.AllArgsConstructor;import lombok.Data;import lombok.NoArgsConstructor;@Data @AllArgsConstructor @NoArgsConstructor public class User { private int id; private String name; private String pwd; private String perms; }
4.mapper 1 2 3 4 5 6 7 8 9 10 11 package com.wu.mapper;import com.wu.pojo.User;import org.apache.ibatis.annotations.Mapper;import org.springframework.stereotype.Repository;@Repository @Mapper public interface UserMapper { public User queryUserByName (String name) ; }
@Mapper:这个注解会产生响应的实现类
@Repository:用在Dao层上的注册bean,这是因为该注解的作用不只是将类识别为Bean,同时它还能将所标注的类中抛出的数据访问异常封装为 Spring 的数据访问异常类型。 Spring本身提供了一个丰富的并且是与具体的数据访问技术无关的数据访问异常结构,用于封装不同的持久层框架抛出的异常,使得异常独立于底层的框架。
1 2 3 4 5 6 7 8 9 10 <?xml version="1.0" encoding="UTF-8" ?> <!DOCTYPE mapper PUBLIC "-//mybatis.org//DTD Mapper 3.0//EN" "http://mybatis.org/dtd/mybatis-3-mapper.dtd" > <mapper namespace ="com.wu.mapper.UserMapper" > <select id ="queryUserByName" resultType ="User" parameterType ="String" > select * from user where name=#{name} </select > </mapper >
5.service层 1 2 3 4 5 6 7 8 9 10 11 12 13 14 15 16 17 18 19 20 21 22 23 24 package com.wu.service;import com.wu.pojo.User;public interface UserService { public User queryUserByName (String name) ; } package com.wu.service;import com.wu.mapper.UserMapper;import com.wu.pojo.User;import org.springframework.beans.factory.annotation.Autowired;import org.springframework.stereotype.Service;@Service public class UserServiceImpl implements UserService { @Autowired UserMapper userMapper; @Override public User queryUserByName (String name) { return userMapper.queryUserByName(name); } }
6.Controller 实现跳转
1 2 3 4 5 6 7 8 9 10 11 12 13 14 15 16 17 18 19 20 21 22 23 24 25 26 27 28 29 30 31 32 33 34 35 36 37 38 39 40 41 42 43 44 45 46 47 48 49 50 51 52 53 54 55 56 57 58 59 60 61 62 63 64 package com.wu.controller;import org.apache.shiro.SecurityUtils;import org.apache.shiro.authc.IncorrectCredentialsException;import org.apache.shiro.authc.LockedAccountException;import org.apache.shiro.authc.UnknownAccountException;import org.apache.shiro.authc.UsernamePasswordToken;import org.apache.shiro.subject.Subject;import org.springframework.stereotype.Controller;import org.springframework.ui.Model;import org.springframework.web.bind.annotation.ModelAttribute;import org.springframework.web.bind.annotation.RequestMapping;import org.springframework.web.bind.annotation.ResponseBody;import org.springframework.web.bind.annotation.RestController;import javax.jws.WebParam;@Controller public class MyController { @RequestMapping(value = {"/","/test"}) public String toindex () { return "index" ; } @RequestMapping("/user/add") public String add (Model model) { model.addAttribute("msg" ,"a" ); return "user/add" ; } @RequestMapping("/user/update") public String update () { return "user/update" ; } @RequestMapping("/toLogin") public String toLogin () { return "login" ; } @RequestMapping("/login") public String login (String username, String password, Model model) { Subject subject = SecurityUtils.getSubject(); UsernamePasswordToken token = new UsernamePasswordToken (username, password); try { subject.login(token); return "index" ; } catch (UnknownAccountException uae) { model.addAttribute("msg" ,"用户名异常" ); return "login" ; } catch (IncorrectCredentialsException ice) { model.addAttribute("msg" ,"密码不存在" ); return "login" ; } } @RequestMapping("/noauth") @ResponseBody public String unauthorized () { return "未经授权,静止访问此页面" ; } }
7.界面html 1 2 3 4 5 6 7 8 9 10 11 12 13 14 15 16 17 18 19 20 21 22 23 24 25 26 27 28 29 30 31 32 33 34 35 36 <!DOCTYPE html > <html lang ="en" xmlns:th ="http://www.thymeleaf.org" xmlns:shiro ="https://www.thymeleaf.org/thymeleaf-extras-shiro" > <head > <meta charset ="UTF-8" > <title > showpage</title > </head > <body > <h1 > 首页</h1 > <div shiro:guest ="true" > <a th:href ="@{/toLogin}" > 登录</a > </div > <div shiro:hasPermission ="user:add" > <a th:href ="@{/user/add}" > add</a > </div > <div shiro:hasPermission ="user:update" > <a th:href ="@{/user/update}" > update</a > </div > </body > </html > <!DOCTYPE html > <html lang ="en" xmlns:th ="http://www.thymeleaf.org" > <head > <meta charset ="UTF-8" > <title > login</title > </head > <body > <h1 > 登陆</h1 > <hr > <p th:text ="${msg}" style ="color: red" > </p > <form th:action ="@{/login}" > <p > 用户名:<input type ="text" name ="username" > </p > <p > 密码:<input type ="text" name ="password" > </p > <p > <input type ="submit" > </p > </form > </body > </html >
8.shiro配置 1 2 3 4 5 6 7 8 9 10 11 12 13 14 15 16 17 18 19 20 21 22 23 24 25 26 27 28 29 30 31 32 33 34 35 36 37 38 39 40 41 42 43 44 45 46 47 48 49 50 51 52 53 54 55 56 57 58 59 60 61 62 63 64 65 66 67 68 69 70 71 72 package com.wu.config;import at.pollux.thymeleaf.shiro.dialect.ShiroDialect;import org.apache.shiro.spring.web.ShiroFilterFactoryBean;import org.apache.shiro.web.mgt.DefaultWebSecurityManager;import org.springframework.context.annotation.Bean;import org.springframework.context.annotation.Configuration;import java.util.HashMap;import java.util.LinkedHashMap;import java.util.Map;@Configuration public class shiroConfig { @Bean public ShiroFilterFactoryBean getShiroFilterFactoryBean (@Qualifier("SecurityManager") DefaultWebSecurityManager defaultWebSecurityManager) { ShiroFilterFactoryBean bean = new ShiroFilterFactoryBean (); bean.setSecurityManager(defaultWebSecurityManager()); Map<String, String> filterMap = new LinkedHashMap <>(); filterMap.put("/user/add" ,"perms[user:add]" ); filterMap.put("/user/update" ,"perms[user:update]" ); filterMap.put("/user/*" ,"authc" ); bean.setFilterChainDefinitionMap(filterMap); bean.setLoginUrl("/toLogin" ); bean.setUnauthorizedUrl("/noauth" ); return bean; } @Bean(name = "SecurityManager") public DefaultWebSecurityManager defaultWebSecurityManager (@Qualifier("userRealm") UserRealm userRealm) { DefaultWebSecurityManager SecurityManager = new DefaultWebSecurityManager (); SecurityManager.setRealm(userRealm); return SecurityManager; } @Bean public UserRealm userRealm () { return new UserRealm (); } @Bean public ShiroDialect getShiroDialect () { return new ShiroDialect (); } }
9.Realm 1 2 3 4 5 6 7 8 9 10 11 12 13 14 15 16 17 18 19 20 21 22 23 24 25 26 27 28 29 30 31 32 33 34 35 36 37 38 39 40 41 42 43 44 45 46 47 48 49 50 51 52 53 54 55 56 57 58 59 60 61 package com.wu.config;import com.wu.pojo.User;import com.wu.service.UserService;import org.apache.catalina.security.SecurityUtil;import org.apache.shiro.SecurityUtils;import org.apache.shiro.authc.*;import org.apache.shiro.authz.AuthorizationInfo;import org.apache.shiro.authz.SimpleAuthorizationInfo;import org.apache.shiro.realm.AuthorizingRealm;import org.apache.shiro.subject.PrincipalCollection;import org.apache.shiro.subject.Subject;import org.springframework.beans.factory.annotation.Autowired;public class UserRealm extends AuthorizingRealm { @Autowired UserService userService; @Override protected AuthorizationInfo doGetAuthorizationInfo (PrincipalCollection principalCollection) { System.out.println("执行了授权" ); SimpleAuthorizationInfo info = new SimpleAuthorizationInfo (); Subject subject = SecurityUtils.getSubject(); User curUser = (User)subject.getPrincipal(); info.addStringPermission(curUser.getPerms()); return info; } @Override protected AuthenticationInfo doGetAuthenticationInfo (AuthenticationToken token) throws AuthenticationException { System.out.println("执行了认证" ); UsernamePasswordToken usertoken = (UsernamePasswordToken) token; User user = userService.queryByName(usertoken.getUsername()); if (user == null ){ return null ; } return new SimpleAccount (user,user.getPwd(),"" ); } }
Swagger 学习目标:
了解Swagger的概念及作用
掌握在项目中集成Swagger自动生成API文档
Swagger简介 前后端分离
前端 -> 前端控制层、视图层
后端 -> 后端控制层、服务层、数据访问层
前后端通过API进行交互
前后端相对独立,且松耦合
产生的问题
前后端集成,前端或者后端无法做到“及时协商,尽早解决”,最终导致问题集中爆发
解决方案
首先定义schema [ 计划的提纲 ],并实时跟踪最新的API,降低集成风险
早些年制定word计划文档
前后端分离:前端测试后端接口:postman
Swagger
号称世界上最流行的API框架
Restful Api 文档在线自动生成器 => API 文档 与API 定义同步更新
直接运行,在线测试API接口(其实就是controller requsetmapping)
支持多种语言 (如:Java,PHP等)
官网:https://swagger.io/
Springboot集成Swagger SpringBoot集成Swagger => springfox ,两个jar包
Springfox-swagger2 swagger-springmvc
使用Swagger
要求:jdk 1.8 + 否则swagger2无法运行
步骤:
1、新建一个SpringBoot-web项目
2、添加Maven依赖
1 2 3 4 5 6 7 8 9 10 11 12 <dependency > <groupId > io.springfox</groupId > <artifactId > springfox-swagger2</artifactId > <version > 2.9.2</version > </dependency > <dependency > <groupId > io.springfox</groupId > <artifactId > springfox-swagger-ui</artifactId > <version > 2.9.2</version > </dependency >
3、编写HelloController,测试确保运行成功!
4、要使用Swagger,我们需要编写一个配置类-SwaggerConfig来配置 Swagger
1 2 3 4 @Configuration @EnableSwagger2 public class SwaggerConfig { }
5、访问测试 :http://localhost:8080/swagger-ui.html ,可以看到swagger的界面;
配置Swagger 1、Swagger实例Bean是Docket,所以通过配置Docket实例来配置Swagger,通过Docket对象接管了原来默认的配置
1 2 3 4 @Bean public Docket docket () { return new Docket (DocumentationType.SWAGGER_2); }
2、可以通过apiInfo()属性配置文档信息
1 2 3 4 5 6 7 8 9 10 11 12 13 14 private ApiInfo apiInfo () { Contact contact = new Contact ("联系人名字" , "http://xxx.xxx.com/联系人访问链接" , "联系人邮箱" ); return new ApiInfo ( "Swagger学习" , "学习演示如何配置Swagger" , "v1.0" , "http://terms.service.url/组织链接" , contact, "Apach 2.0 许可" , "许可链接" , new ArrayList <>() ); }
3、Docket 实例关联上 apiInfo()
1 2 3 4 @Bean public Docket docket () { return new Docket (DocumentationType.SWAGGER_2).apiInfo(apiInfo()); }
配置扫描接口 1、构建Docket时通过select()方法配置怎么扫描接口。
1 2 3 4 5 6 7 8 @Bean public Docket docket () { return new Docket (DocumentationType.SWAGGER_2) .apiInfo(apiInfo()) .select() .apis(RequestHandlerSelectors.basePackage("com.wu.controller" )) .build(); }
2、重启项目测试,由于我们配置根据包的路径扫描接口,所以我们只能看到一个类
3、除了通过包路径配置扫描接口外,还可以通过配置其他方式扫描接口,这里注释一下所有的配置方式:
1 2 3 4 5 6 7 8 any() none() withMethodAnnotation(final Class<? extends Annotation > annotation) withClassAnnotation(final Class<? extends Annotation > annotation) basePackage(final String basePackage) paths(PathSelectors.ant("/guo/**" ))
4、除此之外,我们还可以配置接口扫描过滤:
1 2 3 4 5 6 7 8 9 10 @Bean public Docket docket () { return new Docket (DocumentationType.SWAGGER_2) .apiInfo(apiInfo()) .select() .apis(RequestHandlerSelectors.basePackage("com.wu.controller" )) .paths(PathSelectors.ant("/wu/**" )) .build(); }
5、这里的可选值有
1 2 3 4 any() none() regex(final String pathRegex) ant(final String antPattern)
配置Swagger开关 可以指定相应的环境是否开启swagger功能
1、通过enable()方法配置是否启用swagger,如果是false,swagger将不能在浏览器中访问了
1 2 3 4 5 6 7 8 9 10 11 @Bean public Docket docket () { return new Docket (DocumentationType.SWAGGER_2) .apiInfo(apiInfo()) .enable(false ) .select() .apis(RequestHandlerSelectors.basePackage("com.wu.controller" )) .paths(PathSelectors.ant("/wu/**" )) .build(); }
2、如何动态配置当项目处于test、dev环境时显示swagger,处于prod时不显示?
1 2 3 4 5 6 7 8 9 10 11 12 13 14 15 16 17 @Bean public Docket docket (Environment environment) { Profiles of = Profiles.of("dev" , "test" ); boolean flag = environment.acceptsProfiles(of); return new Docket (DocumentationType.SWAGGER_2) .apiInfo(apiInfo()) .enable(flag) .select() .apis(RequestHandlerSelectors.basePackage("com.wu.controller" )) .paths(PathSelectors.ant("/wu/**" )) .build(); }
3、可以在项目中增加一个dev和prod的配置文件查看效果!
配置API分组 1、如果没有配置分组,默认是default。通过groupName()方法即可配置分组:
1 2 3 4 5 6 @Bean public Docket docket (Environment environment) { return new Docket (DocumentationType.SWAGGER_2).apiInfo(apiInfo()) .groupName("xiaowu" ) }
2、重启项目查看分组
3、如何配置多个分组?配置多个分组只需要配置多个docket即可:
1 2 3 4 5 6 7 8 9 10 11 12 @Bean public Docket docket1 () { return new Docket (DocumentationType.SWAGGER_2).groupName("xiaowu1" ); } @Bean public Docket docket2 () { return new Docket (DocumentationType.SWAGGER_2).groupName("xiaowu2" ); } @Bean public Docket docket3 () { return new Docket (DocumentationType.SWAGGER_2).groupName("xiaowu3" ); }
4、重启项目查看即可
实体配置 1、新建一个实体类
1 2 3 4 5 6 7 @ApiModel("用户实体") public class User { @ApiModelProperty("用户名") public String username; @ApiModelProperty("密码") public String password; }
2、只要这个实体在请求接口 的返回值上(即使是泛型),都能映射到实体项中:
1 2 3 4 @RequestMapping("/User") public User User () { return new User (); }
3、重启查看测试
注:并不是因为@ApiModel这个注解让实体显示在这里了,而是只要出现在接口方法的返回值上的实体都会显示在这里,而@ApiModel和@ApiModelProperty这两个注解只是为实体添加注释的。
@ApiModel为类添加注释
@ApiModelProperty为类属性添加注释
常用注解 Swagger的所有注解定义在io.swagger.annotations包下
下面列一些经常用到的,未列举出来的可以另行查阅说明:
我们也可以给请求的接口配置一些注释
1 2 3 4 5 6 7 @ApiOperation("这是一个接口") @PostMapping("/Test") @ResponseBody public String Test (@ApiParam("这个名字会被返回") String username) { return username; }
这样的话,可以给一些比较难理解的属性或者接口,增加一些配置信息,让人更容易阅读!
相较于传统的Postman或Curl方式测试接口,使用swagger简直就是傻瓜式操作,不需要额外说明文档(写得好本身就是文档)而且更不容易出错,只需要录入数据然后点击Execute,如果再配合自动化框架,可以说基本就不需要人为操作了。
Swagger是个优秀的工具,现在国内已经有很多的中小型互联网公司都在使用它,相较于传统的要先出Word接口文档再测试的方式,显然这样也更符合现在的快速迭代开发行情。当然了,提醒下大家在正式环境要记得关闭Swagger,一来出于安全考虑二来也可以节省运行时内存。
总结:
①给swagger中添加注释
全部代码 Config 1 2 3 4 5 6 7 8 9 10 11 12 13 14 15 16 17 18 19 20 21 22 23 24 25 26 27 28 29 30 31 32 33 34 35 36 37 38 39 40 41 42 43 44 45 46 47 48 49 50 51 package com.wu.config;import org.springframework.context.annotation.Bean;import org.springframework.context.annotation.Configuration;import org.springframework.core.env.Environment;import org.springframework.core.env.Profiles;import springfox.documentation.builders.RequestHandlerSelectors;import springfox.documentation.service.ApiInfo;import springfox.documentation.service.Contact;import springfox.documentation.spi.DocumentationType;import springfox.documentation.spring.web.plugins.Docket;import springfox.documentation.swagger2.annotations.EnableSwagger2;import java.util.ArrayList;@Configuration @EnableSwagger2 public class SwaggerConfig { @Bean public Docket docket (Environment environment) { Profiles profiles = Profiles.of("dev" ); boolean flag = environment.acceptsProfiles(profiles); return new Docket (DocumentationType.SWAGGER_2) .apiInfo(apiInfo()) .enable(flag) .groupName("xiaowu" ) .select() .apis(RequestHandlerSelectors.basePackage("com.wu.controller" )) .build(); } private ApiInfo apiInfo () { Contact contact = new Contact ("xiaowu" ,"http://localhost:8080/" ,"2796189414@qq.com" ); return new ApiInfo ( "xiaowu的API文档" , "baby no money" , "v1.0" , "http://localhost:8080/" , contact , "Apache 2.0" , "https://www.apache.org/licenses/LICENSE-2.0" , new ArrayList () ); } }
Controller 1 2 3 4 5 6 7 8 9 10 11 12 13 14 15 16 17 18 19 20 21 22 23 24 25 26 27 28 29 30 31 package com.wu.controller;import com.wu.pojo.User;import io.swagger.annotations.Api;import io.swagger.annotations.ApiOperation;import io.swagger.annotations.ApiParam;import org.springframework.web.bind.annotation.GetMapping;import org.springframework.web.bind.annotation.PostMapping;import org.springframework.web.bind.annotation.RestController;@Api(tags = "用户相关") @RestController public class HelloController { @GetMapping(value = "/hello") public String hello () { return "hello" ; } @PostMapping(value = "/User") public User User () { return new User (); } @ApiOperation("这是接口Test") @GetMapping("/Test") public String Test (@ApiParam("用户名") String username) { return "Test" + username; } }
Pojo 1 2 3 4 5 6 7 8 9 10 11 12 package com.wu.pojo;import io.swagger.annotations.ApiModel;import io.swagger.annotations.ApiModelProperty;@ApiModel("用户实体") public class User { @ApiModelProperty("用户名") public String username; @ApiModelProperty("密码") public String password; }
三个配置文件 1.application.properties 1 spring.profiles.active =dev
2.application-dev.properties 3.application-prod.properties 任务 异步任务 所谓异步,在某些功能实现时可能要花费一定的时间,但是为了不影响客户端的体验,选择异步执行
案例:
首先创建一个service:
1 2 3 4 5 6 7 8 9 10 11 12 @Service public class AsyncService { public void hello () { try { Thread.sleep(3000 ); } catch (InterruptedException e) { e.printStackTrace(); } System.out.println("数据正在传输..." ); } }
Controller:
1 2 3 4 5 6 7 8 9 10 11 12 @RestController public class AsyncController { @Autowired AsyncService asyncService; @RequestMapping("/async") public String async () { asyncService.hello(); return "ok" ; } }
这样在执行/async请求时,网站会延时三秒再显示ok,后台数据也会三秒后显示数据正在传输
现在想要做到前端快速响应我们的页面,后台去慢慢的传输数据,就要用到springboot自带的功
①想办法告诉spring我们的异步方法是异步的,所以要在方法上添加注解
1 2 3 4 5 6 7 8 9 @Async public void hello () { try { Thread.sleep(3000 ); } catch (InterruptedException e) { e.printStackTrace(); } System.out.println("数据正在传输..." ); }
②去springboot主程序中开启异步注解功能
1 2 3 4 5 6 7 8 9 @EnableAsync @SpringBootApplication public class SwaggerDemoApplication { public static void main (String[] args) { SpringApplication.run(SwaggerDemoApplication.class, args); } }
重启即可
邮件任务 邮件发送,在我们的日常开发中,也非常的多,Springboot也帮我们做了支持
邮件发送需要引入spring-boot-start-mail
SpringBoot 自动配置MailSenderAutoConfiguration
定义MailProperties内容,配置在application.yml中
自动装配JavaMailSender
测试邮件发送
测试:
1、引入pom依赖
1 2 3 4 <dependency > <groupId > org.springframework.boot</groupId > <artifactId > spring-boot-starter-mail</artifactId > </dependency >
看它引入的依赖,可以看到 jakarta.mail
1 2 3 4 5 6 <dependency > <groupId > com.sun.mail</groupId > <artifactId > jakarta.mail</artifactId > <version > 1.6.4</version > <scope > compile</scope > </dependency >
2、查看自动配置类:MailSenderAutoConfiguration
ok我们点进去,看到里面存在bean,JavaMailSenderImpl
然后我们去看下配置文件
1 2 3 4 5 6 7 8 9 10 11 12 13 14 @ConfigurationProperties( prefix = "spring.mail" ) public class MailProperties { private static final Charset DEFAULT_CHARSET; private String host; private Integer port; private String username; private String password; private String protocol = "smtp" ; private Charset defaultEncoding; private Map<String, String> properties; private String jndiName; }
3、配置文件:
spring.mail.username=你的邮箱
spring.mail.password=你的邮箱授权码
spring.mail.host=smtp.163.com
# qq需要配置ssl,其他邮箱不需要
spring.mail.properties.mail.smtp.ssl.enable=true
首先你需要去邮箱网站开启POP3/SMTP
4、Spring单元测试
1 2 3 4 5 6 7 8 9 10 11 12 13 14 15 16 17 18 19 @SpringBootTest class SwaggerDemoApplicationTests { @Autowired JavaMailSenderImpl mailSender; @Test public void contextLoads () { SimpleMailMessage message = new SimpleMailMessage (); message.setSubject("这是一个测试邮件发送标题" ); message.setText("这是一个测试邮件发送内容" ); mailMessage.setTo("2796189414@qq.com" ); mailMessage.setFrom("2796189414@qq.com" ); mailSender.send(message); } }
发送一个较为复杂的邮件:
1 2 3 4 5 6 7 8 9 10 11 12 13 14 15 16 17 18 19 20 21 @Test void contextLoads2 () throws MessagingException { MimeMessage mimeMessage = mailSender.createMimeMessage(); MimeMessageHelper helper = new MimeMessageHelper (mimeMessage, true ); helper.setSubject("xiaowu你好~" ); helper.setText("<p style='color:red'>xiaowu你尊嘟好帅!!!</p>" ,true ); helper.addAttachment("1.png" ,new File ("C:\\Users\\27961\\Pictures\\Screenshots\\2.png" )); helper.addAttachment("2.png" ,new File ("C:\\Users\\27961\\Pictures\\Screenshots\\3.png" )); helper.setTo("2796189414@qq.com" ); helper.setFrom("2796189414@qq.com" ); mailSender.send(mimeMessage); }
查看邮箱,邮件接收成功!
我们只需要使用Thymeleaf进行前后端结合即可开发自己网站邮件收发功能了!
定时任务 项目开发中经常需要执行一些定时任务,比如需要在每天凌晨的时候,分析一次前一天的日志信息,Spring为我们提供了异步执行任务调度的方式,提供了两个接口。
TaskExecutor接口
TaskScheduler接口
两个注解:
@EnableScheduling
@Scheduled
cron表达式:
测试步骤:
1、创建一个ScheduledService
我们里面存在一个hello方法,他需要定时执行,怎么处理呢?
1 2 3 4 5 6 7 8 9 10 11 @Service public class ScheduledService { @Scheduled(cron = "0 * * * * 0-7") public void hello () { System.out.println("hello....." ); } }
2、这里写完定时任务之后,我们需要在主程序上增加@EnableScheduling 开启定时任务功能
1 2 3 4 5 6 7 8 9 10 @EnableAsync @EnableScheduling @SpringBootApplication public class SpringbootTaskApplication { public static void main (String[] args) { SpringApplication.run(SpringbootTaskApplication.class, args); } }
3、我们来详细了解下cron表达式;
http://www.bejson.com/othertools/cron/4、常用的表达式
4.常用表达式
1 2 3 4 5 6 7 8 9 10 11 12 13 14 15 16 17 18 19 20 21 22 23 24 (1)0/2 * * * * ? 表示每2秒 执行任务 (1)0 0/2 * * * ? 表示每2分钟 执行任务 (1)0 0 2 1 * ? 表示在每月的1日的凌晨2点调整任务 (2)0 15 10 ? * MON-FRI 表示周一到周五每天上午10:15执行作业 (3)0 15 10 ? 6L 2002-2006 表示2002-2006年的每个月的最后一个星期五上午10:15执行作 (4)0 0 10,14,16 * * ? 每天上午10点,下午2点,4点 (5)0 0/30 9-17 * * ? 朝九晚五工作时间内每半小时 (6)0 0 12 ? * WED 表示每个星期三中午12点 (7)0 0 12 * * ? 每天中午12点触发 (8)0 15 10 ? * * 每天上午10:15触发 (9)0 15 10 * * ? 每天上午10:15触发 (10)0 15 10 * * ? 每天上午10:15触发 (11)0 15 10 * * ? 2005 2005年的每天上午10:15触发 (12)0 * 14 * * ? 在每天下午2点到下午2:59期间的每1分钟触发 (13)0 0/5 14 * * ? 在每天下午2点到下午2:55期间的每5分钟触发 (14)0 0/5 14,18 * * ? 在每天下午2点到2:55期间和下午6点到6:55期间的每5分钟触发 (15)0 0-5 14 * * ? 在每天下午2点到下午2:05期间的每1分钟触发 (16)0 10,44 14 ? 3 WED 每年三月的星期三的下午2:10和2:44触发 (17)0 15 10 ? * MON-FRI 周一至周五的上午10:15触发 (18)0 15 10 15 * ? 每月15日上午10:15触发 (19)0 15 10 L * ? 每月最后一日的上午10:15触发 (20)0 15 10 ? * 6L 每月的最后一个星期五上午10:15触发 (21)0 15 10 ? * 6L 2002-2005 2002年至2005年的每月的最后一个星期五上午10:15触发 (22)0 15 10 ? * 6#3 每月的第三个星期五上午10:15触发
SpringBoot整合Readis 1. 概述 1.1 SpringData pringBoot 操作数据都是使用 ——SpringData
以下是 Spring 官网中描述的 SpringData 可以整合的数据源
可以发现 Spring Data Redis
1.2 lettuce 在 SpringBoot 2.X 之后,原来的 Jedis 被替换为了 lettuce
Jedis 和 lettuce 区别
Jedis :采用的是直连的服务,如果有多个线程操作的话是不安全的,就需要使用 Jedis Pool 连接池取解决。问题就会比较多。
lettuce :底层采用 Netty ,实例可以在多个线程中共享,不存在线程不安全的情况。可以减少线程数据了,性能更高。
2. 部分源码 2.1 自动配置
找到 spring.factoriesspring-boot-autoconfigure-2.3.4.RELEASE.jar → META-INF → spring.factories
在 spring.factories 中搜索 redis
可以得出配置 Redis,只需要配置 RedisAutoConfiguration 即可
点进 RedisAutoConfiguration
点进 RedisProperties
回到 RedisAutoConfiguration,观察它做了什么
2.2 Jedis.pool 不生效
在 RedisAutoConfiguration 类中的 RedisTemplate 方法需要传递一个 RedisConnectionFactory 参数。点进这个参数
这是一个结构,查看实现类
查看 Jedis 的实现类,下载源码
会发现 ,这个类中很多没有实现的地方。所以 Jedis Pool 不可以
查看 Lettuce 的实现类
没问题
这也说明 SpringBoot 更推荐使用 Lettuce
3. 使用
新建一个 SpringBoot 项目,勾选上以下
相关依赖
1 2 3 4 <dependency > <groupId > org.springframework.boot</groupId > <artifactId > spring-boot-starter-data-redis</artifactId > </dependency >
配置连接,application.yml
1 2 3 4 5 spring: redis: host: 192.168 .142 .120 port: 6379
测试
1 2 3 4 5 6 7 8 9 10 11 12 13 14 15 16 17 18 19 20 21 22 23 24 25 @Autowired private RedisTemplate redisTemplate;@Test void contextLoads () { redisTemplate.opsForValue().set("key" , "呵呵" ); System.out.println(redisTemplate.opsForValue().get("key" )); }
4.序列化 4.1 为什么要序列化
新建一个实体类
1 2 3 4 5 6 7 8 9 @Data @AllArgsConstructor @NoArgsConstructor @Component public class User { private String name; private String age; }
编写测试类,先不序列化
1 2 3 4 5 6 7 8 9 @Test public void test () throws JsonProcessingException { User user = new User ("圆" ,"20" ); redisTemplate.opsForValue().set("user" , user); System.out.println(redisTemplate.opsForValue().get("user" )); }
执行结果
如果序列化就不会报错
4.2 为什么要自定义序列化 执行 3. 使用 中的那个测试类,向数据库中插入了一个中文字符串,虽然在 Java 端可以看到返回了中文,但是在 Redis 中查看是一串乱码。
解决这个问题就需要修改默认的序列化规则。
4.2 源码
在 RedisAutoConfiguration 类的 redisTemplate 方法中用到了一个 RedisTemplate 的对象
点进 RedisTemplate
查看这些序列化对象在哪赋值的
但我们需要的是 JSON 序列化,所以就需要自定义一个配置类
4.3 使用
1 2 3 4 5 6 7 8 9 10 11 12 13 14 15 16 17 18 19 20 21 22 23 24 25 26 27 28 29 30 31 32 33 34 35 36 37 38 @Configuration public class RedisConfig { @Bean @SuppressWarnings("all") public RedisTemplate<String, Object> redisTemplate (RedisConnectionFactory redisConnectionFactory) throws UnknownHostException { RedisTemplate<String, Object> template = new RedisTemplate (); template.setConnectionFactory(redisConnectionFactory); Jackson2JsonRedisSerializer<Object> jackson2JsonRedisSerializer = new Jackson2JsonRedisSerializer <>(Object.class); ObjectMapper objectMapper = new ObjectMapper (); objectMapper.setVisibility(PropertyAccessor.ALL, JsonAutoDetect.Visibility.ANY); objectMapper.activateDefaultTyping(LaissezFaireSubTypeValidator.instance, ObjectMapper.DefaultTyping.NON_FINAL); jackson2JsonRedisSerializer.setObjectMapper(objectMapper); StringRedisSerializer stringRedisSerializer = new StringRedisSerializer (); template.setKeySerializer(stringRedisSerializer); template.setHashKeySerializer(stringRedisSerializer); template.setValueSerializer(jackson2JsonRedisSerializer); template.setHashValueSerializer(jackson2JsonRedisSerializer); template.afterPropertiesSet(); return template; } }
清空一下数据库
再次执行之前那个插入 User 对象的测试类
发现执行成功,没有报错,并且在 Redis 中也没有转义字符了
但是去获取这个对象或者中文字符串的时候还是会显示转义字符,怎么解决?
只需要在启动 Redis 客户端的时候加上 –raw 即可
redis-cli –raw -p 6379
工具类 1 2 3 4 5 6 7 8 9 10 11 12 13 14 15 16 17 18 19 20 21 22 23 24 25 26 27 28 29 30 31 32 33 34 35 36 37 38 39 40 41 42 43 44 45 46 47 48 49 50 51 52 53 54 55 56 57 58 59 60 61 62 63 64 65 66 67 68 69 70 71 72 73 74 75 76 77 78 79 80 81 82 83 84 85 86 87 88 89 90 91 92 93 94 95 96 97 98 99 100 101 102 103 104 105 106 107 108 109 110 111 112 113 114 115 116 117 118 119 120 121 122 123 124 125 126 127 128 129 130 131 132 133 134 135 136 137 138 139 140 141 142 143 144 145 146 147 148 149 150 151 152 153 154 155 156 157 158 159 160 161 162 163 164 165 166 167 168 169 170 171 172 173 174 175 176 177 178 179 180 181 182 183 184 185 186 187 188 189 190 191 192 193 194 195 196 197 198 199 200 201 202 203 204 205 206 207 208 209 210 211 212 213 214 215 216 217 218 219 220 221 222 223 224 225 226 227 228 229 230 231 232 233 234 235 236 237 238 239 240 241 242 243 244 245 246 247 248 249 250 251 252 253 254 255 256 257 258 259 260 261 262 263 264 265 266 267 268 269 270 271 272 273 274 275 276 277 278 279 280 281 282 283 284 285 286 287 288 289 290 291 292 293 294 295 296 297 298 299 300 301 302 303 304 305 306 307 308 309 310 311 312 313 314 315 316 317 318 319 320 321 322 323 324 325 326 327 328 329 330 331 332 333 334 335 336 337 338 339 340 341 342 343 344 345 346 347 348 349 350 351 352 353 354 355 356 357 358 359 360 361 362 363 364 365 366 367 368 369 370 371 372 373 374 375 376 377 378 379 380 381 382 383 384 385 386 387 388 389 390 391 392 393 394 395 396 397 398 399 400 401 402 403 404 405 406 407 408 409 410 411 412 413 414 415 416 417 418 419 420 421 422 423 424 425 426 427 428 429 430 431 432 433 434 435 436 437 438 439 440 441 442 443 444 445 446 447 448 449 450 451 452 453 454 455 456 457 458 459 460 461 462 463 464 465 466 467 468 469 470 471 472 473 474 475 476 477 478 479 480 481 482 483 484 485 486 487 488 489 490 491 492 493 494 495 496 497 498 499 500 501 502 503 504 505 506 507 508 509 510 511 512 513 514 515 516 517 518 519 520 521 522 523 524 525 526 527 528 529 530 531 532 533 534 535 536 537 538 539 540 541 542 543 544 545 546 547 548 549 550 551 552 553 554 555 556 557 558 559 560 @Component public final class RedisUtil { @Autowired private RedisTemplate<String, Object> redisTemplate; public boolean expire (String key, long time) { try { if (time > 0 ) { redisTemplate.expire(key, time, TimeUnit.SECONDS); } return true ; } catch (Exception e) { e.printStackTrace(); return false ; } } public long getExpire (String key) { return redisTemplate.getExpire(key, TimeUnit.SECONDS); } public boolean hasKey (String key) { try { return redisTemplate.hasKey(key); } catch (Exception e) { e.printStackTrace(); return false ; } } @SuppressWarnings("unchecked") public void del (String... key) { if (key != null && key.length > 0 ) { if (key.length == 1 ) { redisTemplate.delete(key[0 ]); } else { redisTemplate.delete(CollectionUtils.arrayToList(key)); } } } public Object get (String key) { return key == null ? null : redisTemplate.opsForValue().get(key); } public boolean set (String key, Object value) { try { redisTemplate.opsForValue().set(key, value); return true ; } catch (Exception e) { e.printStackTrace(); return false ; } } public boolean set (String key, Object value, long time) { try { if (time > 0 ) { redisTemplate.opsForValue().set(key, value, time, TimeUnit.SECONDS); } else { set(key, value); } return true ; } catch (Exception e) { e.printStackTrace(); return false ; } } public long incr (String key, long delta) { if (delta < 0 ) { throw new RuntimeException ("递增因子必须大于0" ); } return redisTemplate.opsForValue().increment(key, delta); } public long decr (String key, long delta) { if (delta < 0 ) { throw new RuntimeException ("递减因子必须大于0" ); } return redisTemplate.opsForValue().increment(key, -delta); } public Object hget (String key, String item) { return redisTemplate.opsForHash().get(key, item); } public Map<Object, Object> hmget (String key) { return redisTemplate.opsForHash().entries(key); } public boolean hmset (String key, Map<String, Object> map) { try { redisTemplate.opsForHash().putAll(key, map); return true ; } catch (Exception e) { e.printStackTrace(); return false ; } } public boolean hmset (String key, Map<String, Object> map, long time) { try { redisTemplate.opsForHash().putAll(key, map); if (time > 0 ) { expire(key, time); } return true ; } catch (Exception e) { e.printStackTrace(); return false ; } } public boolean hset (String key, String item, Object value) { try { redisTemplate.opsForHash().put(key, item, value); return true ; } catch (Exception e) { e.printStackTrace(); return false ; } } public boolean hset (String key, String item, Object value, long time) { try { redisTemplate.opsForHash().put(key, item, value); if (time > 0 ) { expire(key, time); } return true ; } catch (Exception e) { e.printStackTrace(); return false ; } } public void hdel (String key, Object... item) { redisTemplate.opsForHash().delete(key, item); } public boolean hHasKey (String key, String item) { return redisTemplate.opsForHash().hasKey(key, item); } public double hincr (String key, String item, double by) { return redisTemplate.opsForHash().increment(key, item, by); } public double hdecr (String key, String item, double by) { return redisTemplate.opsForHash().increment(key, item, -by); } public Set<Object> sGet (String key) { try { return redisTemplate.opsForSet().members(key); } catch (Exception e) { e.printStackTrace(); return null ; } } public boolean sHasKey (String key, Object value) { try { return redisTemplate.opsForSet().isMember(key, value); } catch (Exception e) { e.printStackTrace(); return false ; } } public long sSet (String key, Object... values) { try { return redisTemplate.opsForSet().add(key, values); } catch (Exception e) { e.printStackTrace(); return 0 ; } } public long sSetAndTime (String key, long time, Object... values) { try { Long count = redisTemplate.opsForSet().add(key, values); if (time > 0 ) expire(key, time); return count; } catch (Exception e) { e.printStackTrace(); return 0 ; } } public long sGetSetSize (String key) { try { return redisTemplate.opsForSet().size(key); } catch (Exception e) { e.printStackTrace(); return 0 ; } } public long setRemove (String key, Object... values) { try { Long count = redisTemplate.opsForSet().remove(key, values); return count; } catch (Exception e) { e.printStackTrace(); return 0 ; } } public List<Object> lGet (String key, long start, long end) { try { return redisTemplate.opsForList().range(key, start, end); } catch (Exception e) { e.printStackTrace(); return null ; } } public long lGetListSize (String key) { try { return redisTemplate.opsForList().size(key); } catch (Exception e) { e.printStackTrace(); return 0 ; } } public Object lGetIndex (String key, long index) { try { return redisTemplate.opsForList().index(key, index); } catch (Exception e) { e.printStackTrace(); return null ; } } public boolean lSet (String key, Object value) { try { redisTemplate.opsForList().rightPush(key, value); return true ; } catch (Exception e) { e.printStackTrace(); return false ; } } public boolean lSet (String key, Object value, long time) { try { redisTemplate.opsForList().rightPush(key, value); if (time > 0 ) expire(key, time); return true ; } catch (Exception e) { e.printStackTrace(); return false ; } } public boolean lSet (String key, List<Object> value) { try { redisTemplate.opsForList().rightPushAll(key, value); return true ; } catch (Exception e) { e.printStackTrace(); return false ; } } public boolean lSet (String key, List<Object> value, long time) { try { redisTemplate.opsForList().rightPushAll(key, value); if (time > 0 ) expire(key, time); return true ; } catch (Exception e) { e.printStackTrace(); return false ; } } public boolean lUpdateIndex (String key, long index, Object value) { try { redisTemplate.opsForList().set(key, index, value); return true ; } catch (Exception e) { e.printStackTrace(); return false ; } } public long lRemove (String key, long count, Object value) { try { Long remove = redisTemplate.opsForList().remove(key, count, value); return remove; } catch (Exception e) { e.printStackTrace(); return 0 ; } } }
Dubbo和Zookeeper集成 分布式理论 在《分布式系统原理与范型》一书中有如下定义:“分布式系统是若干独立计算机的集合,这些计算机对于用户来说就像单个相关系统”;
分布式系统是由一组通过网络进行通信、为了完成共同的任务而协调工作的计算机节点组成的系统。分布式系统的出现是为了用廉价的、普通的机器完成单个计算机无法完成的计算、存储任务。其目的是利用更多的机器,处理更多的数据。
分布式系统(distributed system)是建立在网络之上的软件系统。
首先需要明确的是,只有当单个节点的处理能力无法满足日益增长的计算、存储任务的时候,且硬件的提升(加内存、加磁盘、使用更好的CPU)高昂到得不偿失的时候,应用程序也不能进一步优化的时候,我们才需要考虑分布式系统。(所以分布式不应该在一开始设计系统时就考虑到)因为,分布式系统要解决的问题本身就是和单机系统一样的,而由于分布式系统多节点、通过网络通信的拓扑结构,会引入很多单机系统没有的问题,为了解决这些问题又会引入更多的机制、协议,带来更多的问题。。。
Dubbo文档 随着互联网的发展,网站应用的规模不断扩大,常规的垂直应用架构已无法应对,分布式服务架构以及流动计算架构势在必行,急需一个治理系统 确保架构有条不紊的演进。
在Dubbo的官网文档有这样一张图
单一应用架构
当网站流量很小时,只需一个应用,将所有功能都部署在一起,以减少部署节点和成本。此时,用于简化增删改查工作量的数据访问框架(ORM)是关键。
适用于小型网站,小型管理系统,将所有功能都部署到一个功能里,简单易用。
缺点:
1、性能扩展比较难
2、协同开发问题
3、不利于升级维护
垂直应用架构
当访问量逐渐增大,单一应用增加机器带来的加速度越来越小,将应用拆成互不相干的几个应用,以提升效率。此时,用于加速前端页面开发的Web框架(MVC)是关键。
通过切分业务来实现各个模块独立部署,降低了维护和部署的难度,团队各司其职更易管理,性能扩展也更方便,更有针对性。
缺点:公用模块无法重复利用,开发性的浪费
分布式服务架构
当垂直应用越来越多,应用之间交互不可避免,将核心业务抽取出来,作为独立的服务,逐渐形成稳定的服务中心,使前端应用能更快速的响应多变的市场需求。此时,用于提高业务复用及整合的**分布式服务框架(RPC)**是关键。
流动计算架构
当服务越来越多,容量的评估,小服务资源的浪费等问题逐渐显现,此时需增加一个调度中心基于访问压力实时管理集群容量,提高集群利用率。此时,用于提高机器利用率的资源调度和治理中心 (SOA)[ Service Oriented Architecture]是关键。
RPC【Remote Procedure Call】是指远程过程调用,是一种进程间通信方式,他是一种技术的思想,而不是规范。它允许程序调用另一个地址空间(通常是共享网络的另一台机器上)的过程或函数,而不用程序员显式编码这个远程调用的细节。即程序员无论是调用本地的还是远程的函数,本质上编写的调用代码基本相同。
也就是说两台服务器A,B,一个应用部署在A服务器上,想要调用B服务器上应用提供的函数/方法,由于不在一个内存空间,不能直接调用,需要通过网络来表达调用的语义和传达调用的数据。为什么要用RPC呢?就是无法在一个进程内,甚至一个计算机内通过本地调用的方式完成的需求,比如不同的系统间的通讯,甚至不同的组织间的通讯,由于计算能力需要横向扩展,需要在多台机器组成的集群上部署应用。RPC就是要像调用本地的函数一样去调远程函数;
————————————————
推荐阅读文章:https://www.jianshu.com/p/2accc2840a1b
说白了就是不同于调用本地的而是调用远程资源和方法
RPC原理:
步骤分析:
RPC两个核心模块:通讯,序列化。
Dubbo的概念和介绍 Dubbo是什么 Dubbo是一个分布式服务框架,致力于提供高性能和透明化的RPC远程服务调用方案,以及SOA服务治理方案。简单的说,dubbo就是个服务框架,如果没有分布式的需求,其实是不需要用的,只有在分布式的时候,才有dubbo这样的分布式服务框架的需求,并且本质上是个服务调用的东东,说白了就是个远程服务调用的分布式框架
其核心部分包含:
1》远程通讯: 提供对多种基于长连接的NIO框架抽象封装,包括多种线程模型,序列化,以及“请求-响应”模式的信息交换方式。
2》集群容错: 提供基于接口方法的透明远程过程调用,包括多协议支持,以及软负载均衡,失败容错,地址路由,动态配置等集群支持。
3》自动发现: 基于注册中心目录服务,使服务消费方能动态的查找服务提供方,使地址透明,使服务提供方可以平滑增加或减少机器。
Dubbo能做什么 1.透明化的远程方法调用,就像调用本地方法一样调用远程方法,只需简单配置,没有任何API侵入。
2.软负载均衡及容错机制,可在内网替代F5等硬件负载均衡器,降低成本,减少单点。
3.服务自动注册与发现,不再需要写死服务提供方地址,注册中心基于接口名查询服务提供者的IP地址,并且能够平滑添加或删除服务提供者。
搭建测试环境 Apache Dubbo |ˈdʌbəʊ| 是一款高性能、轻量级的开源Java RPC框架,它提供了三大核心能力:面向接口的远程方法调用,智能容错和负载均衡,以及服务自动注册和发现。
dubbo官网 http://dubbo.apache.org/zh-cn/index.html
服务提供者 (Provider):暴露服务的服务提供方,服务提供者在启动时,向注册中心注册自己提供的服务。
服务消费者 (Consumer):调用远程服务的服务消费方,服务消费者在启动时,向注册中心订阅自己所需的服务,服务消费者,从提供者地址列表中,基于软负载均衡算法,选一台提供者进行调用,如果调用失败,再选另一台调用。
注册中心 (Registry):注册中心返回服务提供者地址列表给消费者,如果有变更,注册中心将基于长连接推送变更数据给消费者
监控中心 (Monitor):服务消费者和提供者,在内存中累计调用次数和调用时间,定时每分钟发送一次统计数据到监控中心
调用关系说明
l 服务容器负责启动,加载,运行服务提供者。
l 服务提供者在启动时,向注册中心注册自己提供的服务。
l 服务消费者在启动时,向注册中心订阅自己所需的服务。
l 注册中心返回服务提供者地址列表给消费者,如果有变更,注册中心将基于长连接推送变更数据给消费者。
l 服务消费者,从提供者地址列表中,基于软负载均衡算法,选一台提供者进行调用,如果调用失败,再选另一台调用。
l 服务消费者和提供者,在内存中累计调用次数和调用时间,定时每分钟发送一次统计数据到监控中心
Zookeeper介绍 Zoookeeper是什么?
官方文档上这么解释zookeeper,它是一个分布式服务框架,是Apache Hadoop 的一个子项目,它主要是用来解决分布式应用中经常遇到的一些数据管理问题,如:统一命名服务、状态同步服务、集群管理、分布式应用配置项的管理等。
上面的解释有点抽象,简单来说zookeeper=文件系统 +监听通知机制
①.文件系统
Zookeeper维护一个类似文件系统的数据结构
每个子目录项如 NameService 都被称作为 znode(目录节点),和文件系统一样,我们能够自由的增加、删除znode,在一个znode下增加、删除子znode,唯一的不同在于znode是可以存储数据的。
有四种类型的znode:
PERSISTENT-持久化目录节点
PERSISTENT_SEQUENTIAL-持久化顺序编号目录节点
EPHEMERAL-临时目录节点
EPHEMERAL_SEQUENTIAL-临时顺序编号目录节点
2、 监听通知机制
客户端注册监听它关心的目录节点,当目录节点发生变化(数据改变、被删除、子目录节点增加删除)时,zookeeper会通知客户端。
就这么简单,下面我们看看Zookeeper能做点什么呢?
Zookeeper能做什么
如上,你大致应该了解zookeeper是个什么东西,大概能做些什么了,我们马上来学习下zookeeper的安装及使用
windows下安装zookeeper 1、下载zookeeper :地址, 我们下载3.4.14 , 最新版!解压zookeeper
2、运行/bin/zkServer.cmd ,初次运行会报错,没有zoo.cfg配置文件;
官方下载地址:zookeeper3.4.14下载地址
可能遇到问题:闪退 !
解决方案:编辑zkServer.cmd文件末尾添加pause 。这样运行出错就不会退出,会提示错误信息,方便找到原因。
解决
将conf文件夹下面的zoo_sample.cfg复制一份改名为zoo.cfg即可(Linux系统也是一样的操作)
注意几个重要位置****:
dataDir=./ 临时数据存储的目录(可写相对路径)
clientPort=2181 zookeeper的端口号
修改完成后再次启动zookeeper
4、使用zkCli.cmd测试
ls /:列出zookeeper根下保存的所有节点
1 2 [zk: 127.0.0.1:2181(CONNECTED) 4] ls / [zookeeper]
create –e /xiaowu123:创建一个xiaowu节点,值为123
get /xiaowu :取值
window下安装dubbo-admin dubbo本身并不是一个服务软件。它其实就是一个jar包,能够帮你的java程序连接到zookeeper,并利用zookeeper消费、提供服务。
但是为了让用户更好的管理监控众多的dubbo服务,官方提供了一个可视化的监控程序dubbo-admin,不过这个监控即使不装也不影响使用。
我们这里来安装一下:
1、下载dubbo-admin
dubbo-admin下载地址
2、解压进入目录
修改 dubbo-admin\src\main\resources \application.properties 指定zookeeper地址(一般都默认地址)
1 2 3 4 5 6 7 8 9 10 server.port=7001 spring.velocity.cache=false spring.velocity.charset=UTF-8 spring.velocity.layout-url=/templates/default.vm spring.messages.fallback-to-system-locale=false spring.messages.basename=i18n/message spring.root.password=root spring.guest.password=guest dubbo.registry.address=zookeeper://127.0.0.1:2181
3、在项目目录下 打包dubbo-admin
1 mvn clean package -Dmaven.test.skip=true
第一次打包的过程有点慢,需要耐心等待!直到成功!
4、执行 dubbo-admin\target 下的dubbo-admin-0.0.1-SNAPSHOT.jar
1 java -jar dubbo-admin-0.0.1-SNAPSHOT.jar
【注意:zookeeper的服务一定要打开!】
执行完毕,我们去访问一下 http://localhost:7001/ , 这时候我们需要输入登录账户和密码,我们都是默认的root-root ;
登录成功后,查看界面
SpringBoot + Dubbo + zookeeper 框架搭建 1. 启动zookeeper !
2. IDEA创建一个空项目;
3.创建一个模块,实现服务提供者:provider-server , 选择web依赖即可
4.项目创建完毕,我们写一个服务,比如卖票的服务;
编写接口
1 2 3 4 5 package com.wu.service;public interface TicketService { public String getTicket () ; }
编写实现类
1 2 3 4 5 6 7 8 package com.wu.service;public class TicketServiceImpl implements TicketService { @Override public String getTicket () { return "xiaowu真是帅哥" ; } }
5.创建一个模块,实现服务消费者:consumer-server , 选择web依赖即可
6.项目创建完毕,我们写一个服务,比如用户的服务;
编写service
1 2 3 4 5 package com.wu.service;public class UserService { }
需求:现在我们的用户想使用买票的服务,这要怎么弄呢 ?
服务提供者 1、将服务提供者注册到注册中心,我们需要整合Dubbo和zookeeper,所以需要导包
我们从dubbo官网进入github,看下方的帮助文档,找到dubbo-springboot,找到依赖包
1 2 3 4 5 6 <dependency > <groupId > org.apache.dubbo</groupId > <artifactId > dubbo-spring-boot-starter</artifactId > <version > 2.7.3</version > </dependency >
zookeeper的包我们去maven仓库下载,zkclient;
1 2 3 4 5 6 <dependency > <groupId > com.github.sgroschupf</groupId > <artifactId > zkclient</artifactId > <version > 0.1</version > </dependency >
【新版的坑】zookeeper及其依赖包,解决日志冲突,还需要剔除日志依赖;
1 2 3 4 5 6 7 8 9 10 11 12 13 14 15 16 17 18 19 20 21 22 23 <dependency > <groupId > org.apache.curator</groupId > <artifactId > curator-framework</artifactId > <version > 2.12.0</version > </dependency > <dependency > <groupId > org.apache.curator</groupId > <artifactId > curator-recipes</artifactId > <version > 2.12.0</version > </dependency > <dependency > <groupId > org.apache.zookeeper</groupId > <artifactId > zookeeper</artifactId > <version > 3.4.14</version > <exclusions > <exclusion > <groupId > org.slf4j</groupId > <artifactId > slf4j-log4j12</artifactId > </exclusion > </exclusions > </dependency >
2、在springboot配置文件中配置dubbo相关属性!
1 2 3 4 5 6 dubbo.application.name =provider-server dubbo.registry.address =zookeeper://127.0.0.1:2181 dubbo.scan.base-packages =com.wu.service
3、在service的实现类中配置服务注解,发布服务!注意导包问题,因为这里的Service注解需要导入的是dubbo中的注解,而不是spring的注解,所以要把其注入就要用Componet,不过最新版本的好像已经解决这个问题:一个新的注解@DubboService
1 2 3 4 5 6 7 8 9 10 11 import org.apache.dubbo.config.annotation.Service;import org.springframework.stereotype.Component;@Service @Component public class TicketServiceImpl implements TicketService { @Override public String getTicket () { return "xiaowu是帅哥" ; } }
逻辑理解 :应用启动起来,dubbo就会扫描指定的包下带有@component注解的服务,将它发布在指定的注册中心中!
服务消费者 1.导入依赖,和之前的依赖一样;
1 2 3 4 5 6 7 8 9 10 11 12 13 14 15 16 17 18 19 20 21 22 23 24 25 26 27 28 29 30 31 32 33 34 35 36 37 <dependency > <groupId > org.apache.dubbo</groupId > <artifactId > dubbo-spring-boot-starter</artifactId > <version > 2.7.3</version > </dependency > <dependency > <groupId > com.github.sgroschupf</groupId > <artifactId > zkclient</artifactId > <version > 0.1</version > </dependency > <dependency > <groupId > org.apache.curator</groupId > <artifactId > curator-framework</artifactId > <version > 2.12.0</version > </dependency > <dependency > <groupId > org.apache.curator</groupId > <artifactId > curator-recipes</artifactId > <version > 2.12.0</version > </dependency > <dependency > <groupId > org.apache.zookeeper</groupId > <artifactId > zookeeper</artifactId > <version > 3.4.14</version > <exclusions > <exclusion > <groupId > org.slf4j</groupId > <artifactId > slf4j-log4j12</artifactId > </exclusion > </exclusions > </dependency >
2.配置参数
1 2 3 4 dubbo.application.name =consumer-server dubbo.registry.address =zookeeper://127.0.0.1:2181
3.本来正常步骤是需要将服务提供者的接口打包,然后用pom文件导入,我们这里使用简单的方式,直接将服务的接口拿过来,路径必须保证正确,即和服务提供者相同;
完善消费者的服务类
1 2 3 4 5 6 7 8 9 10 11 12 13 14 15 16 17 18 package com.wu.service;import com.wu.service.TicketService;import org.apache.dubbo.config.annotation.Reference;import org.springframework.stereotype.Service;@Service public class UserService { @Reference TicketService ticketService; public void buyTicket () { String ticket = ticketService.getTicket(); System.out.println("在注册中心买到" +ticket); } }
5.测试类编写
1 2 3 4 5 6 7 8 9 10 11 12 13 14 15 @RunWith(SpringRunner.class) @SpringBootTest public class ConsumerServerApplicationTests { @Autowired UserService userService; @Test public void contextLoads () { userService.bugTicket(); } }
微服务架构问题: 分布式架构会遇到的四个核心问题:
这么多的服务,客户端该如何去访问? 这么多的服务,服务器之间如何进行通信? 这么多的服务,该如何管理和治理? 服务挂了,怎么办? SpringCloud,是一套生态,就是来解决以上分布式架构的四个问题 想使用SpringCloud,必须要掌握Springboot,因为它是基于SpirngBoot的 1.SpringCloud NetFlix,出了一套解决方案
2.Apcahe Dubbo zookeeper 第二套解决方案
API:没有,要么找第三方,要么自己实现 Dubbo是一个高性能的基于java实现的RPC通信框架 服务注册与发现,zookeeper,没有熔断机制,接住了Hystrix 3.SpringCloud Alibaba 一站式解决方案!
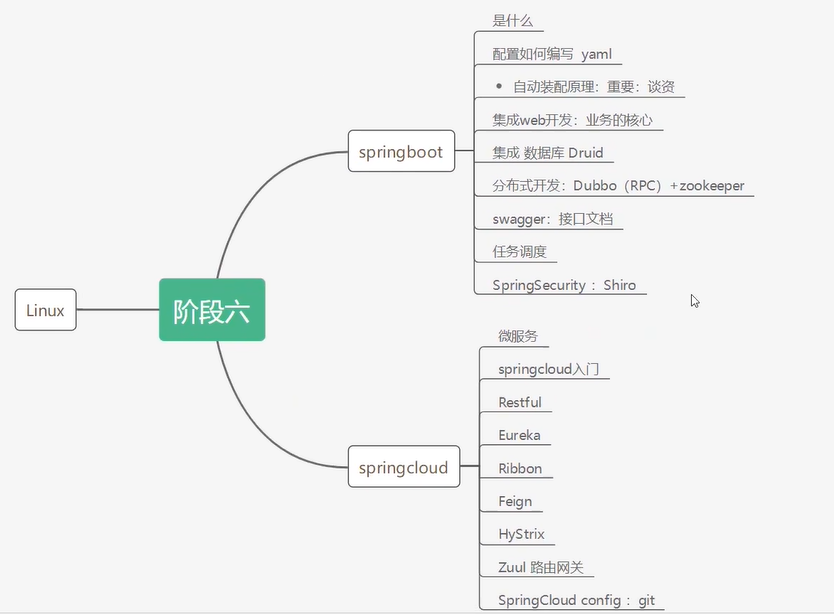
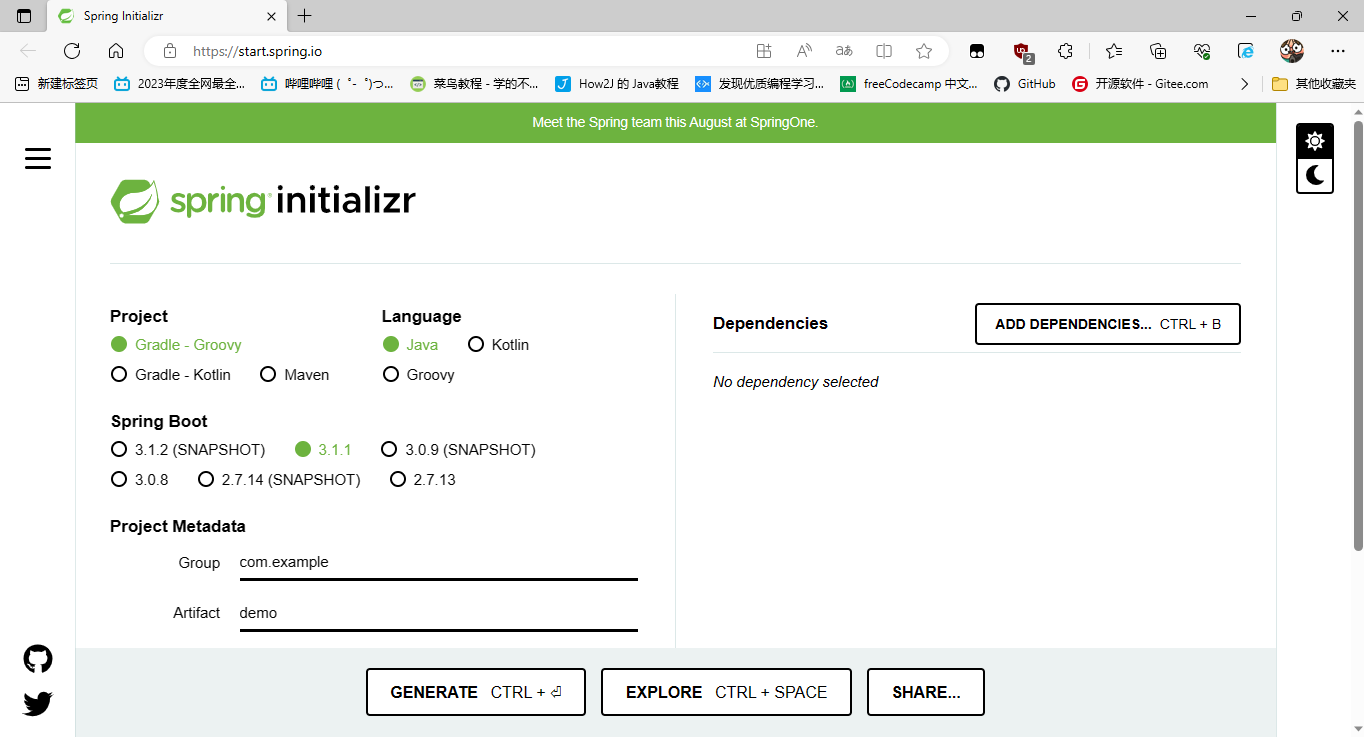
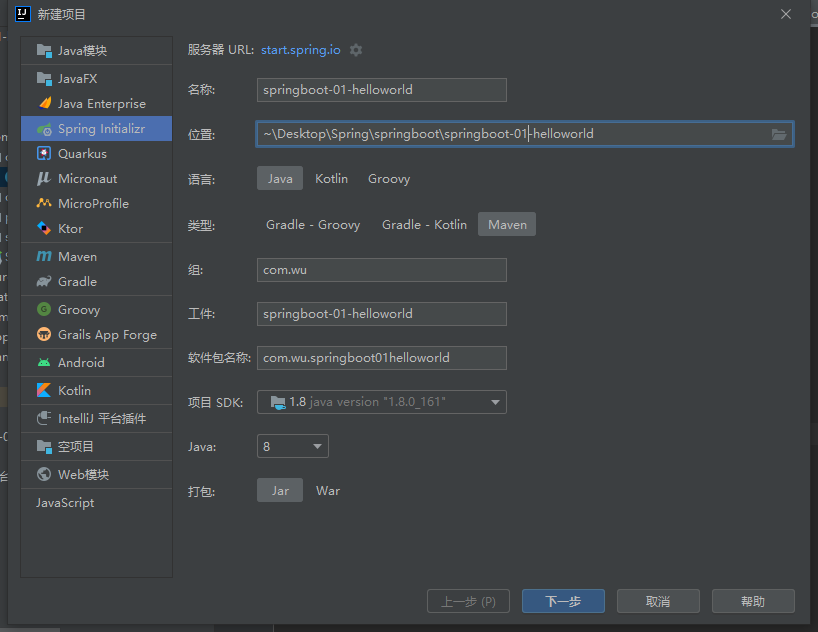

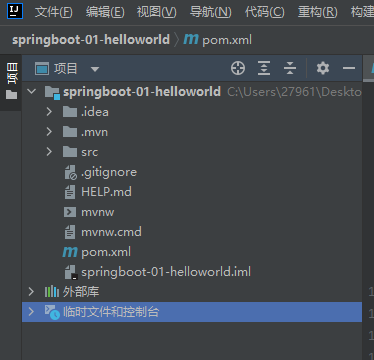
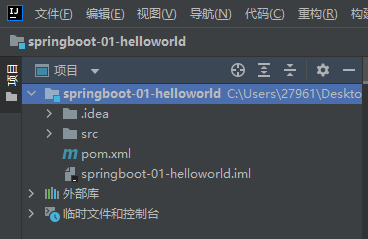

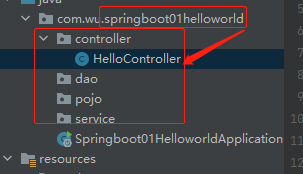
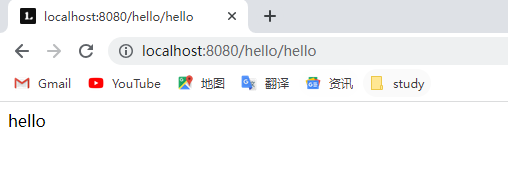
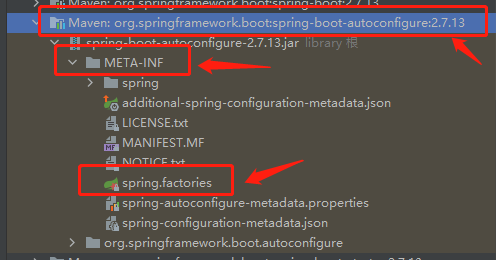
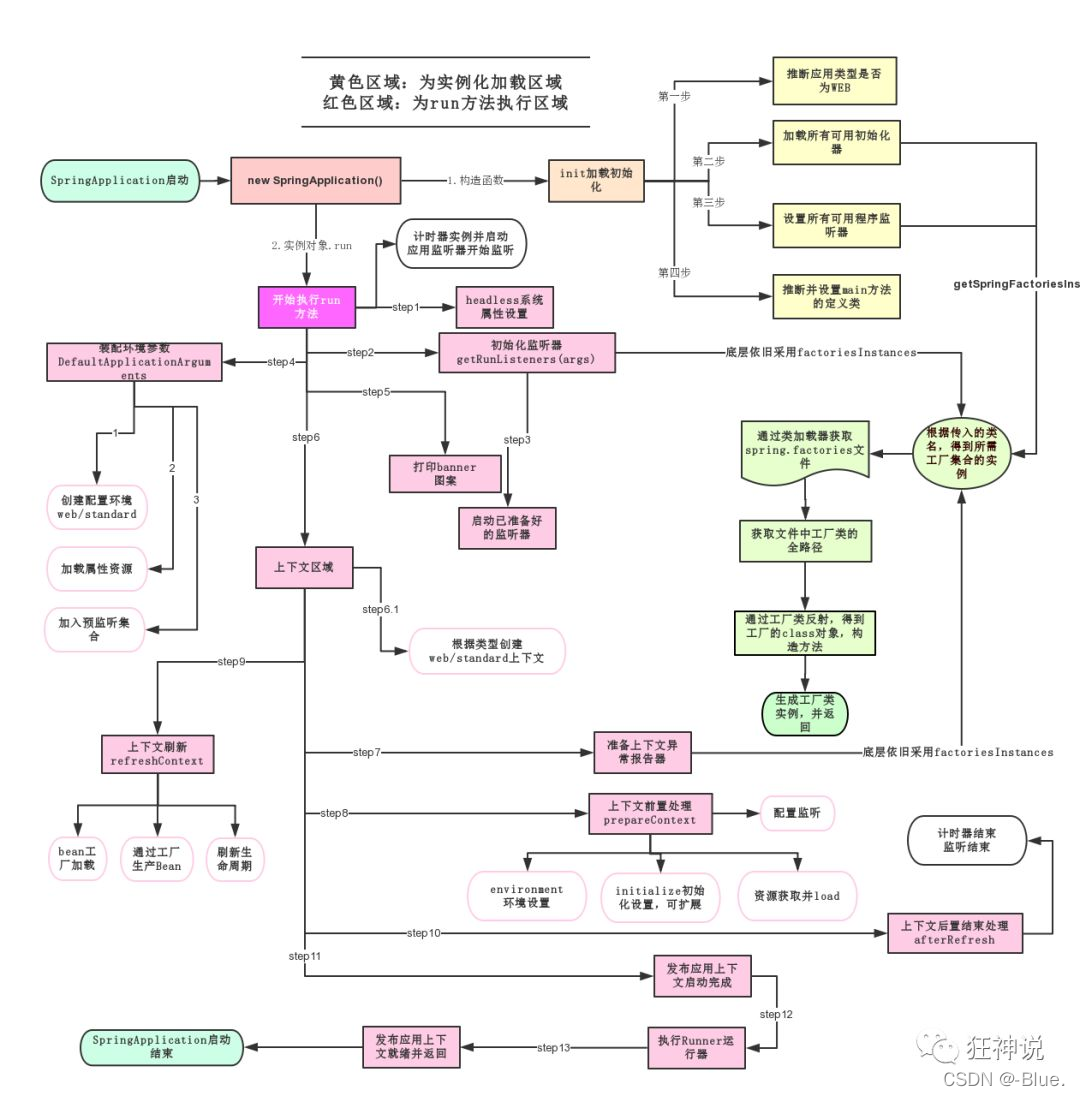
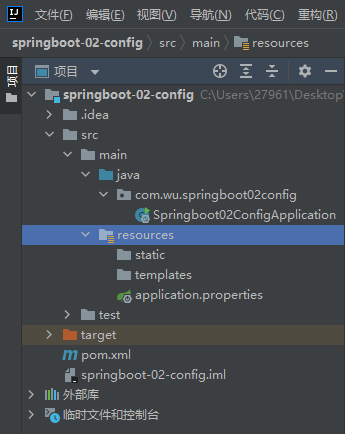
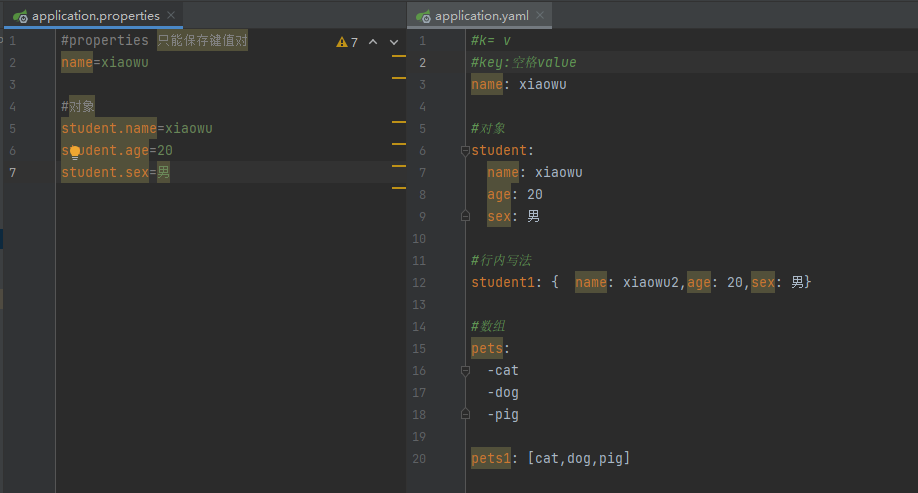


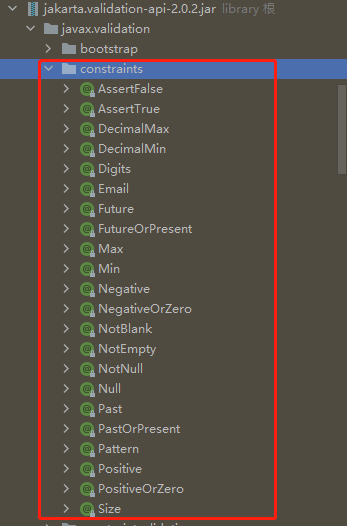
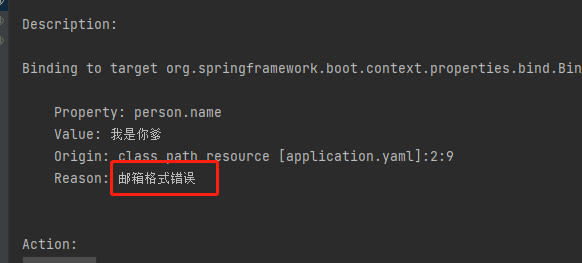

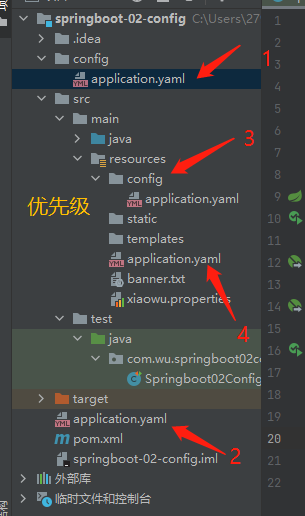
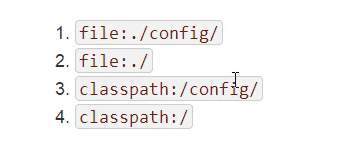


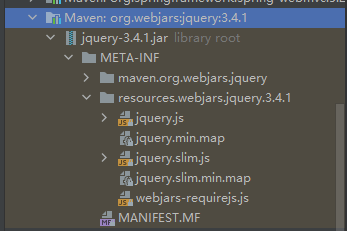
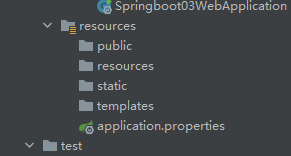

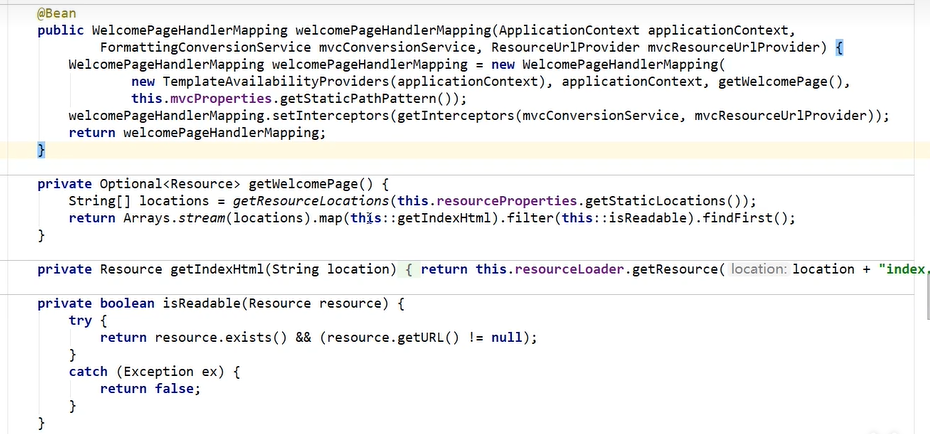
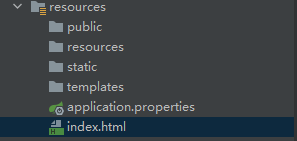


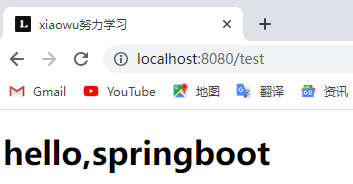
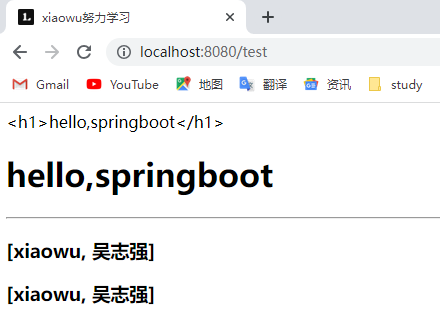
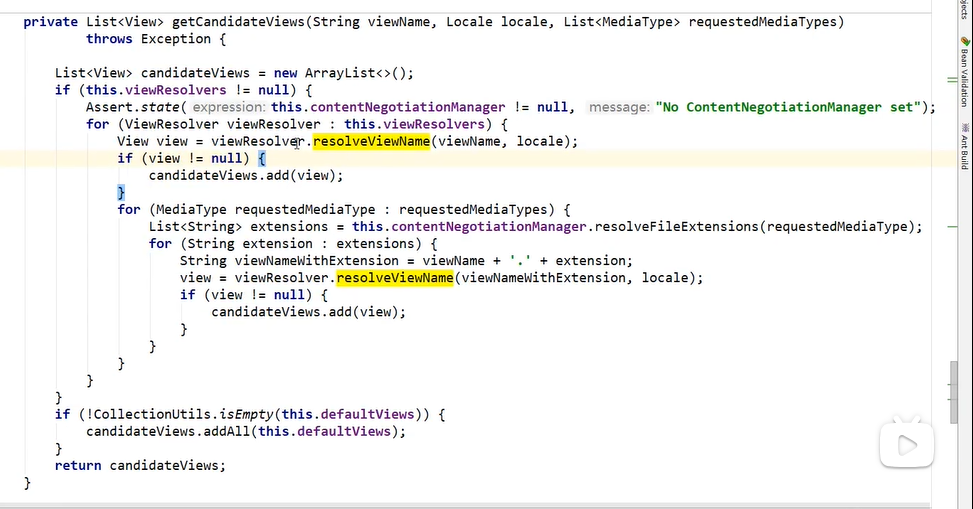


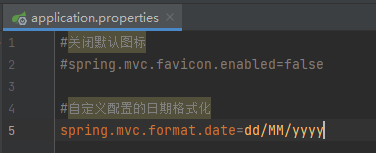
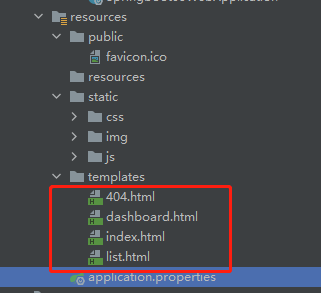
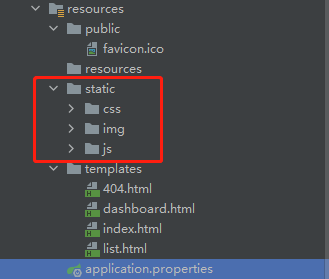
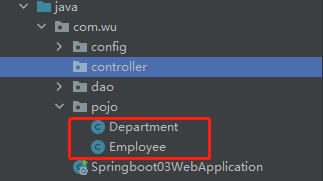
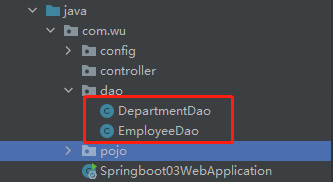
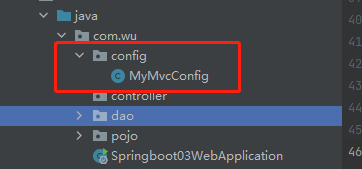
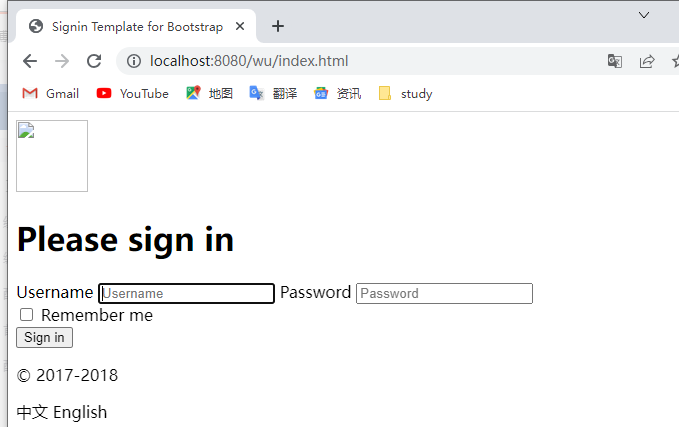
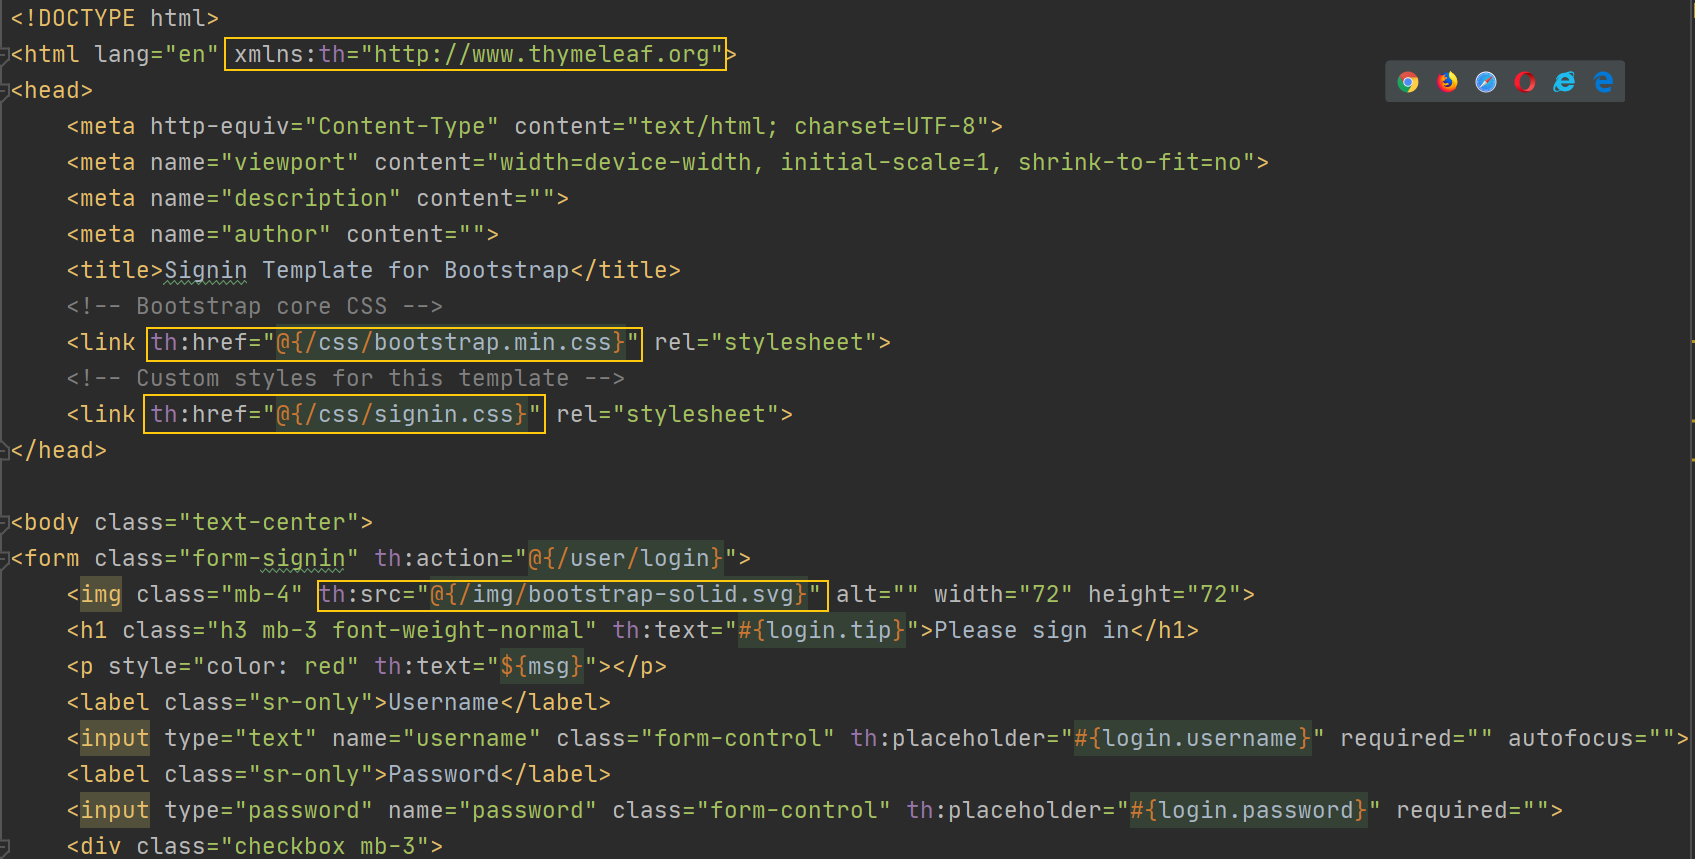
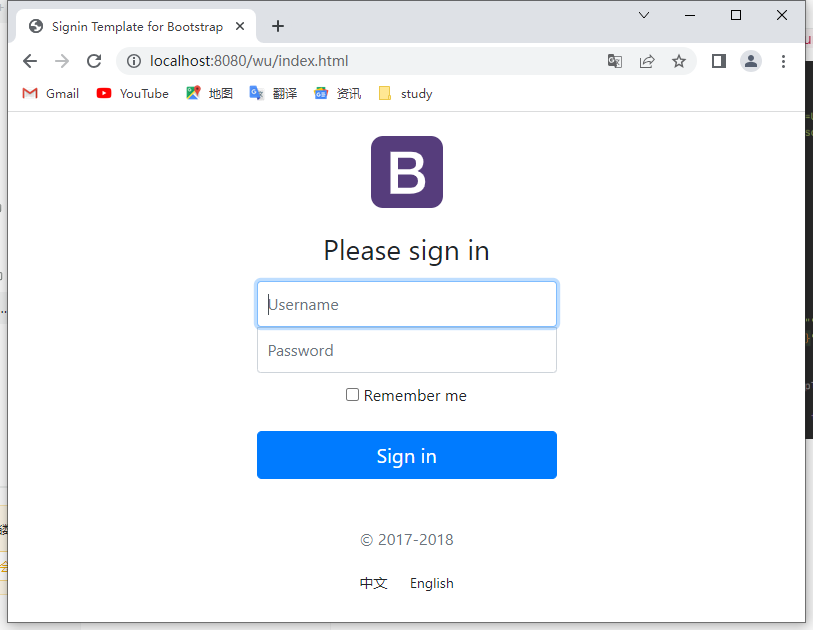
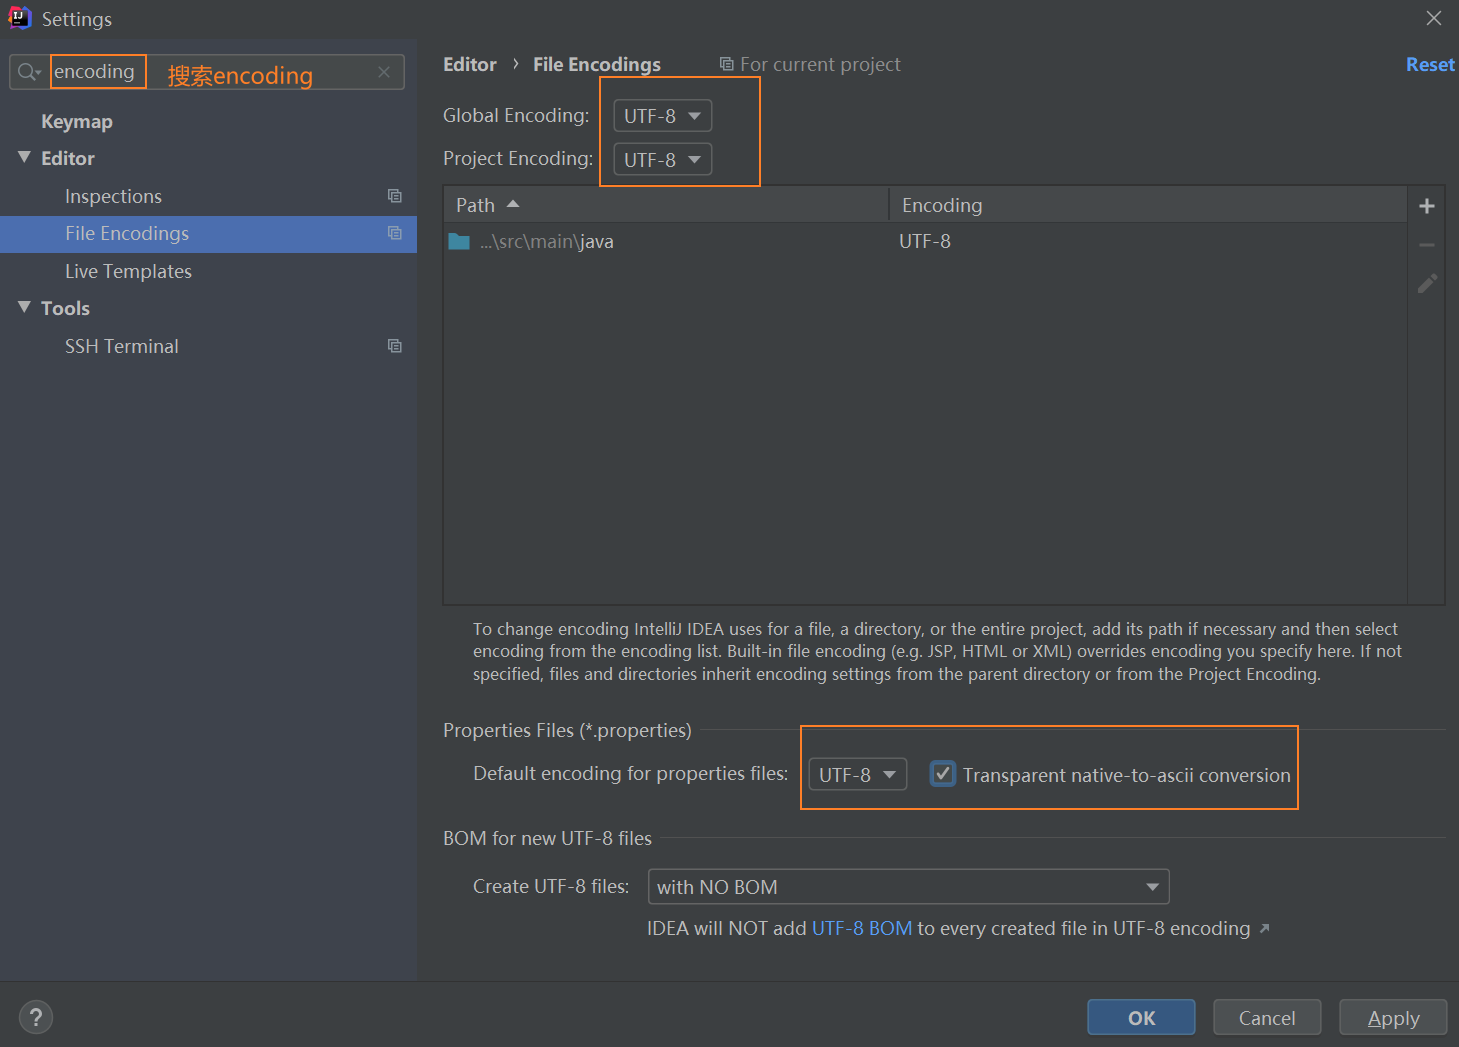


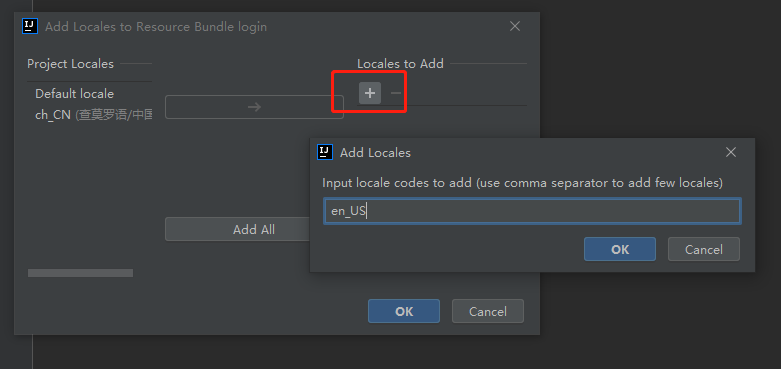
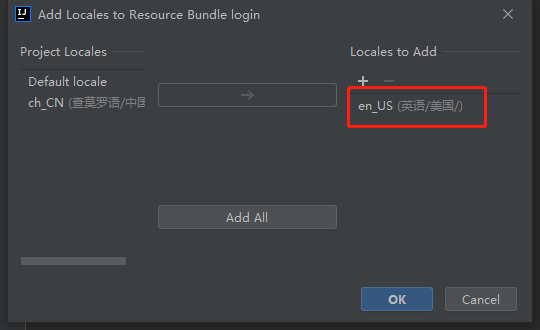
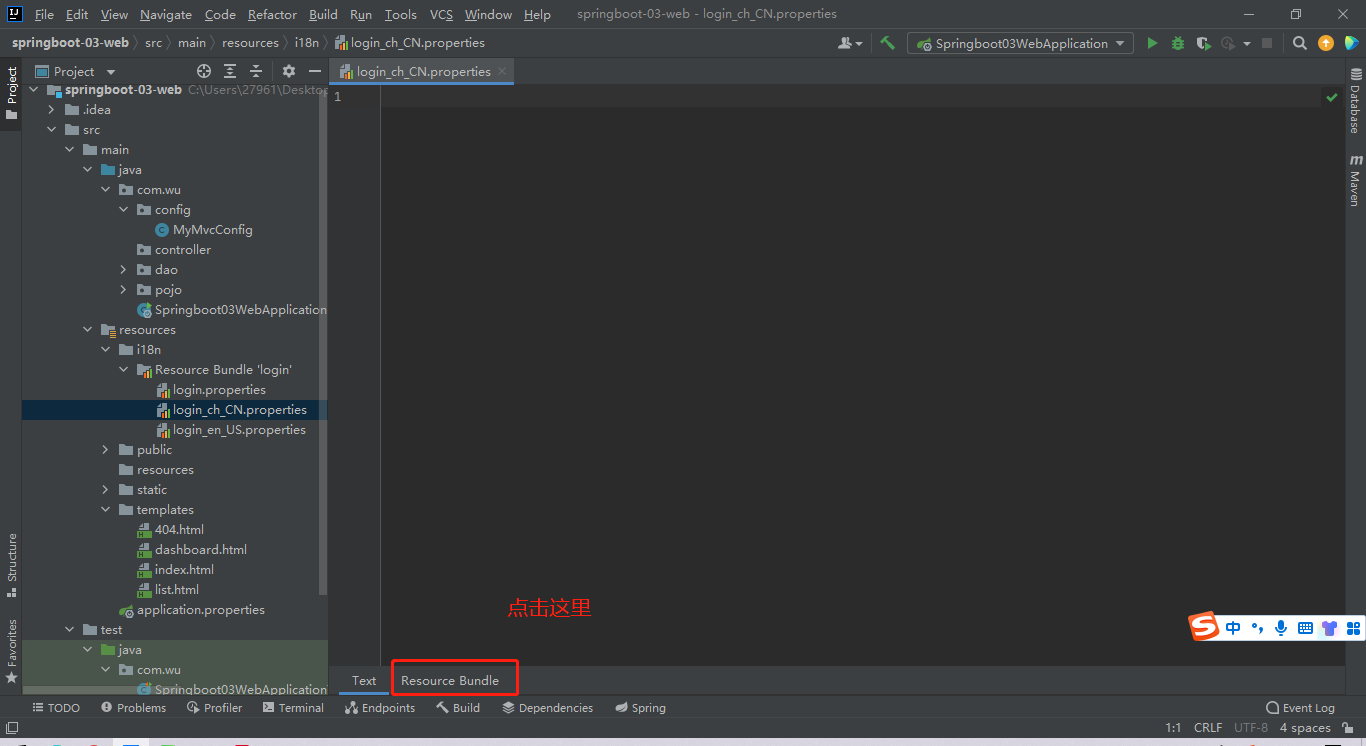
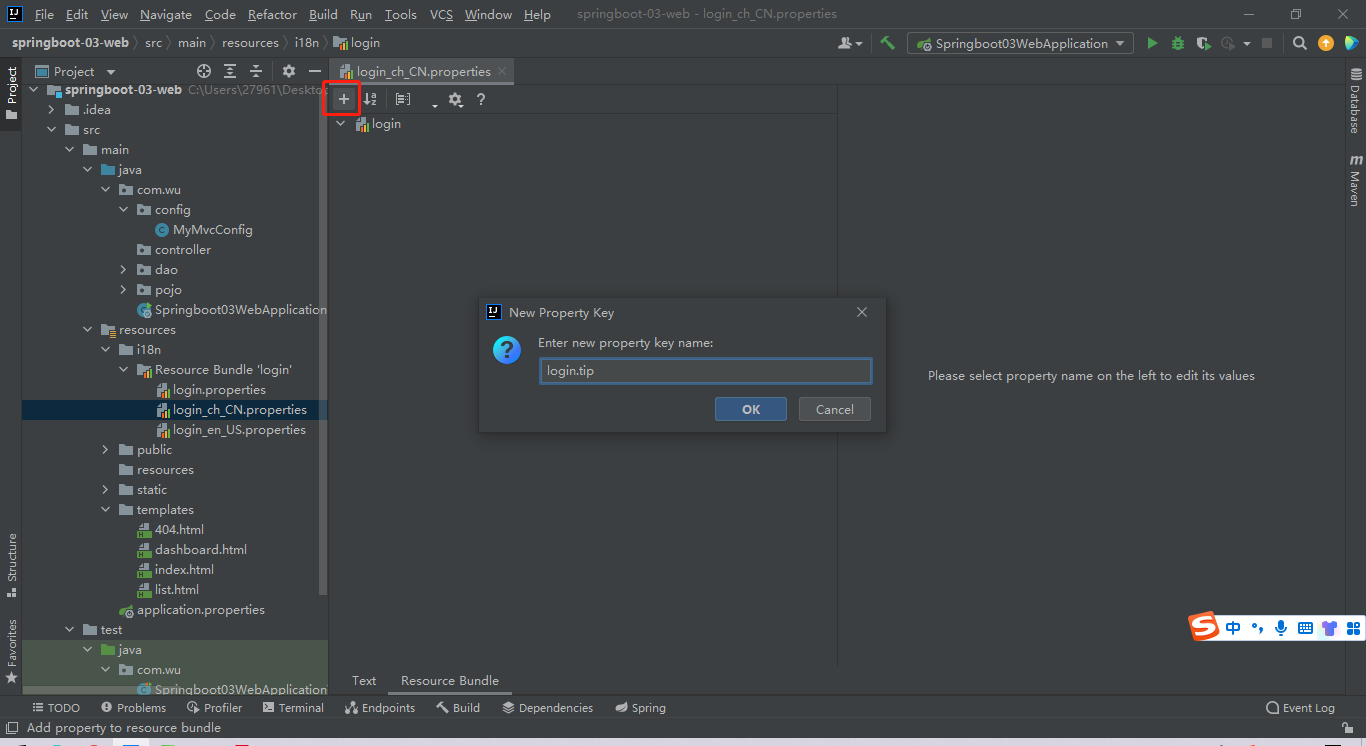
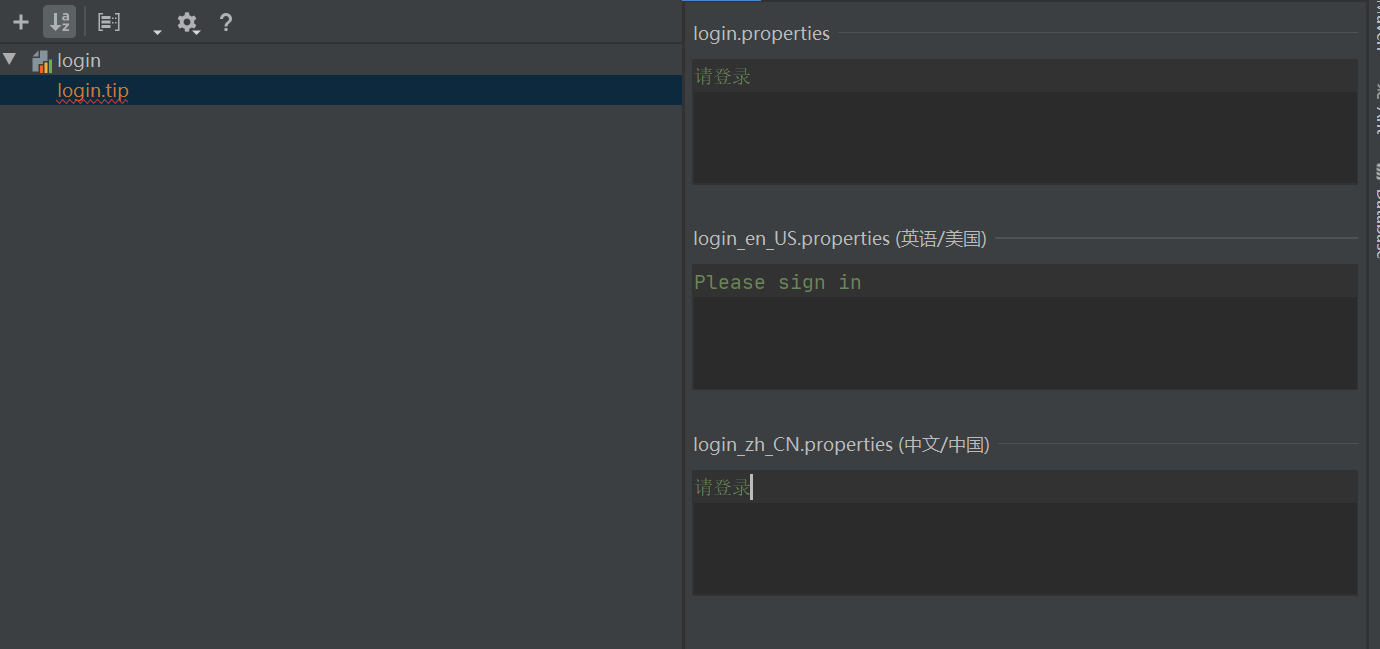
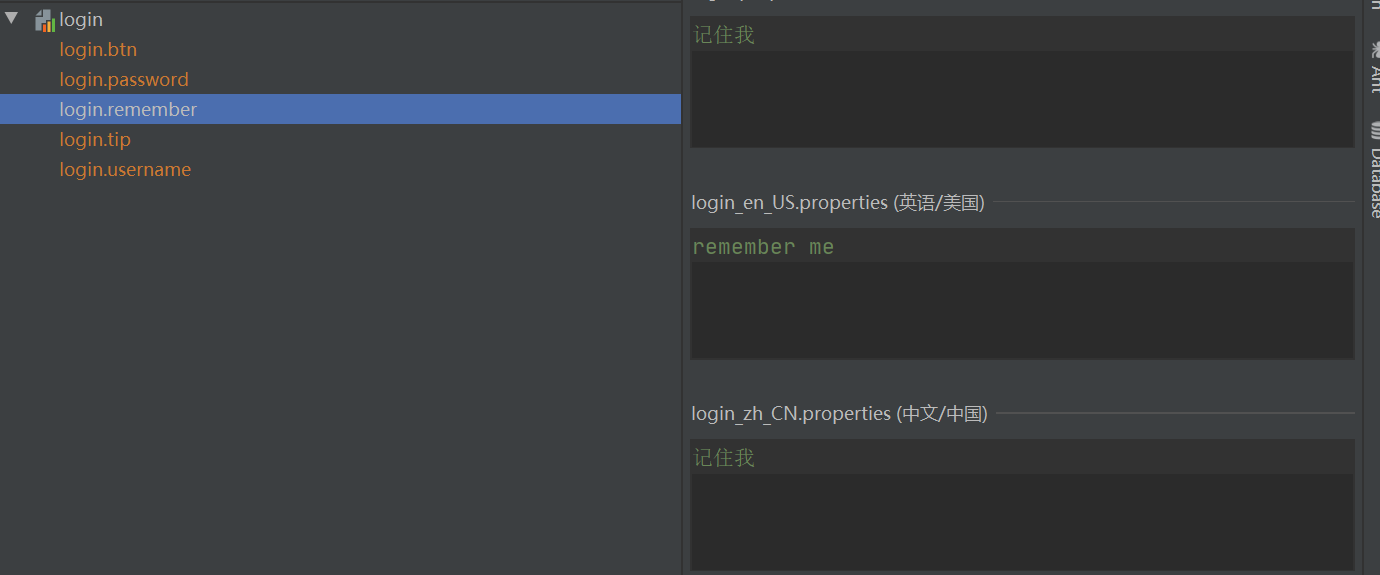
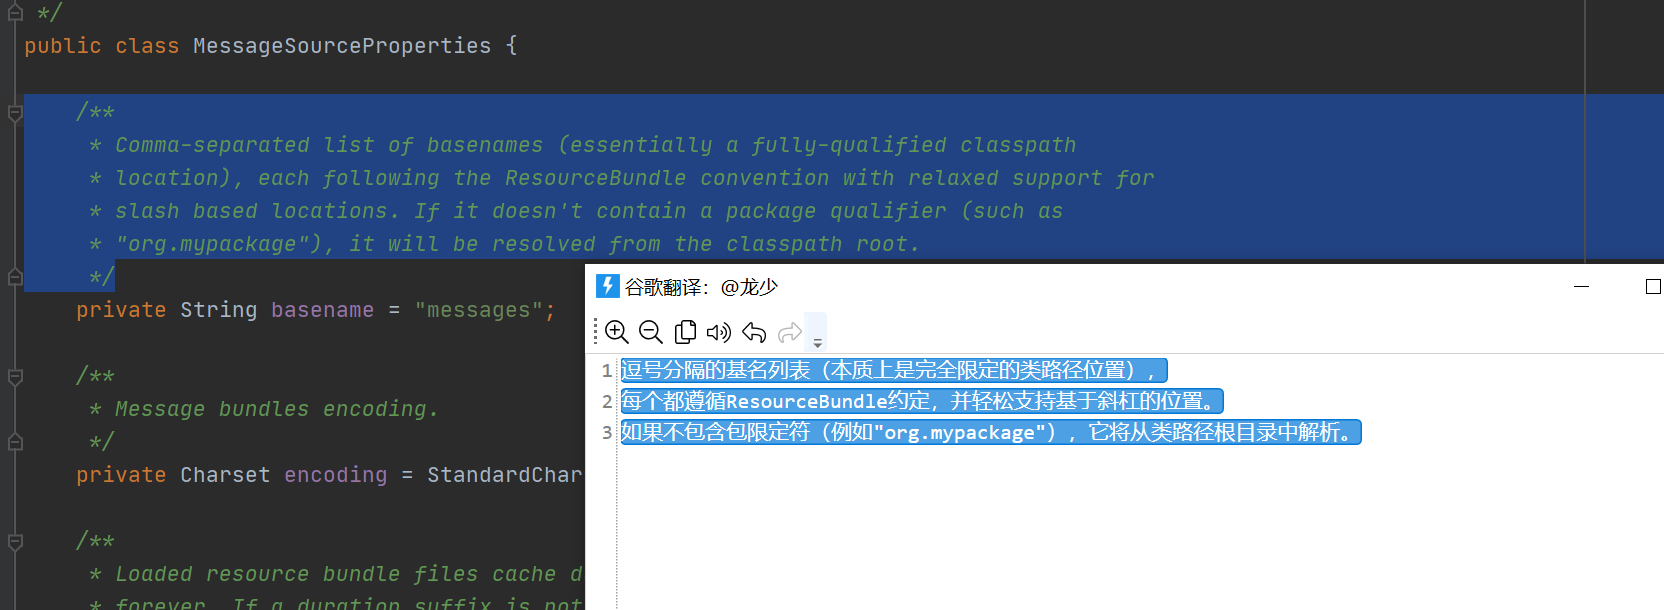
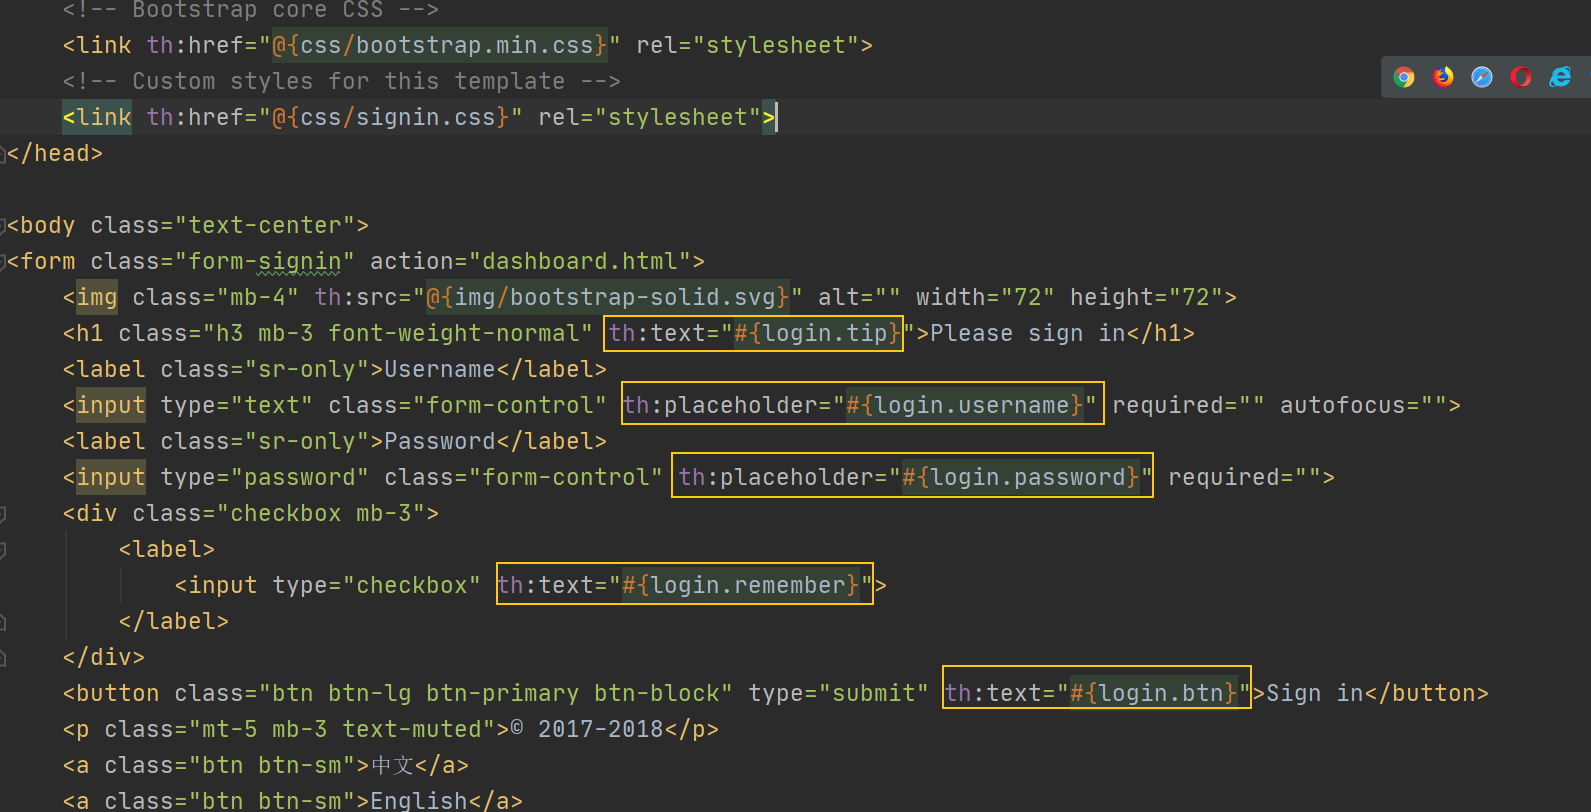
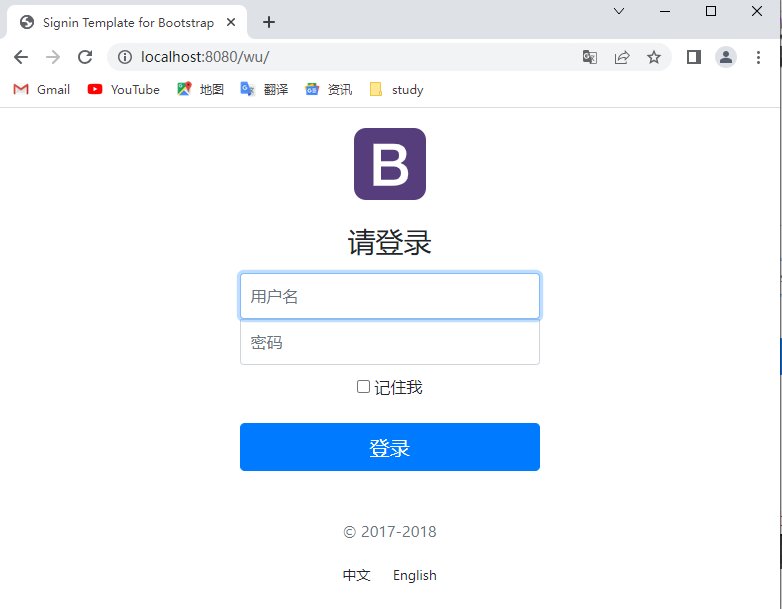
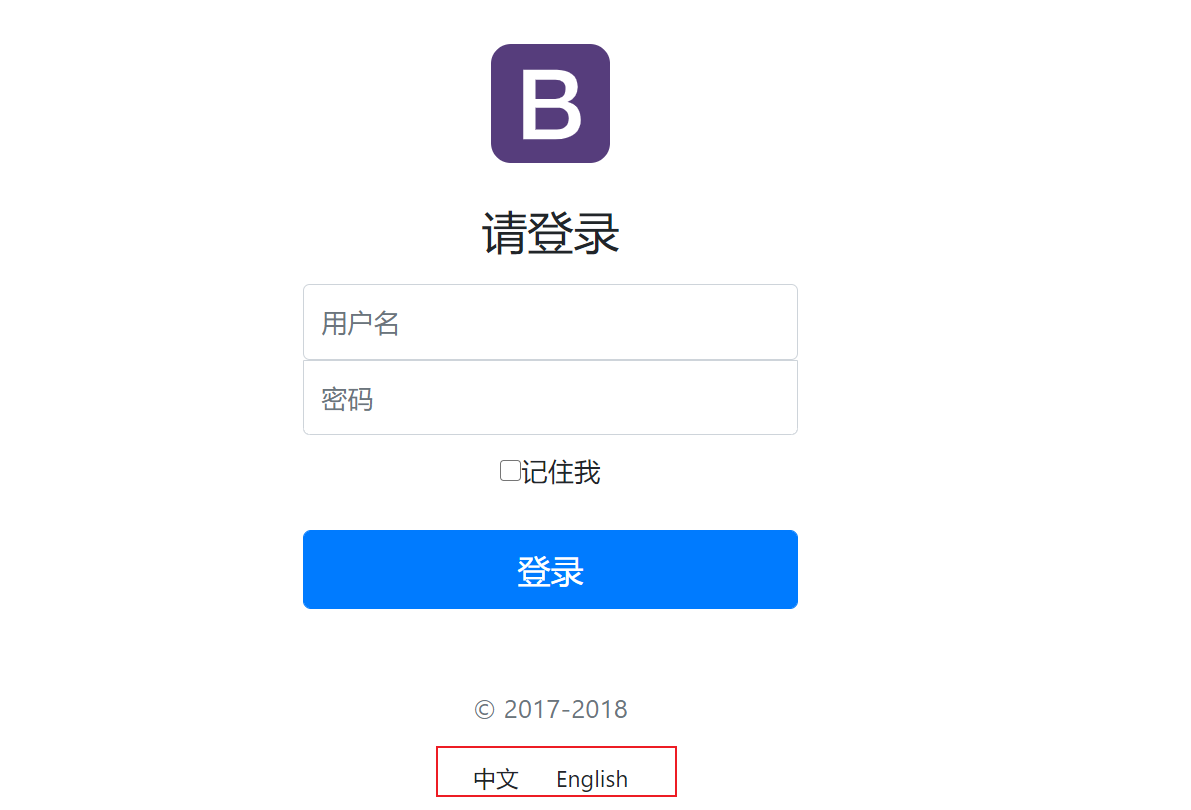

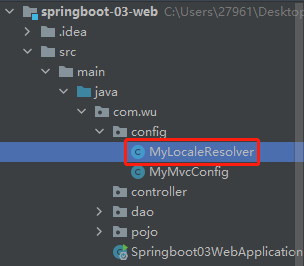

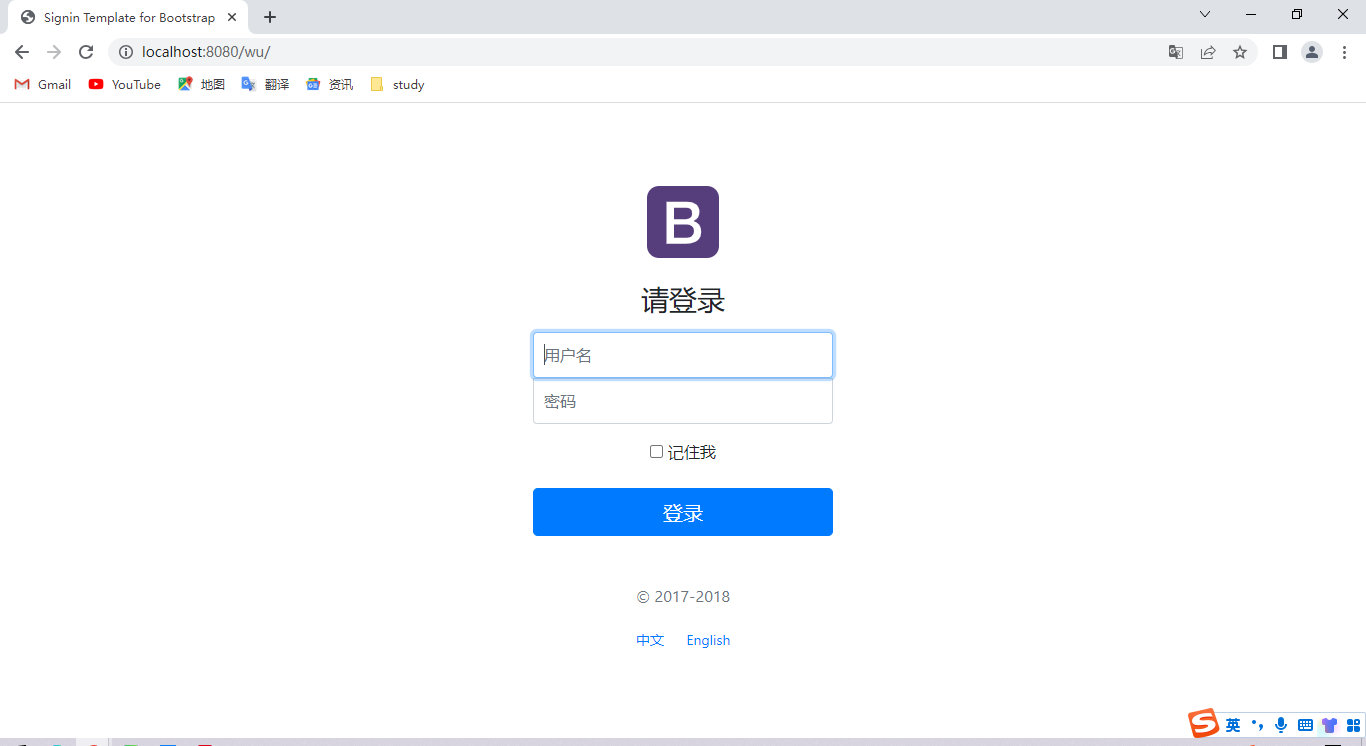
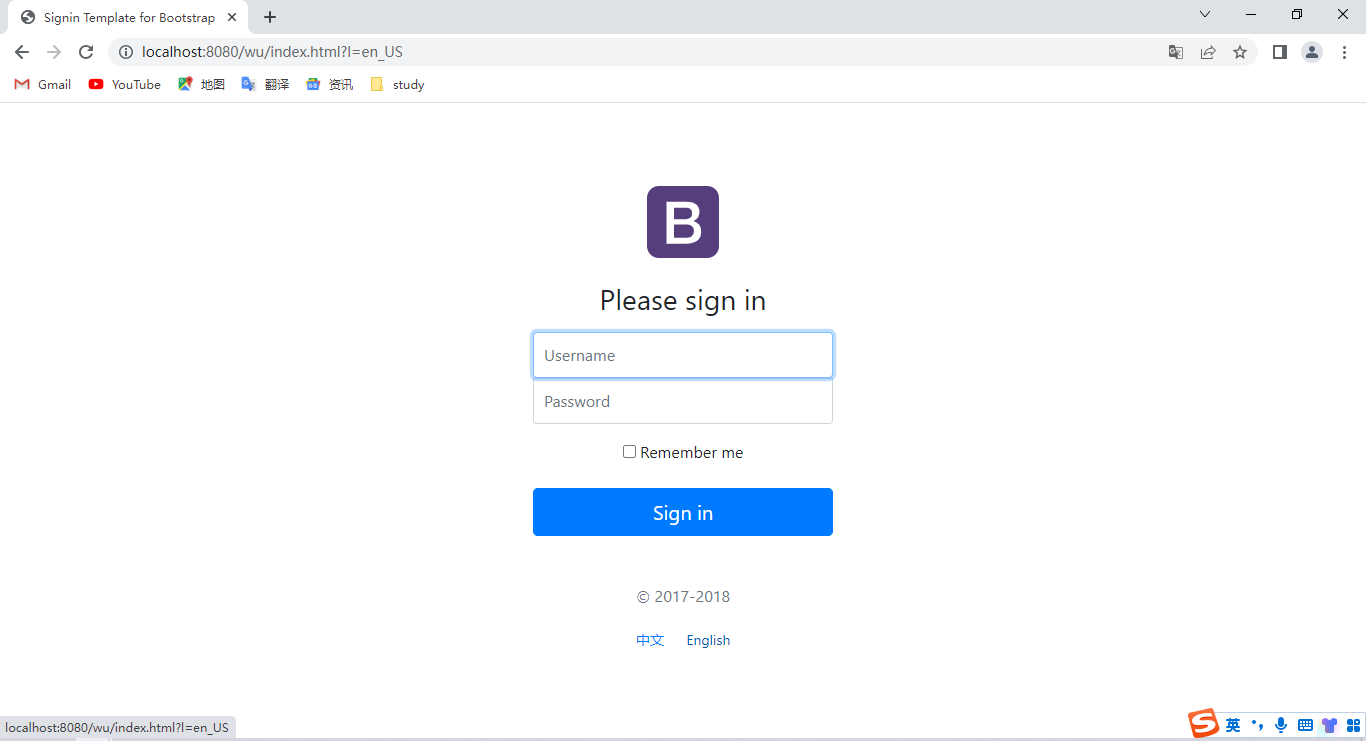


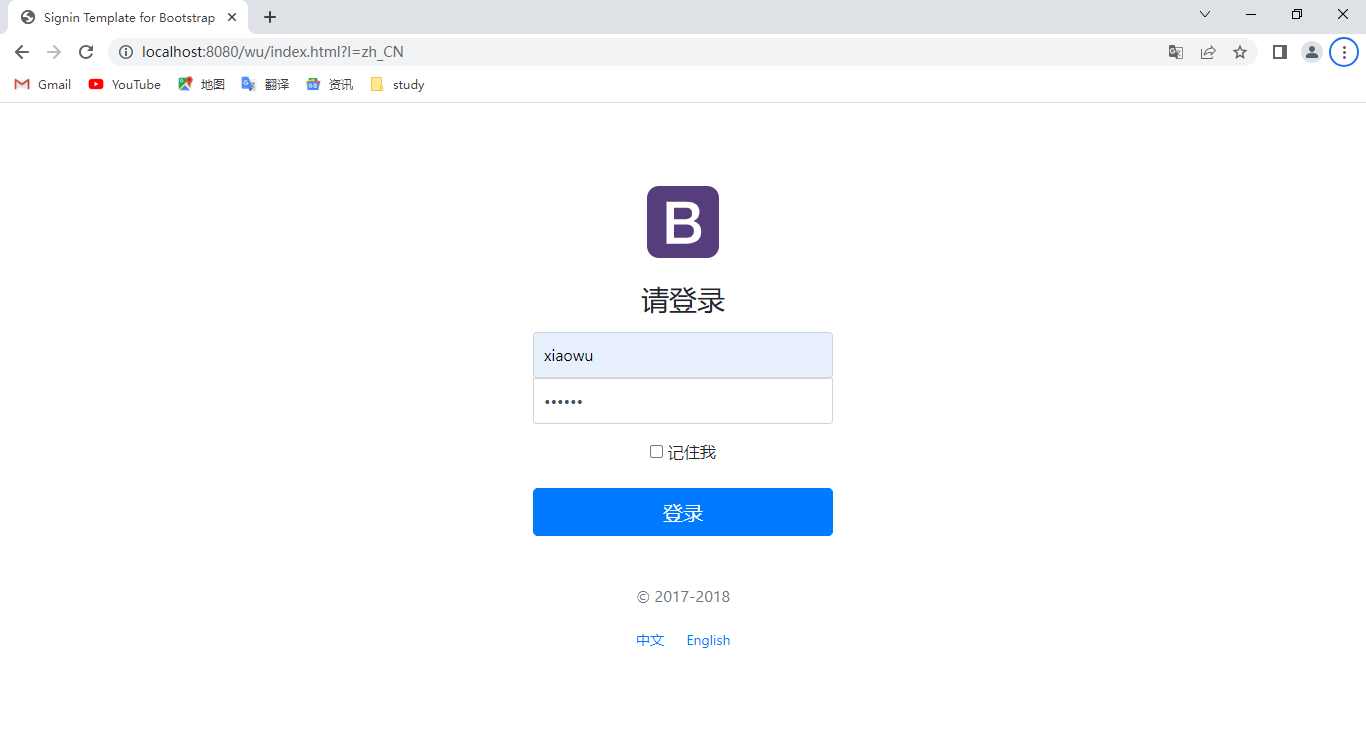
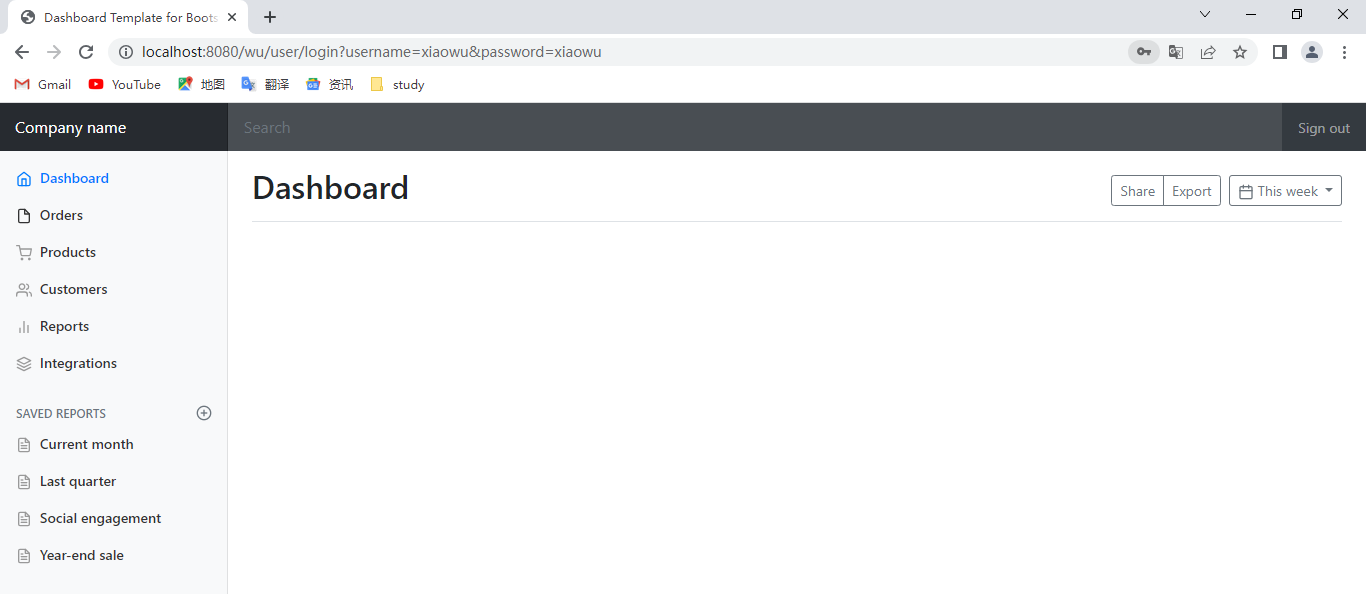
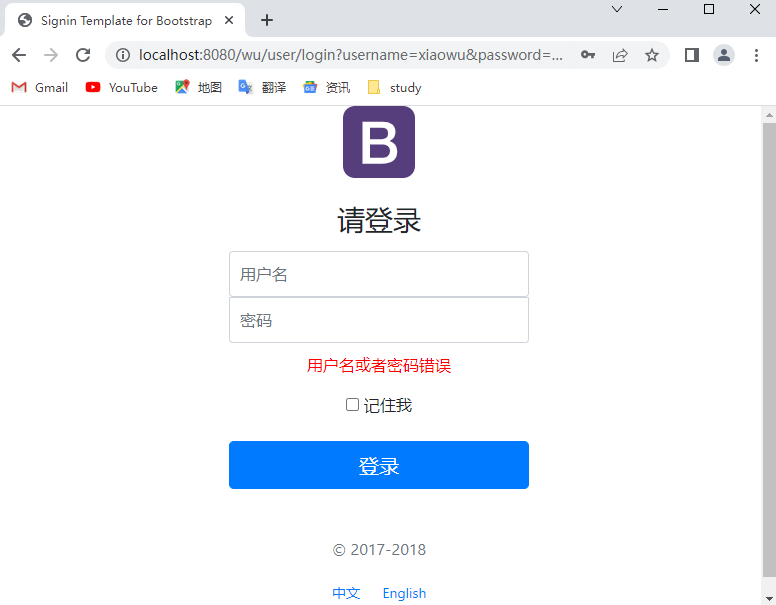
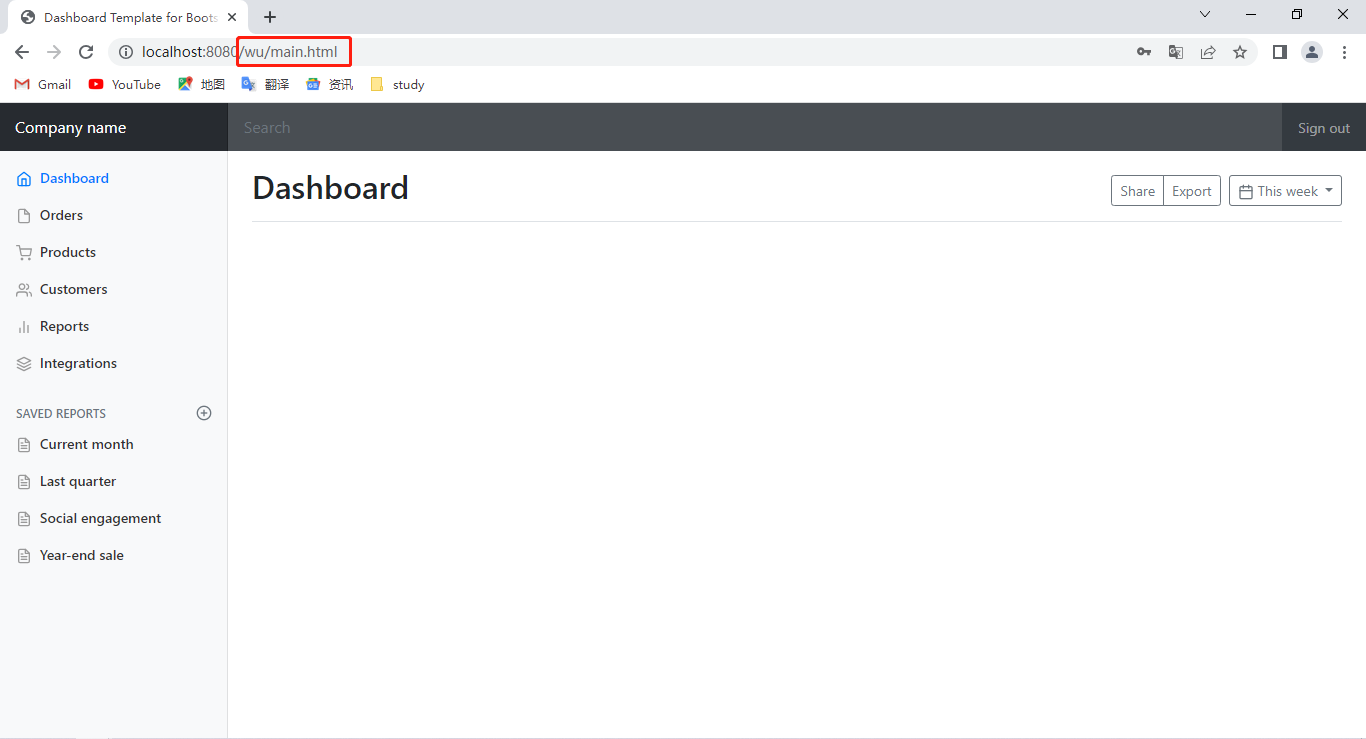
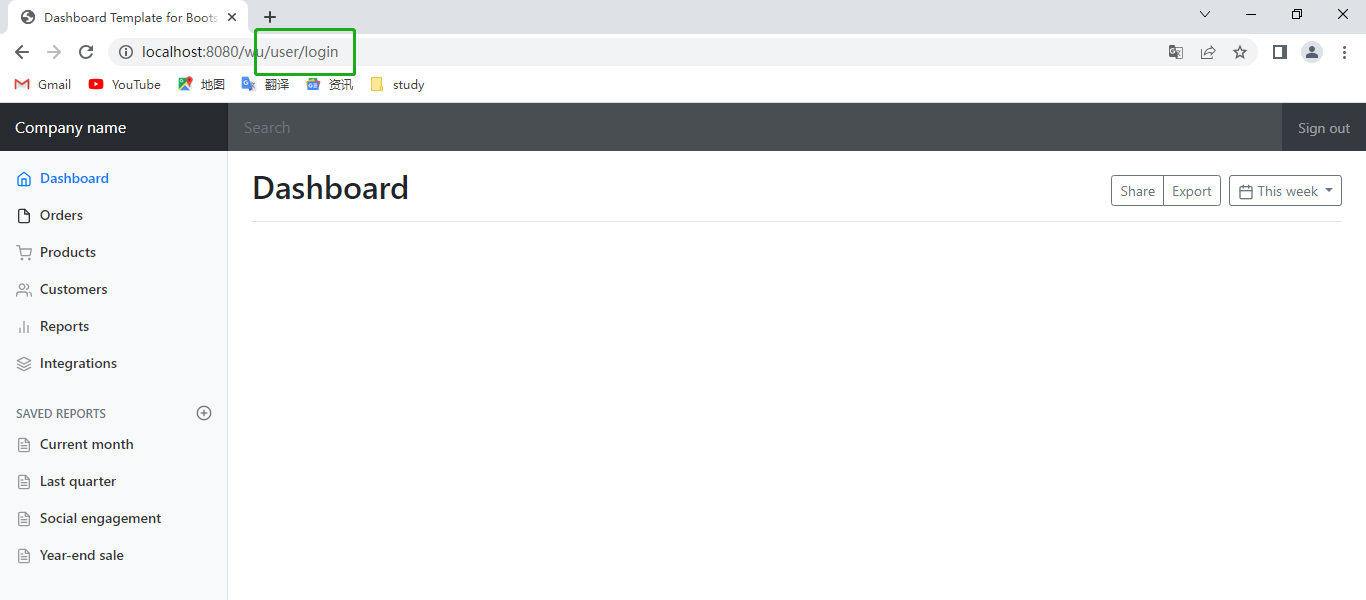
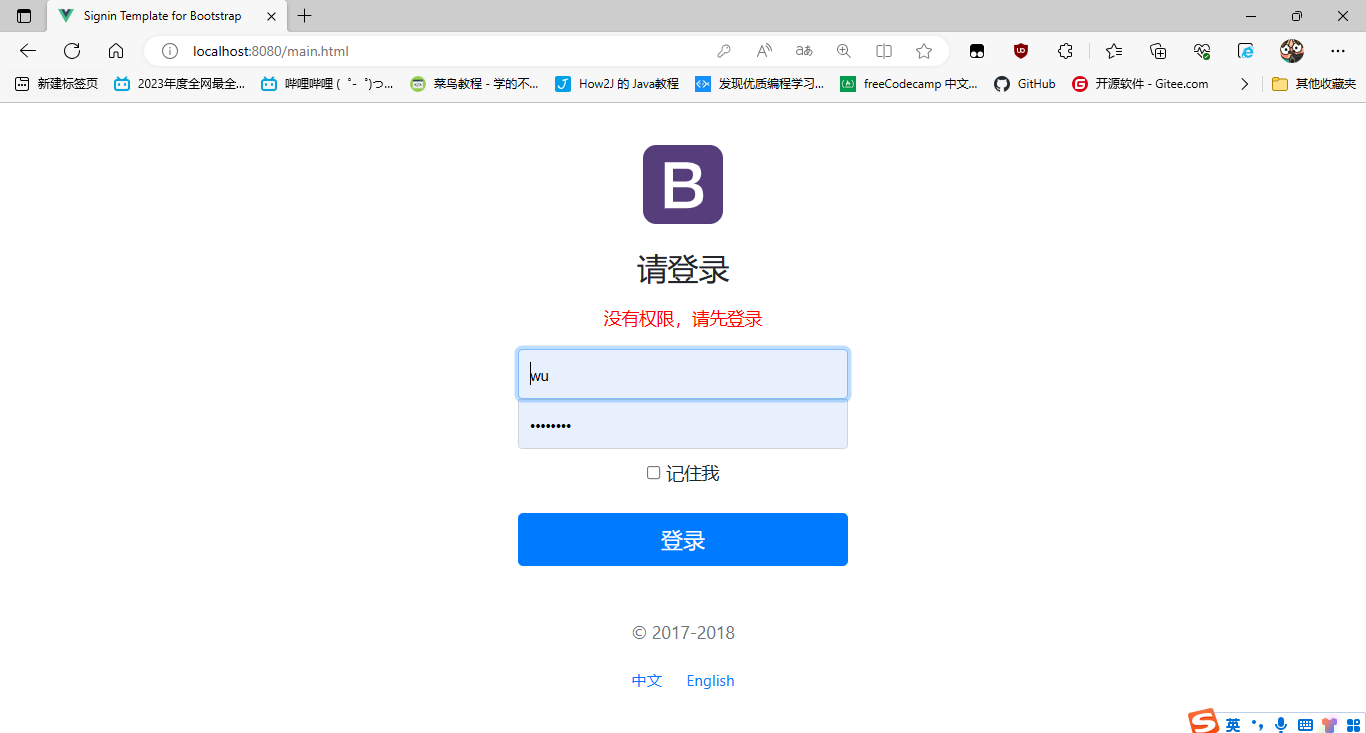
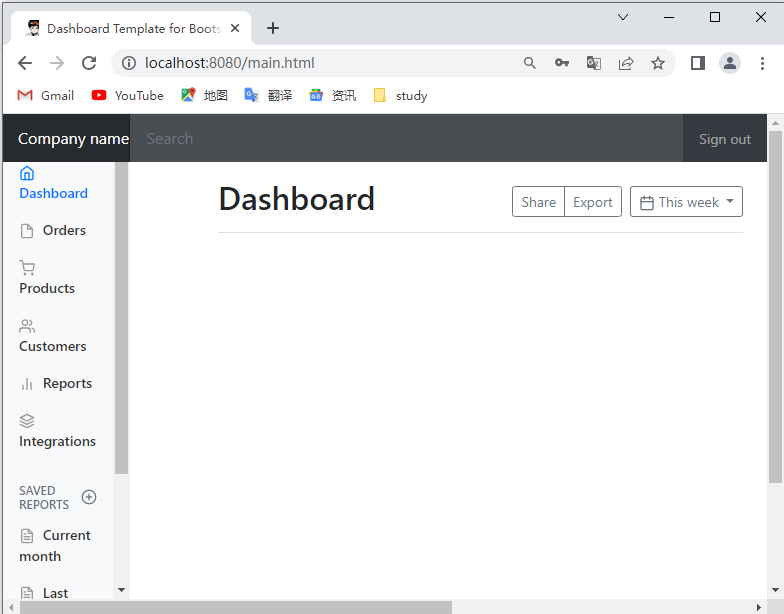
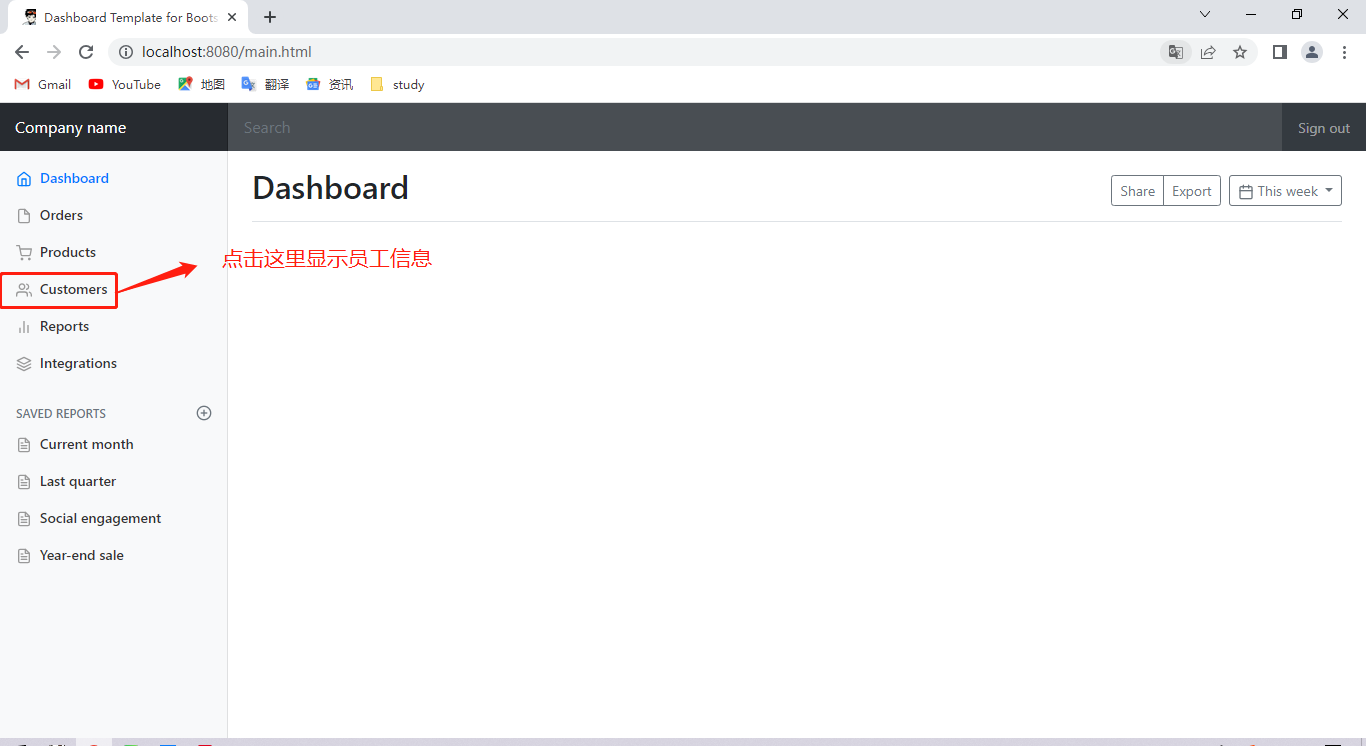
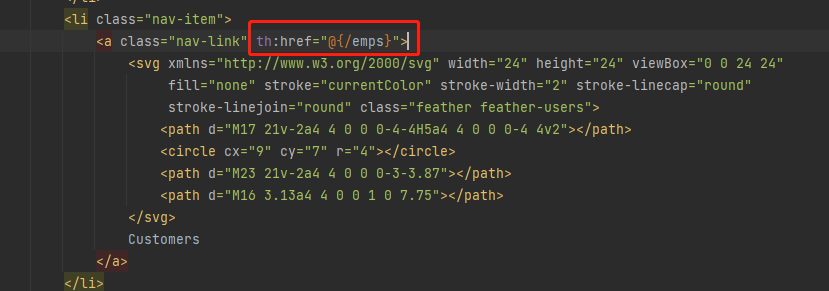
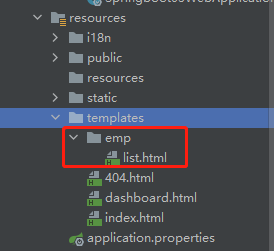
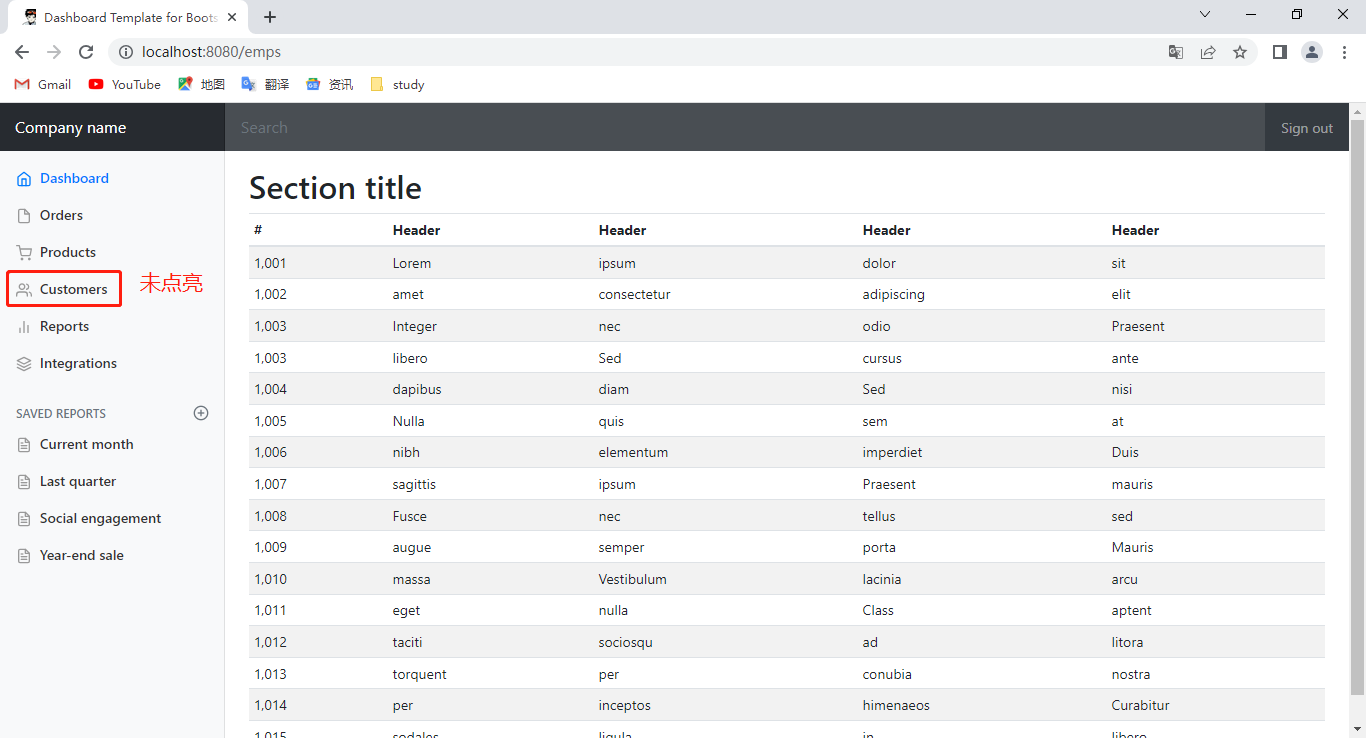
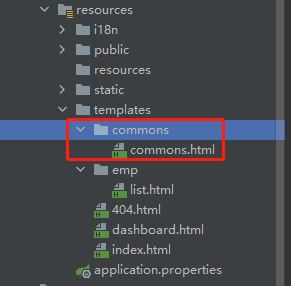
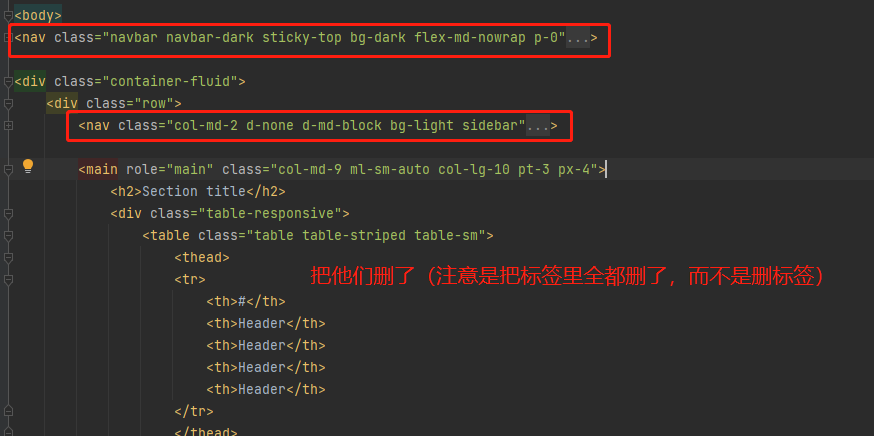
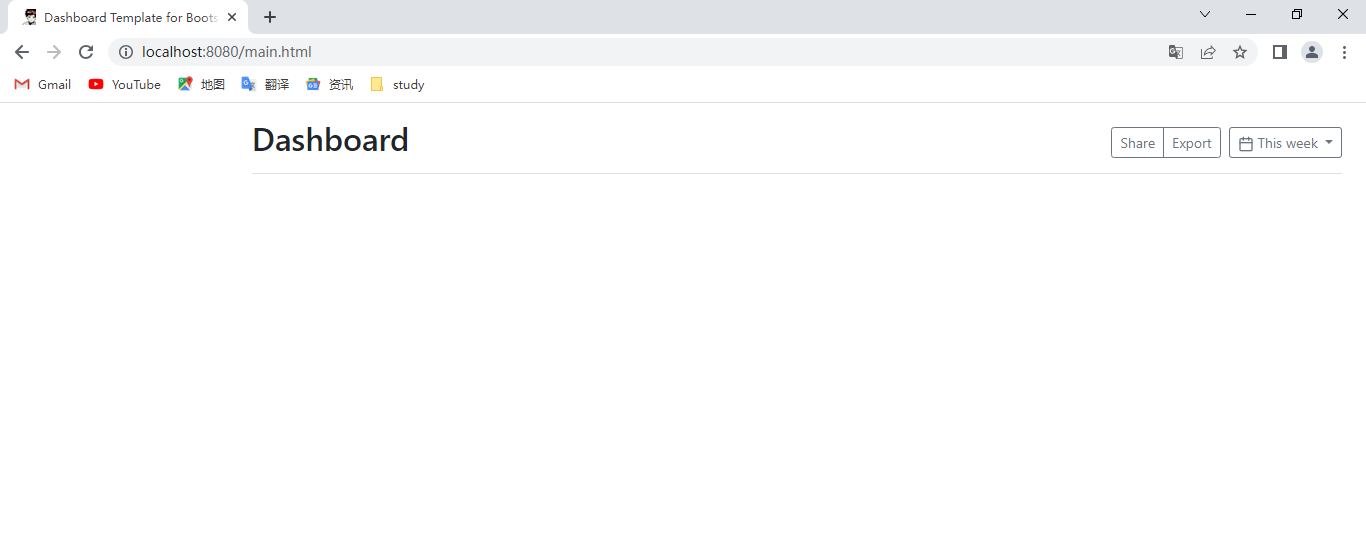
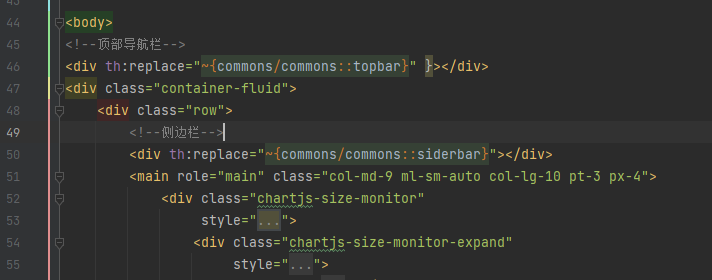
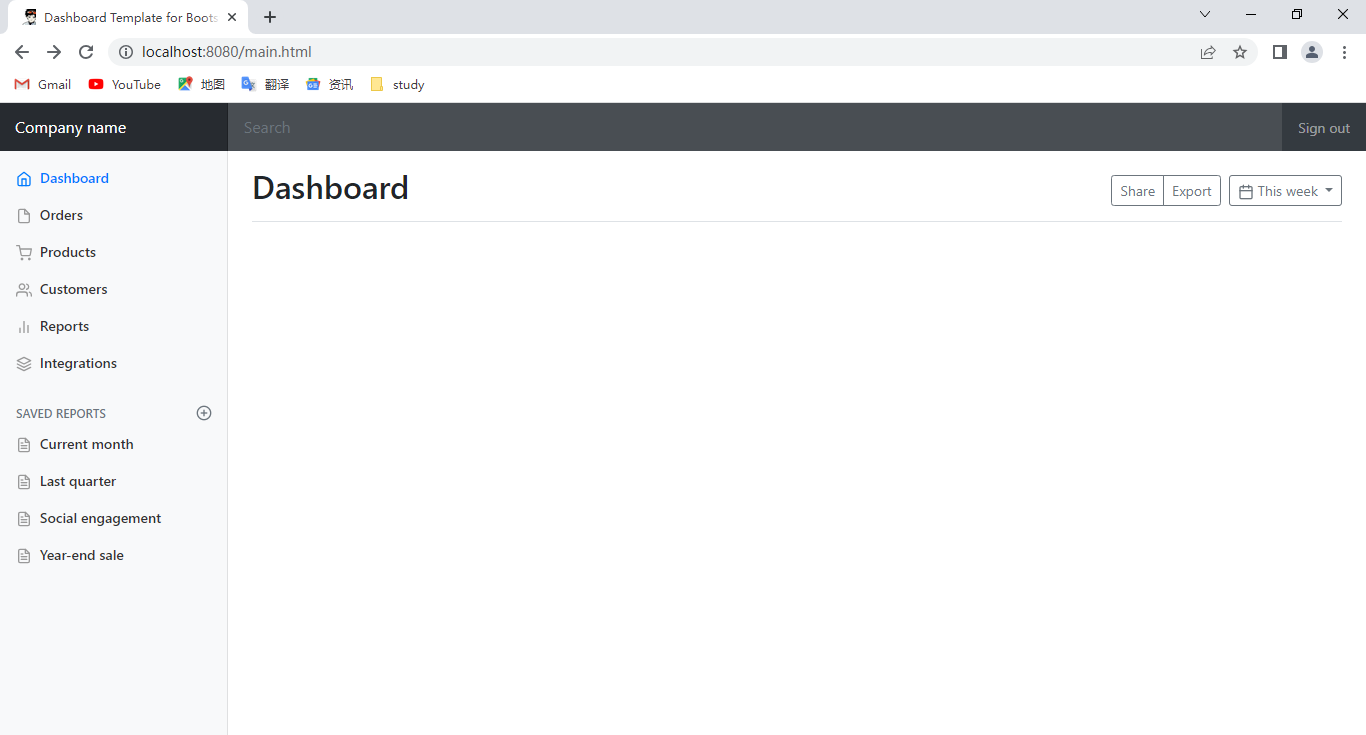
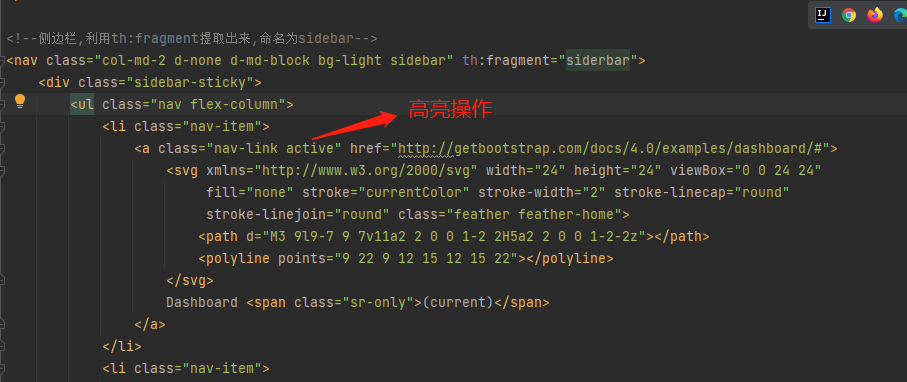
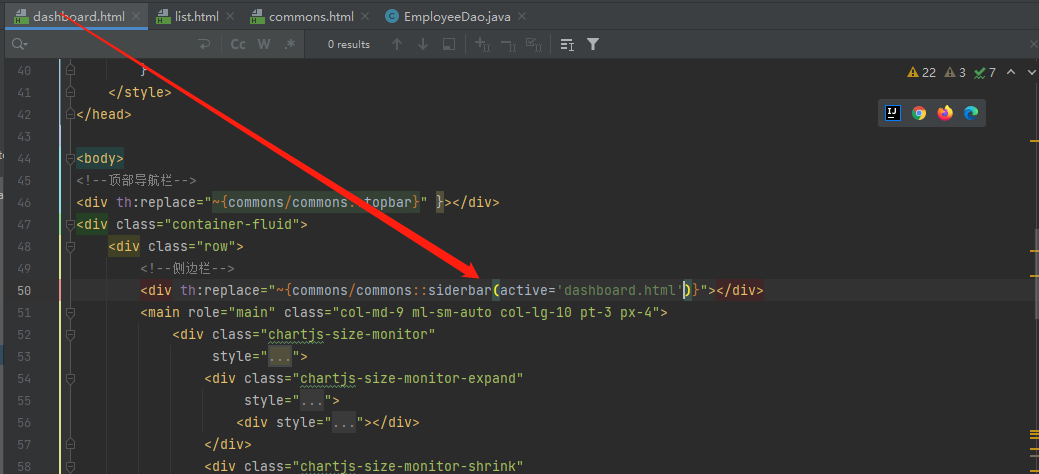
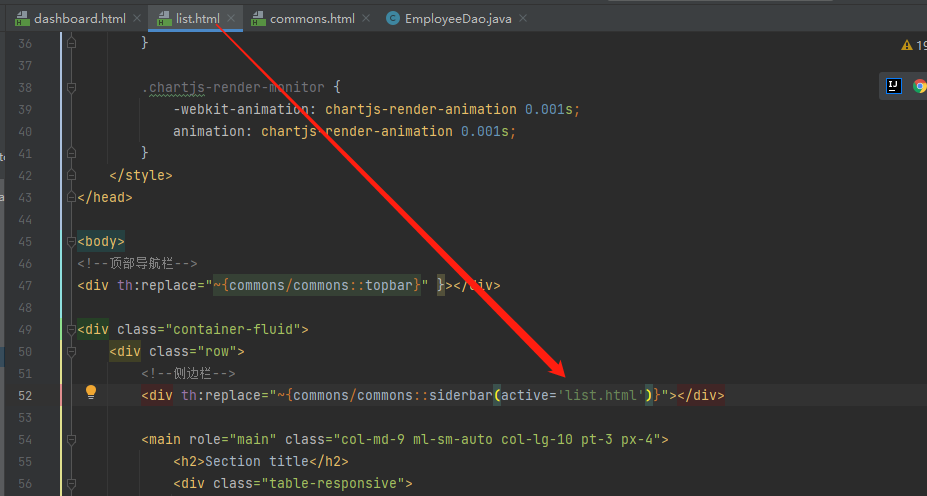
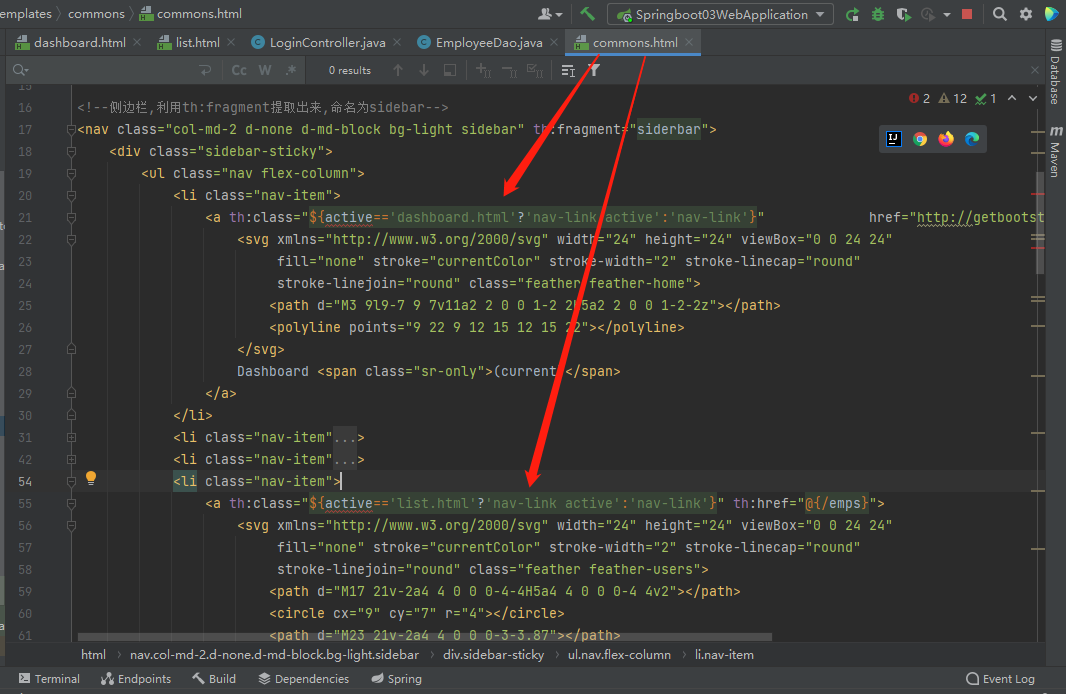
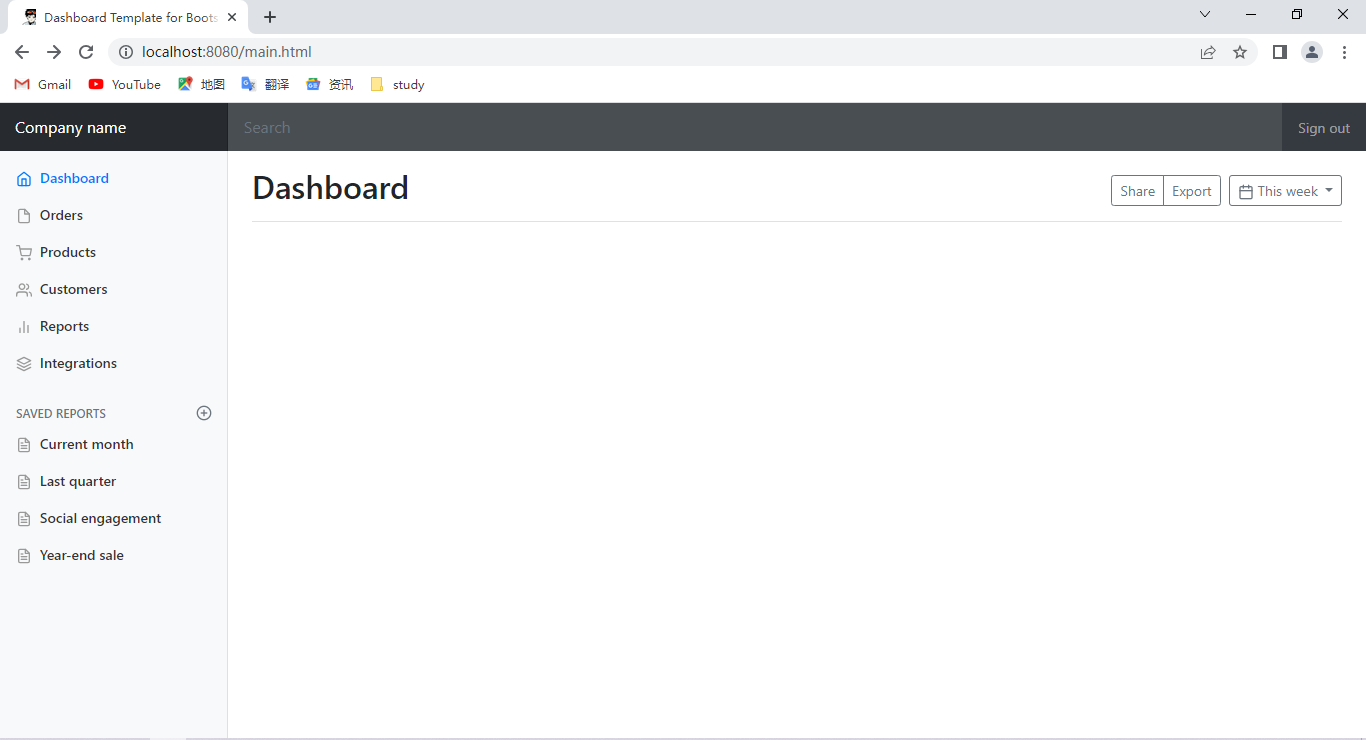
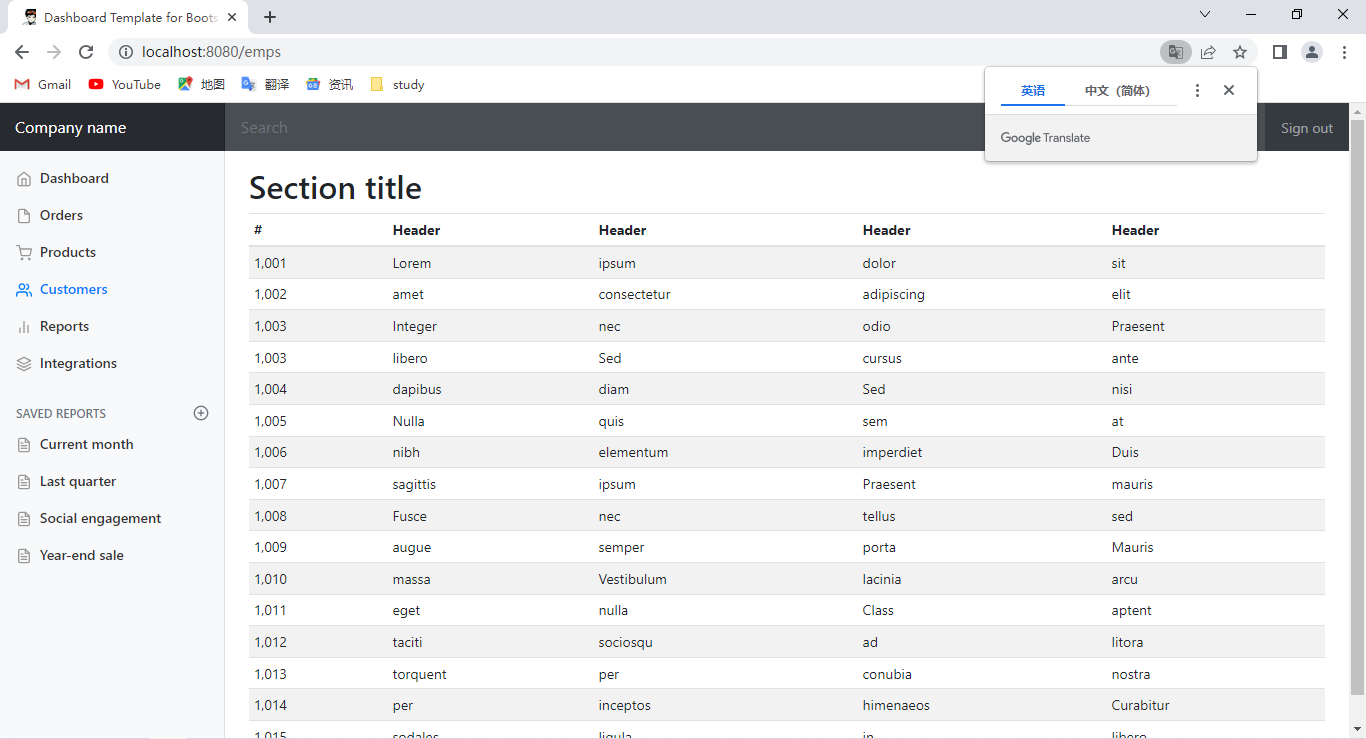
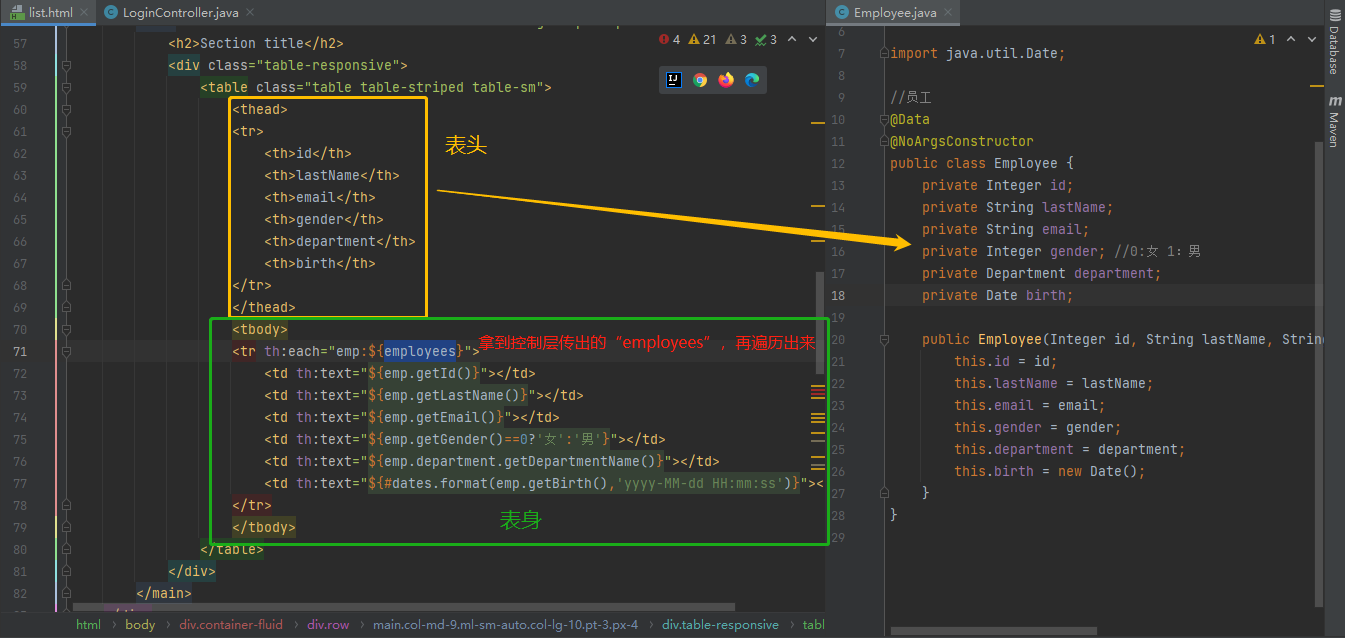
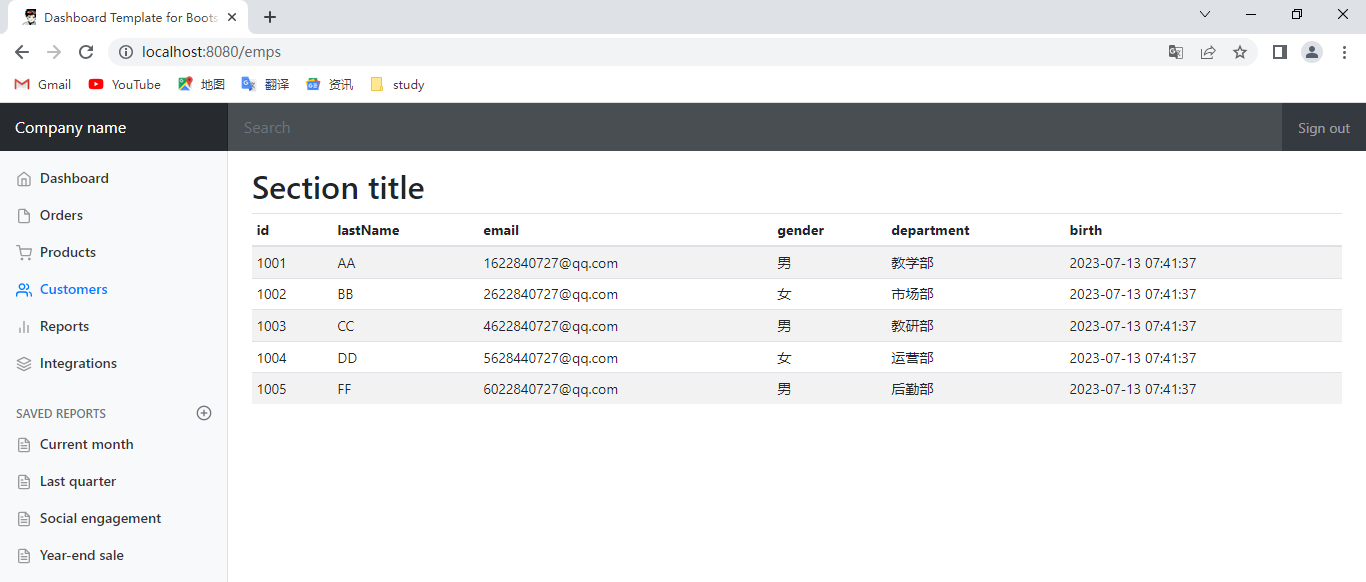
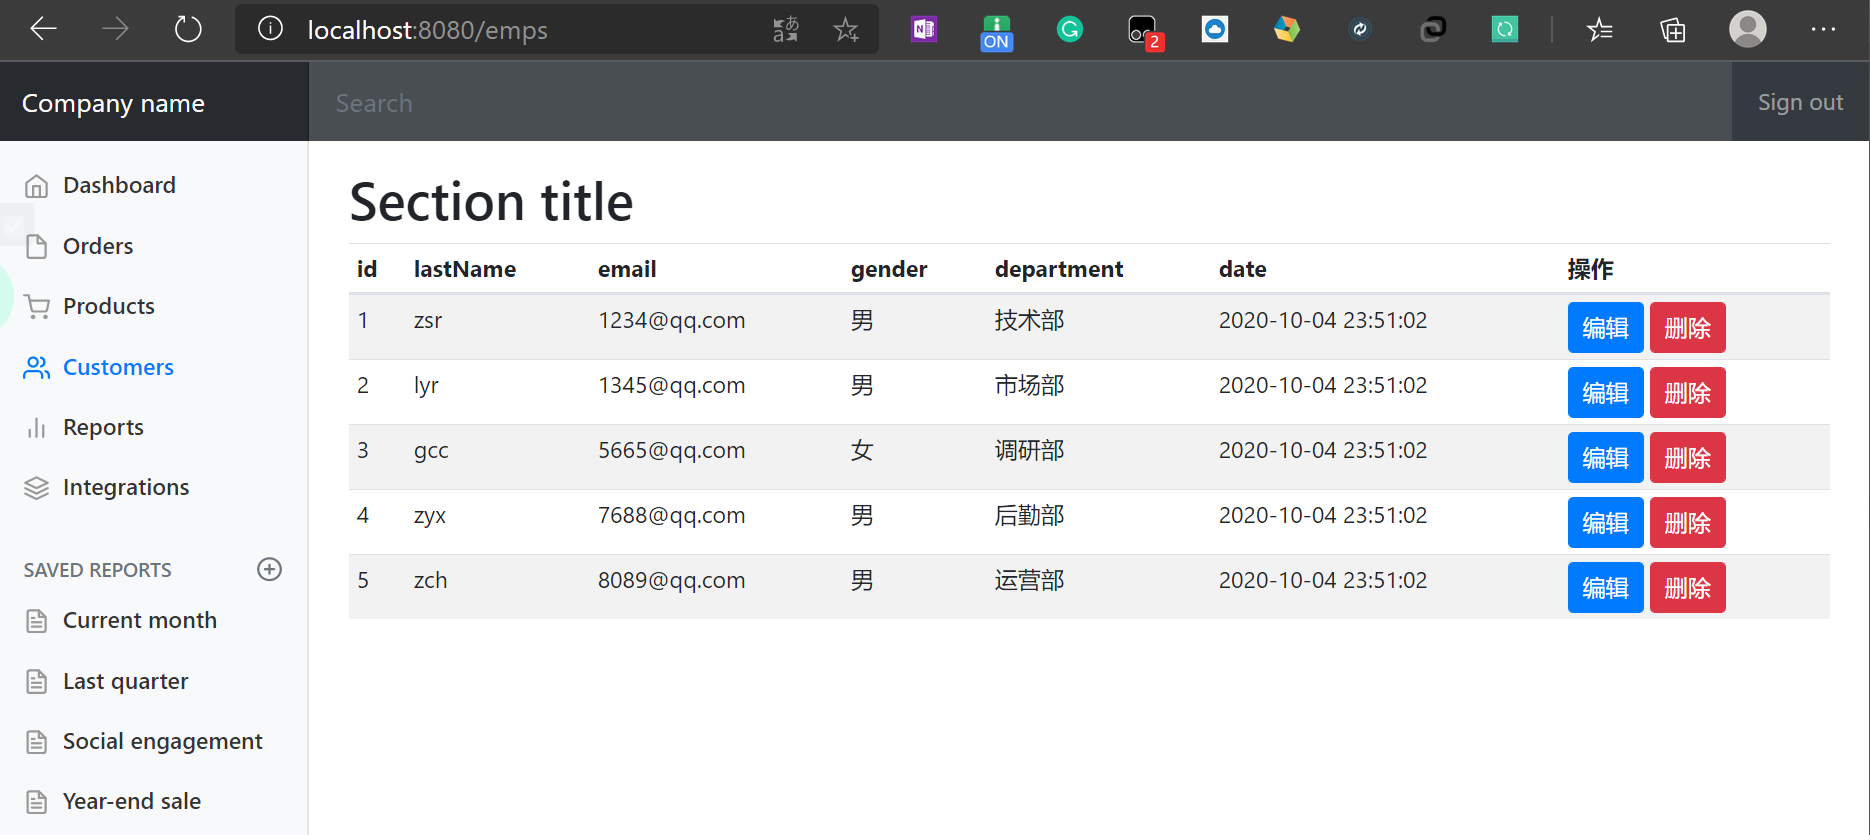
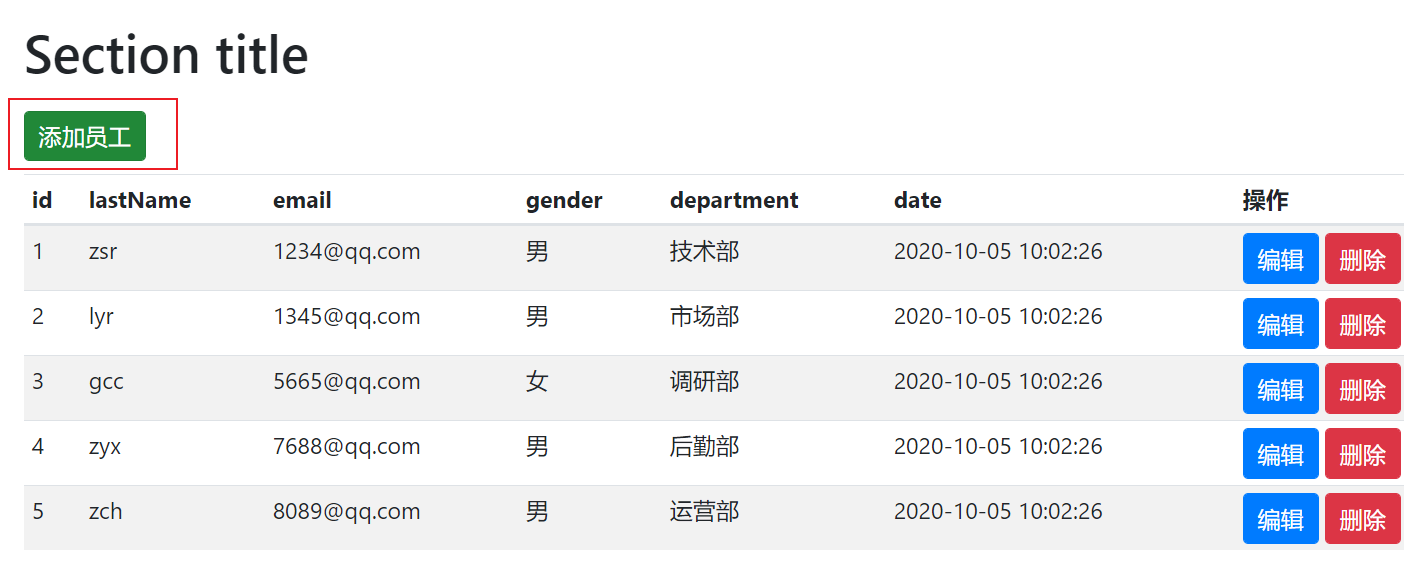
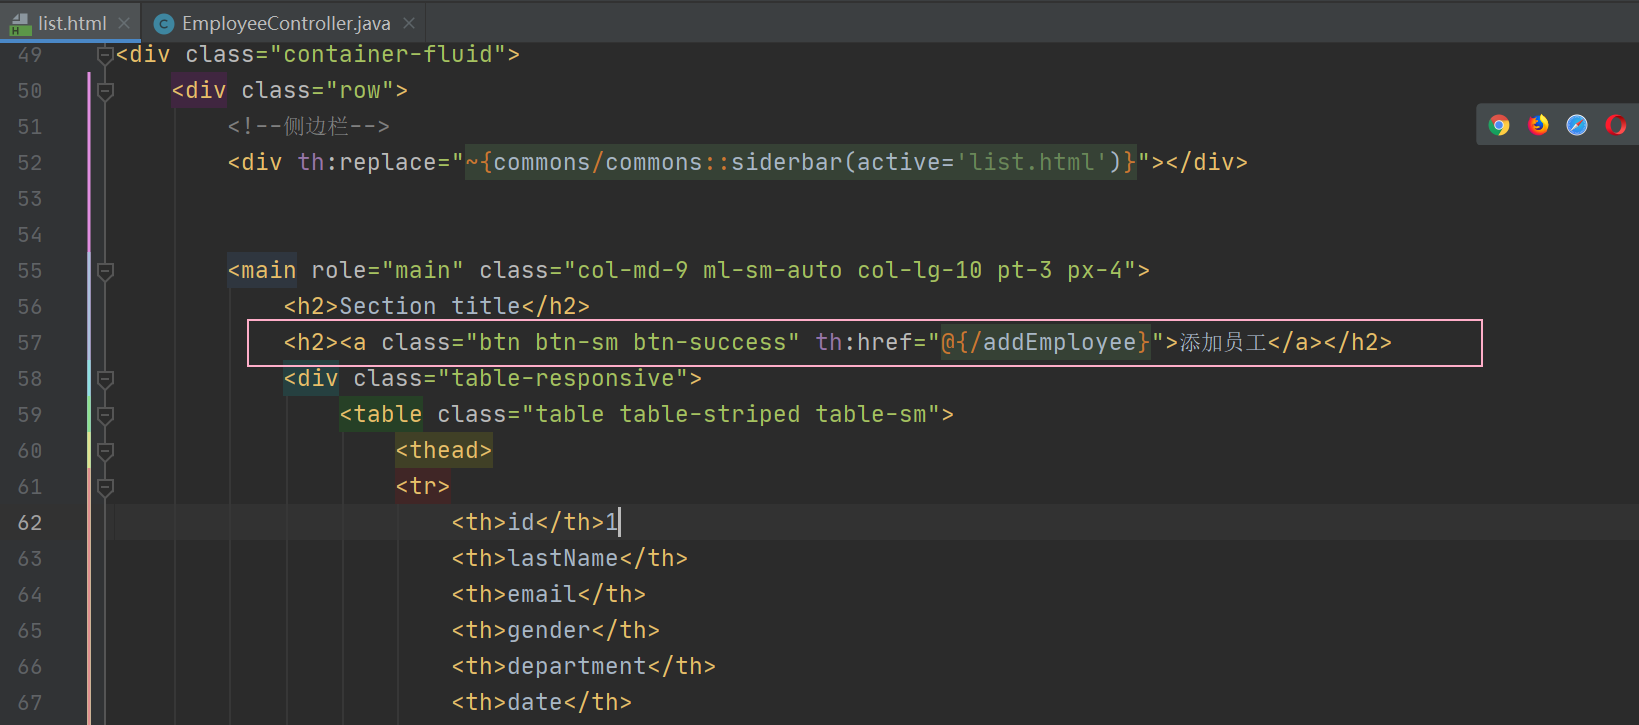
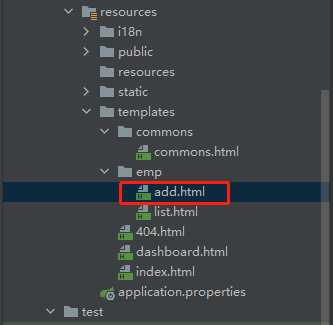
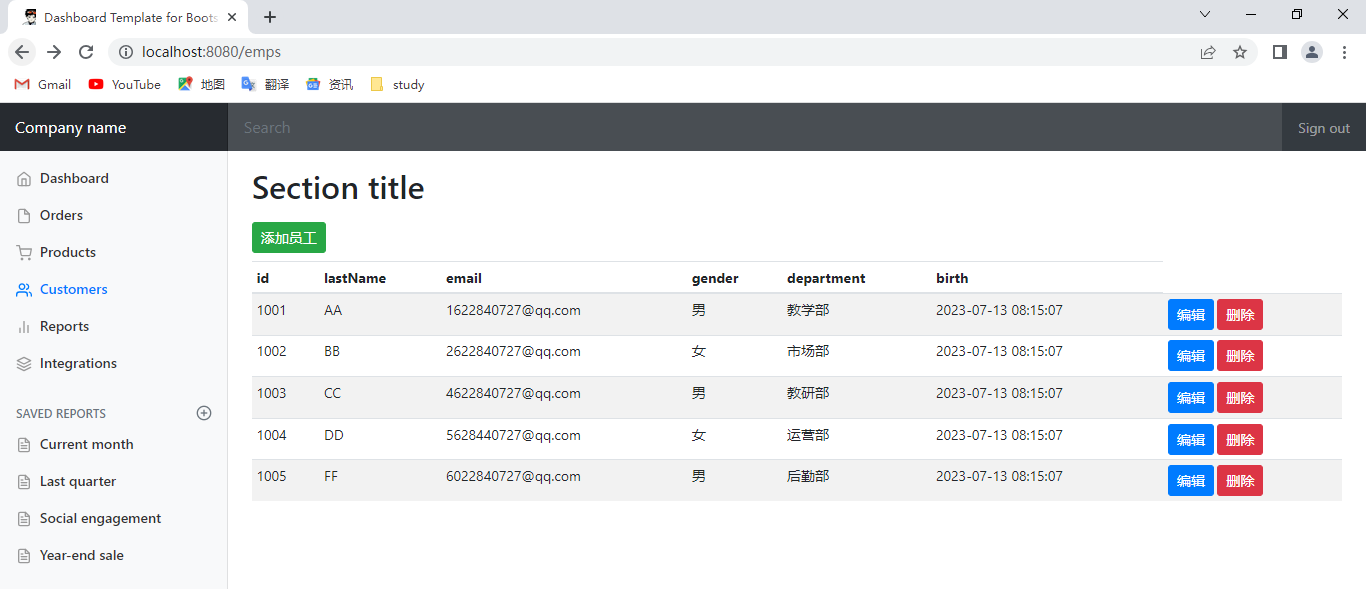
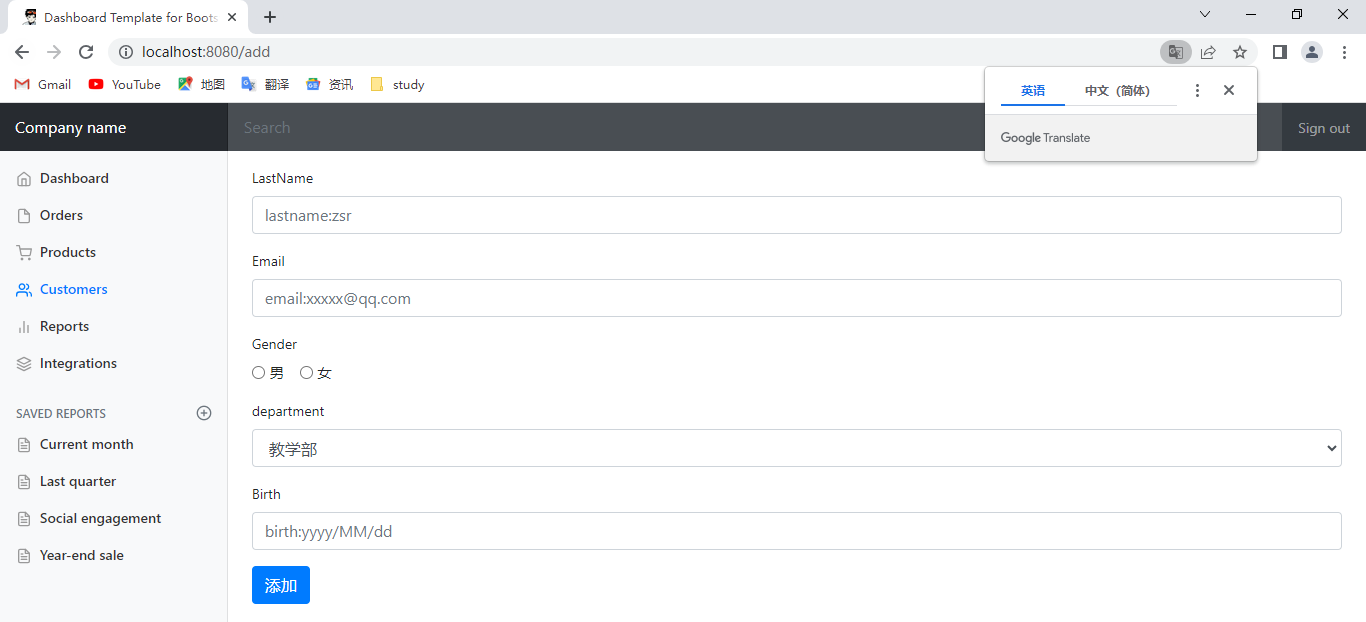
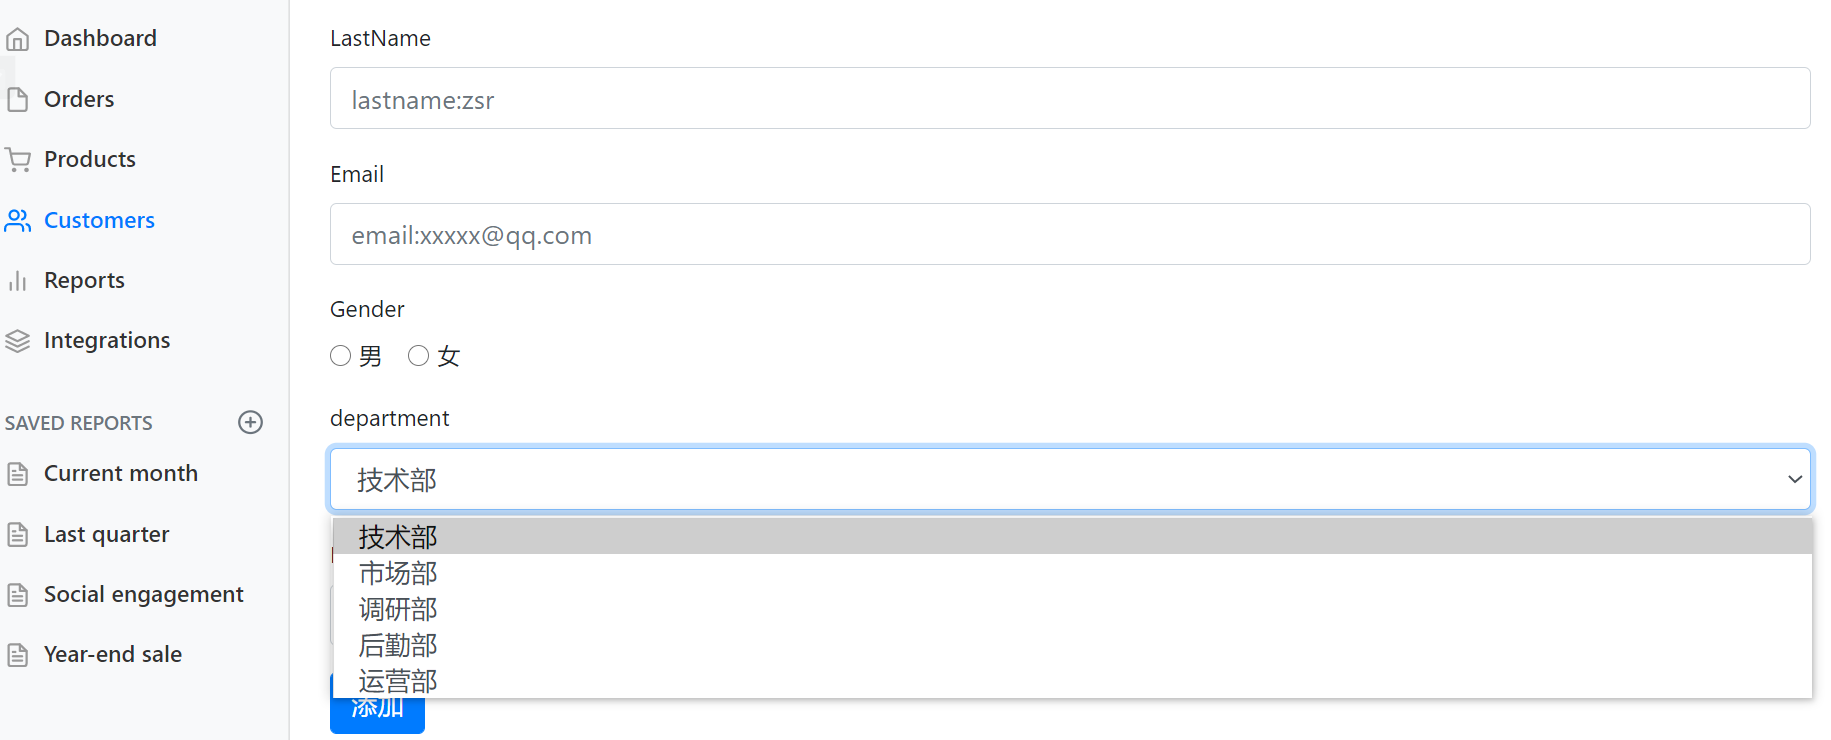
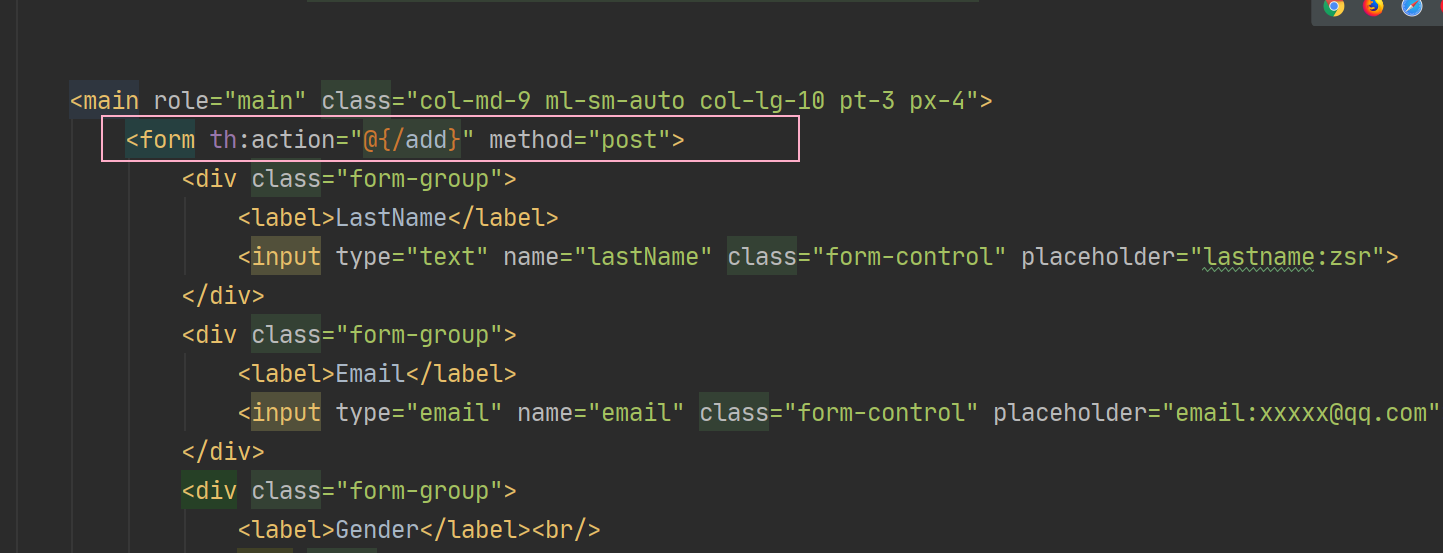
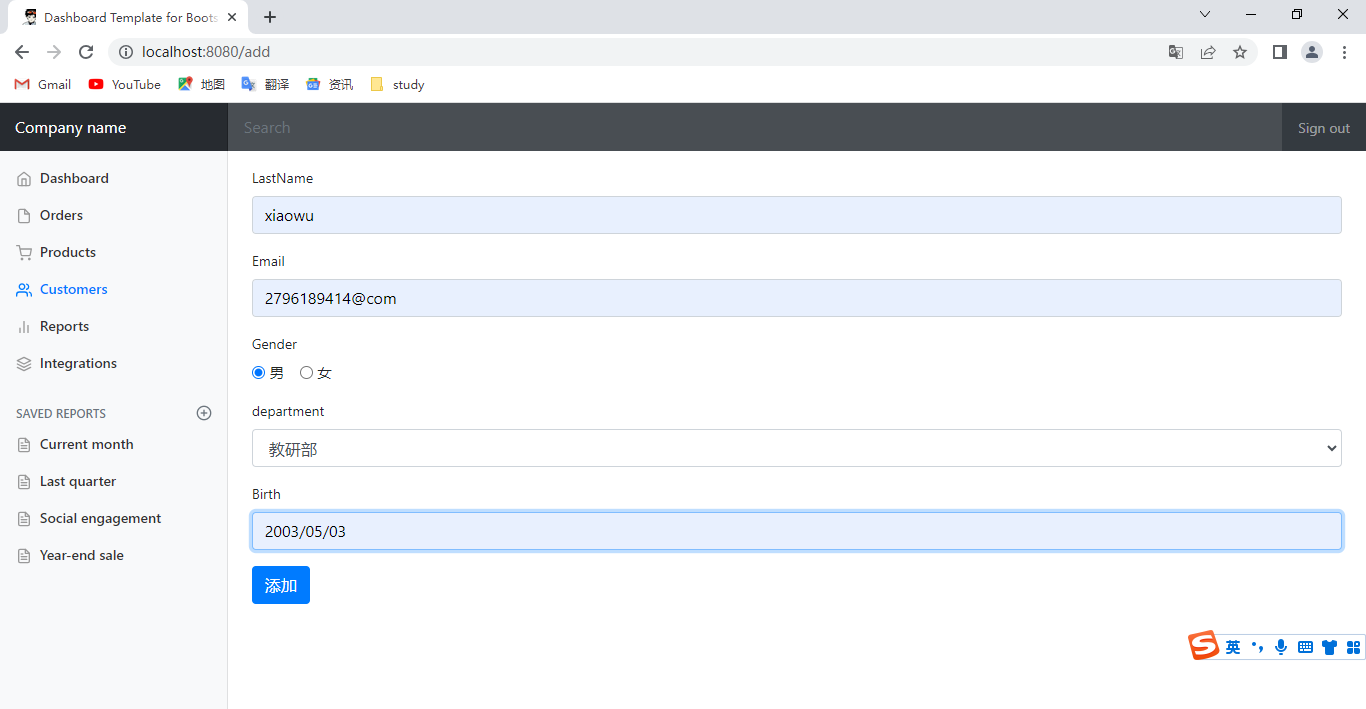
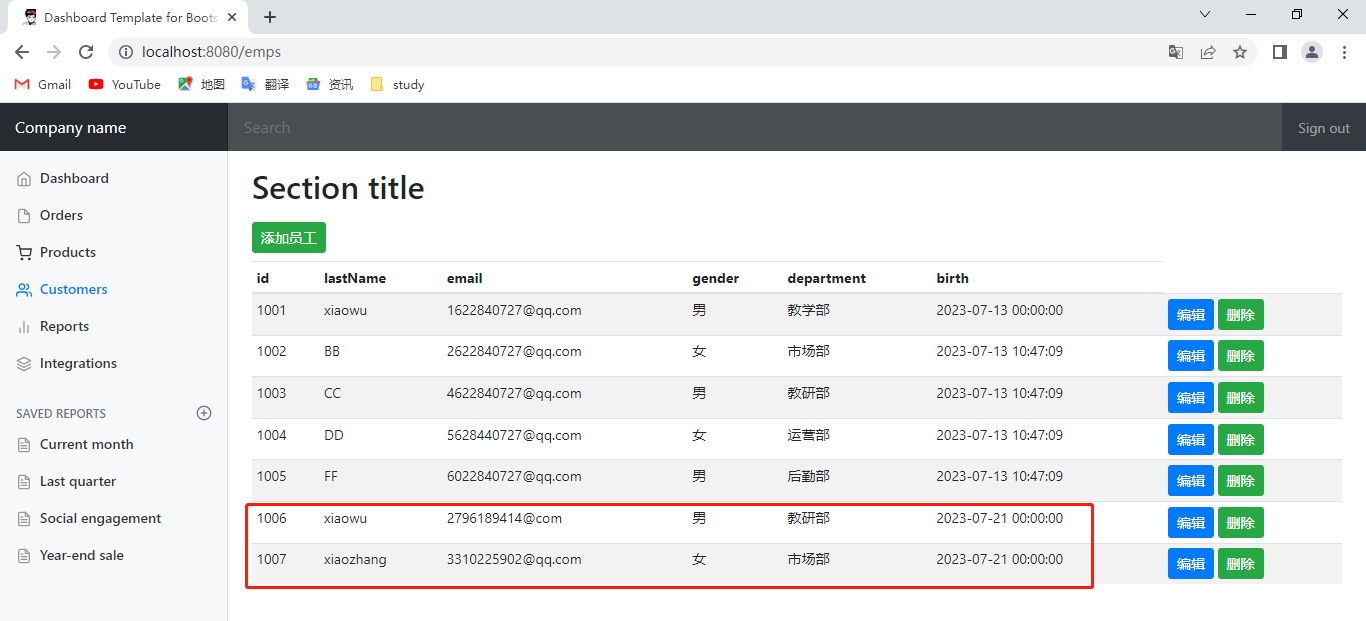
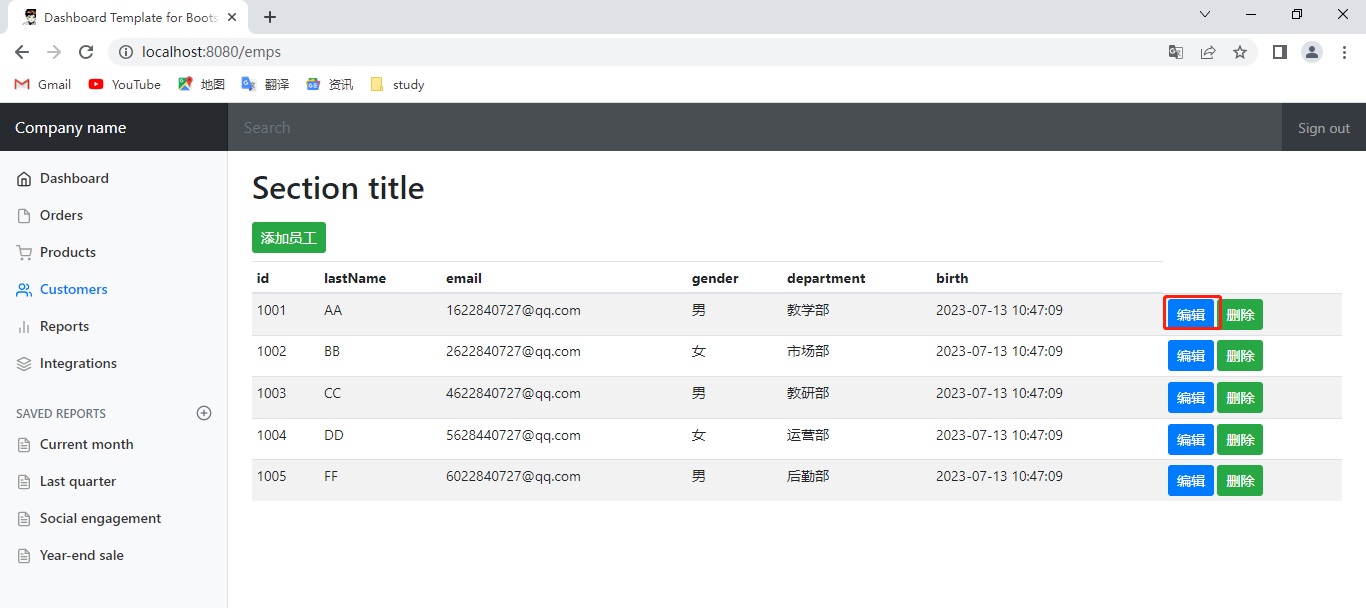
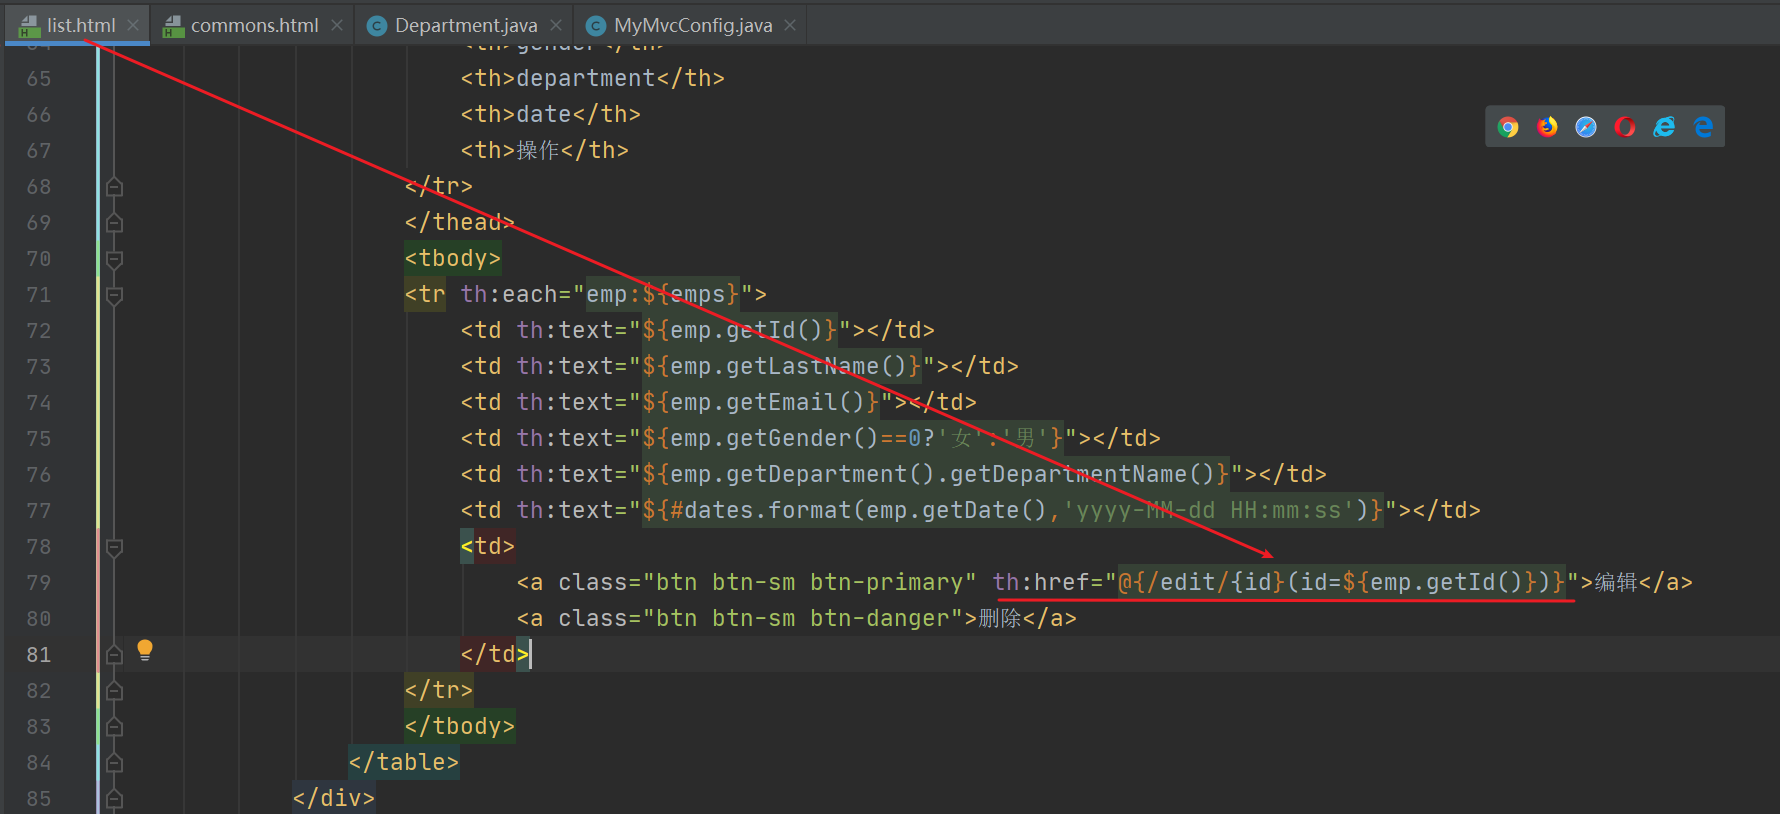
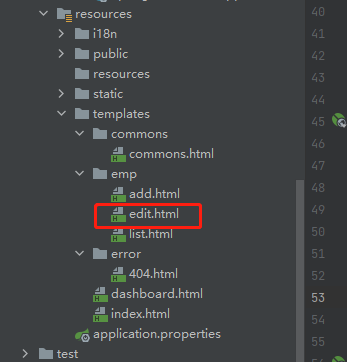
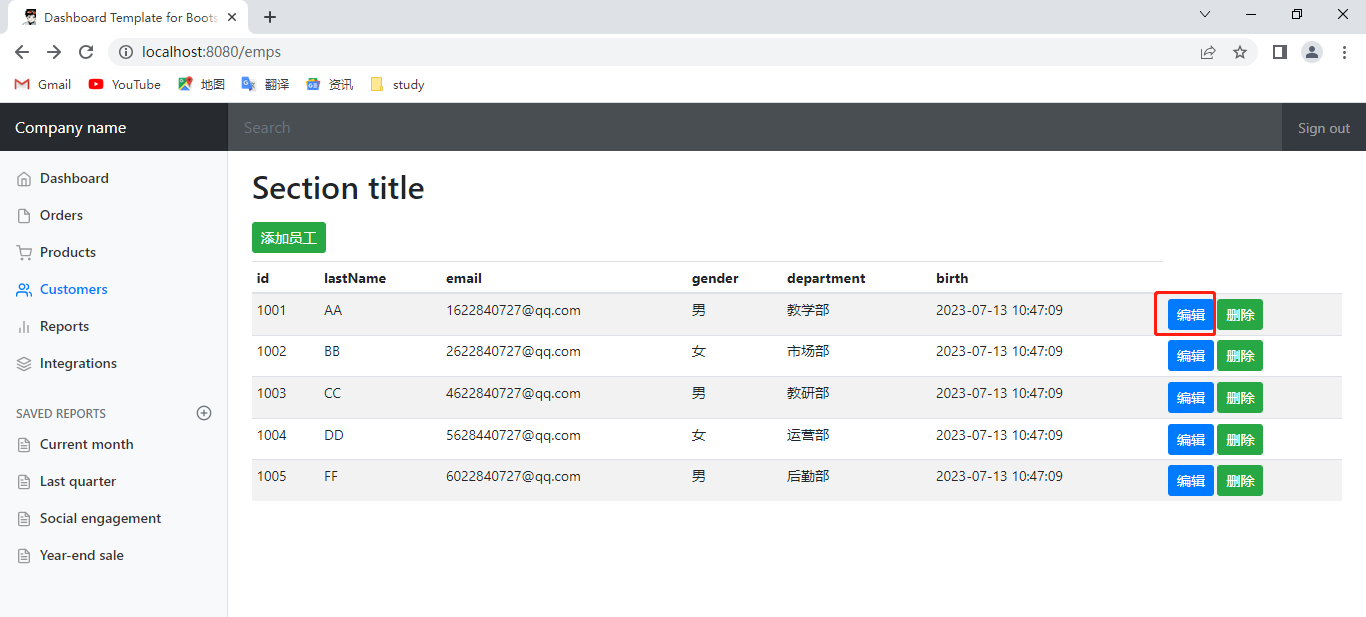
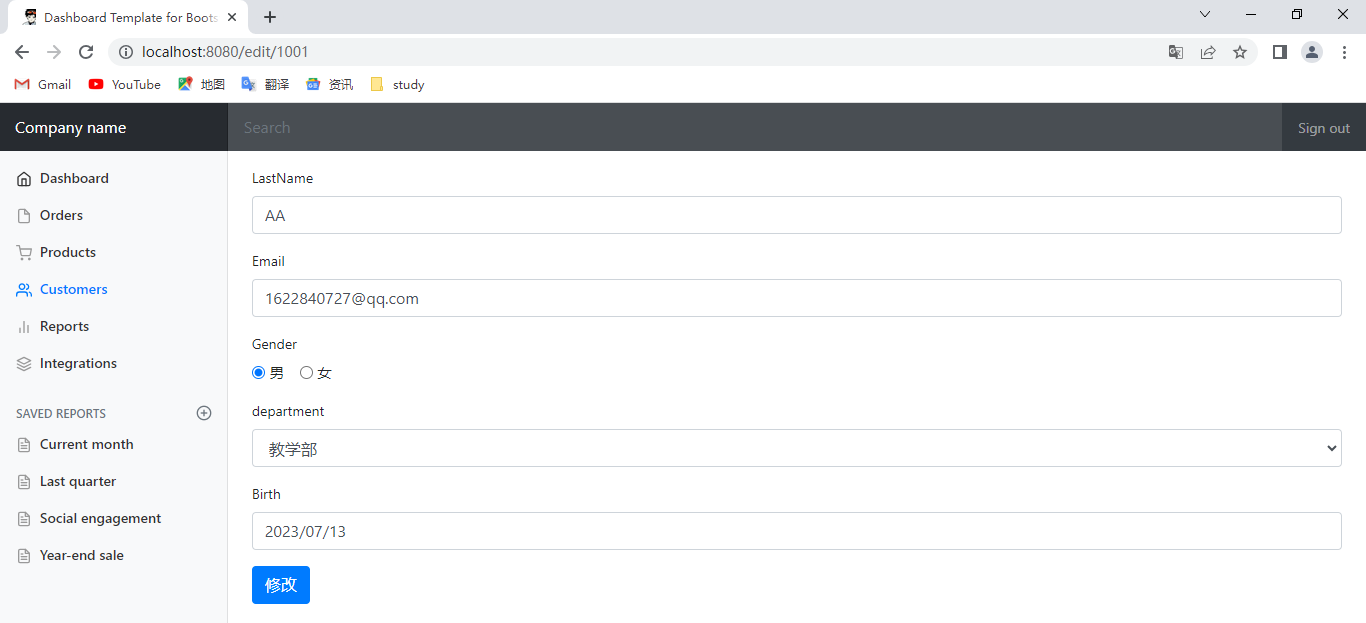

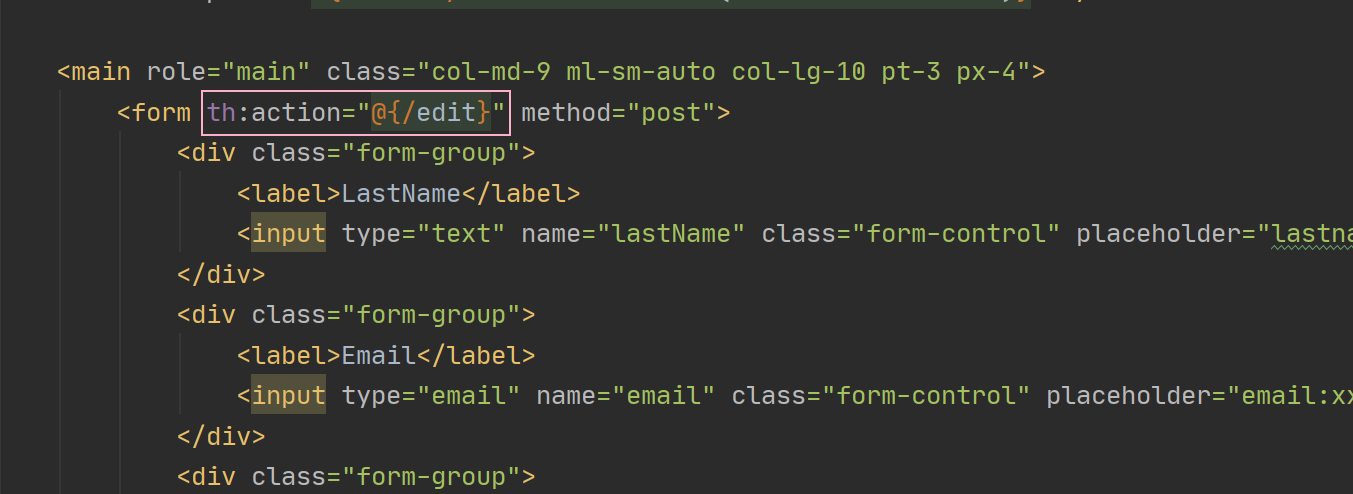
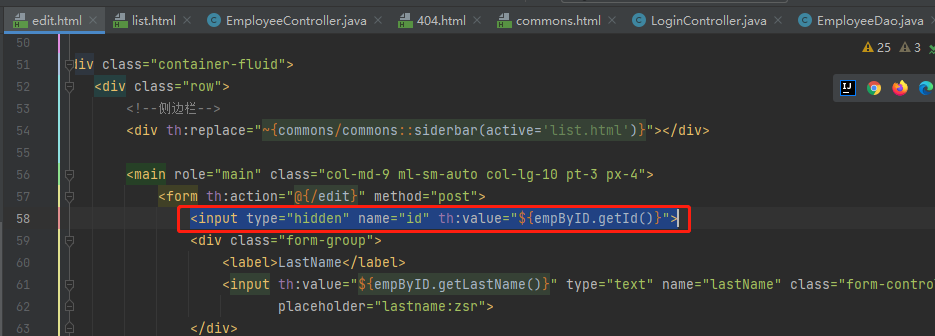
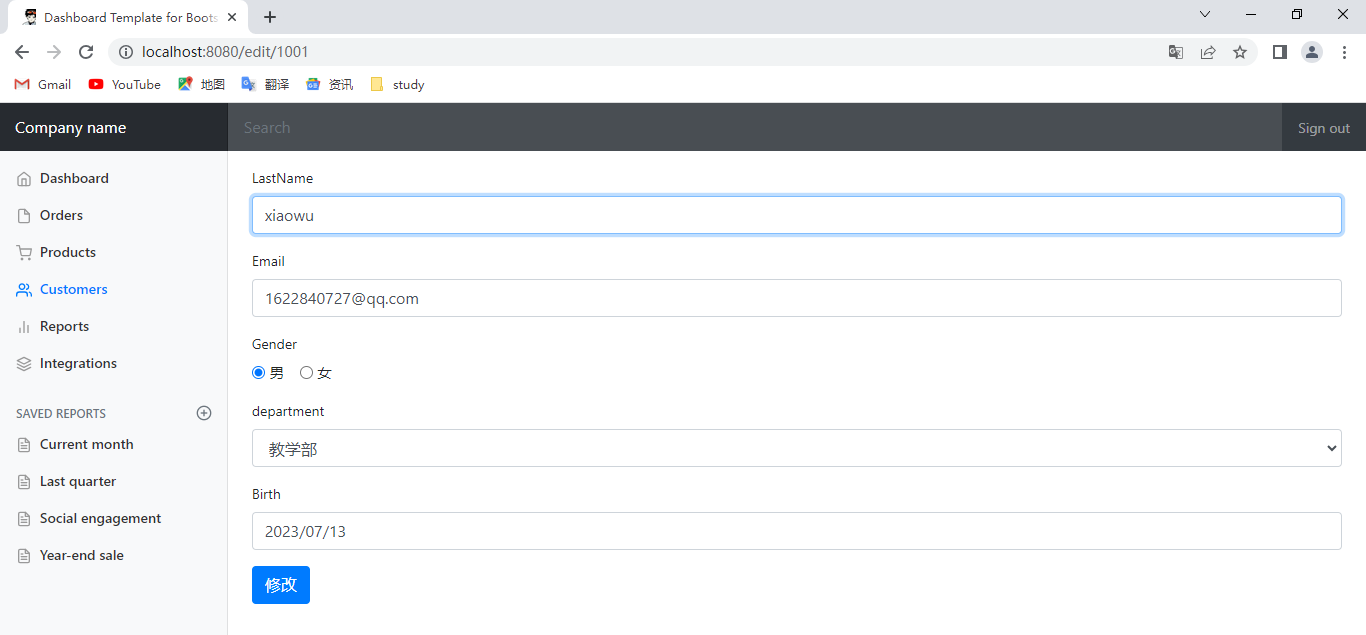
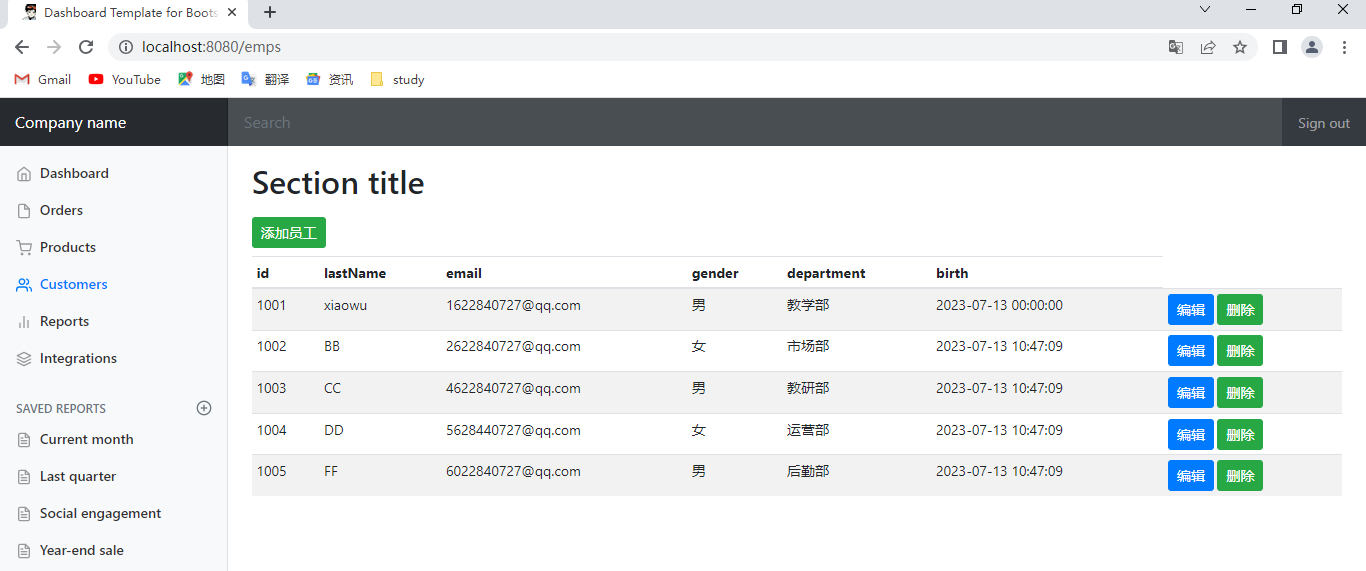
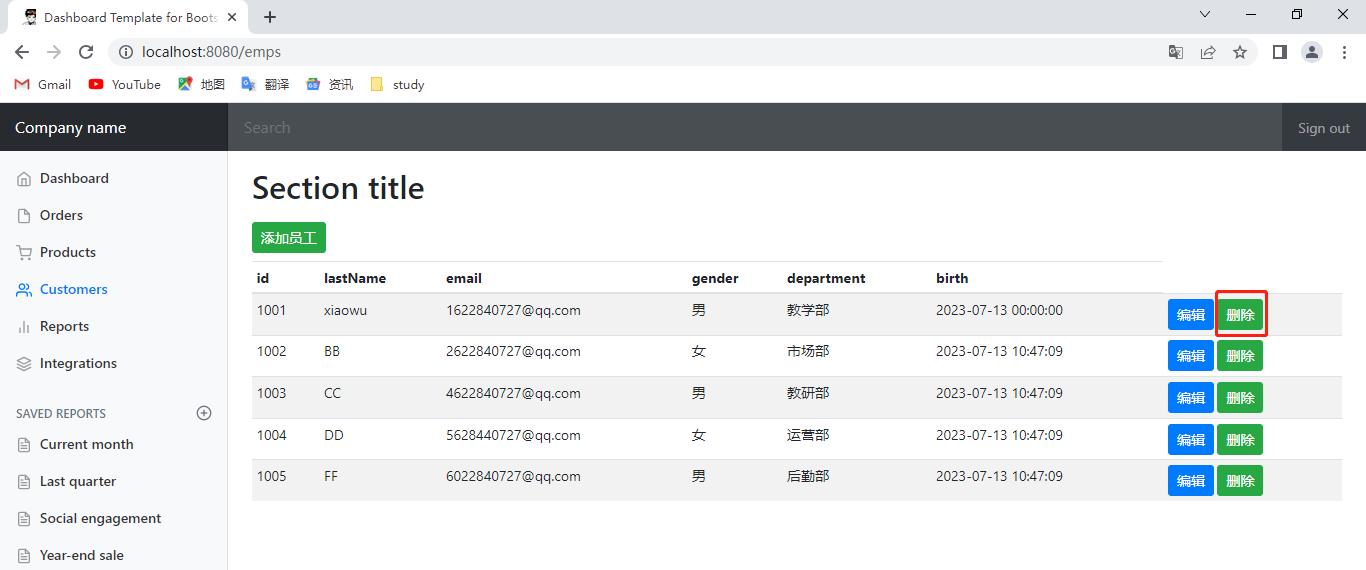
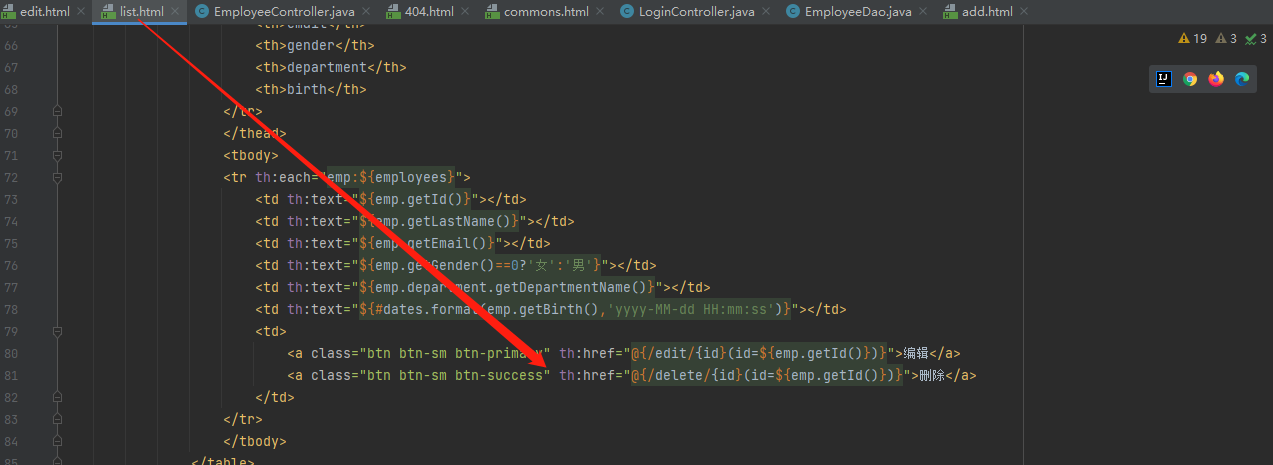
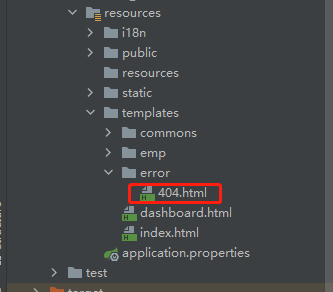
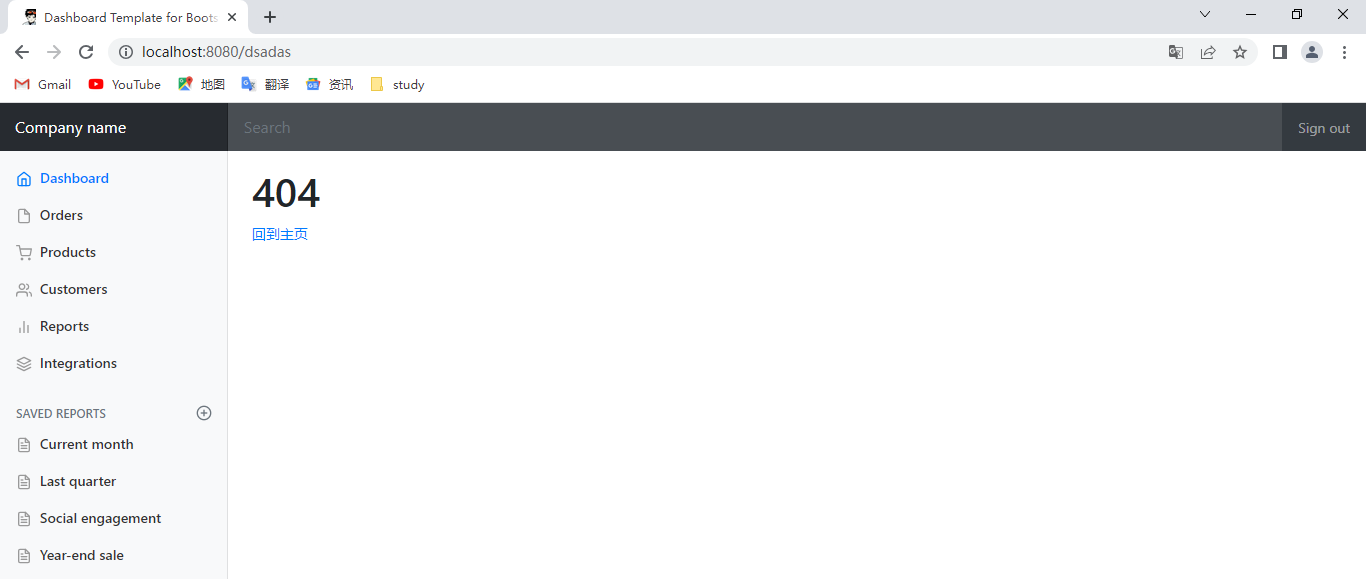
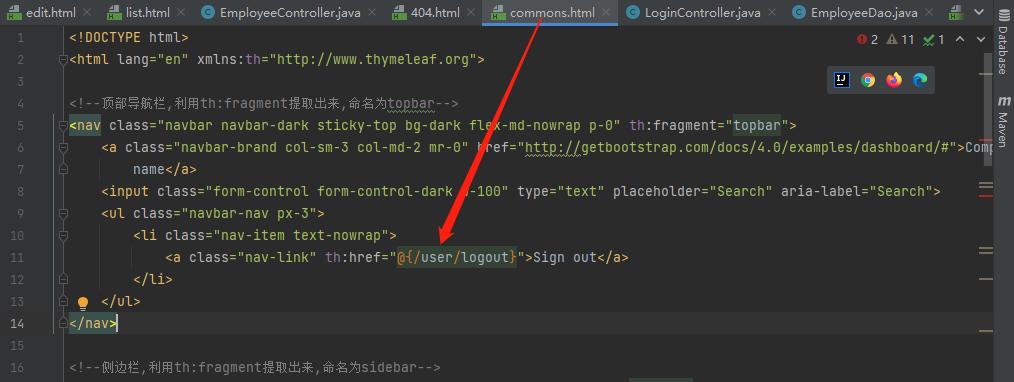
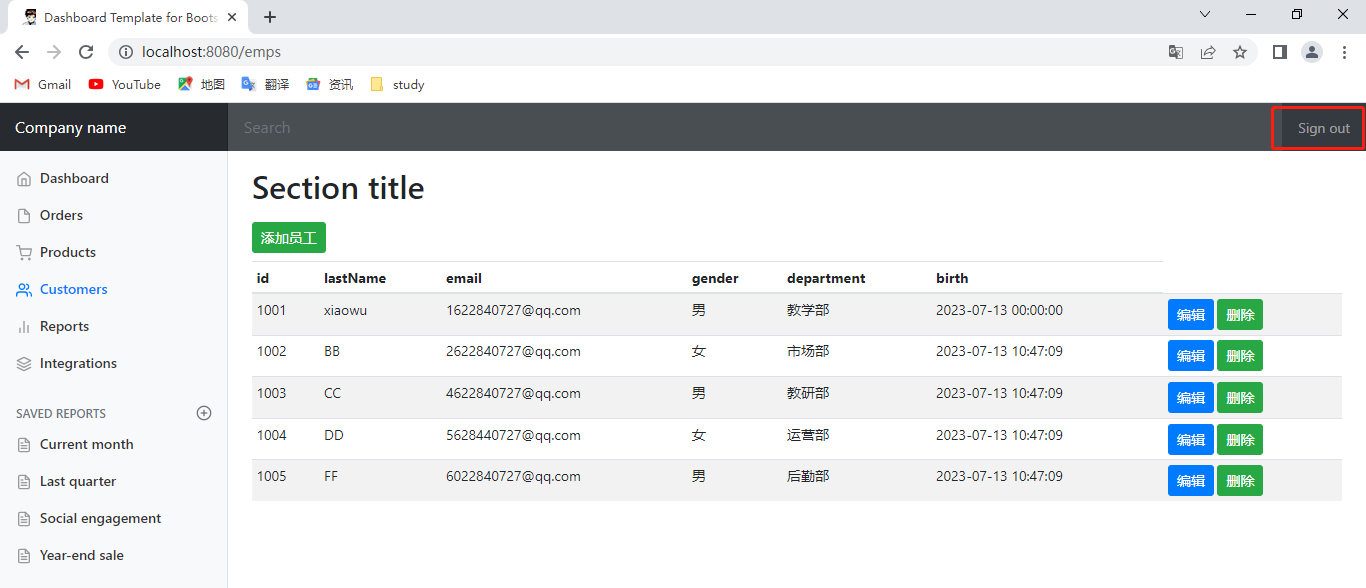
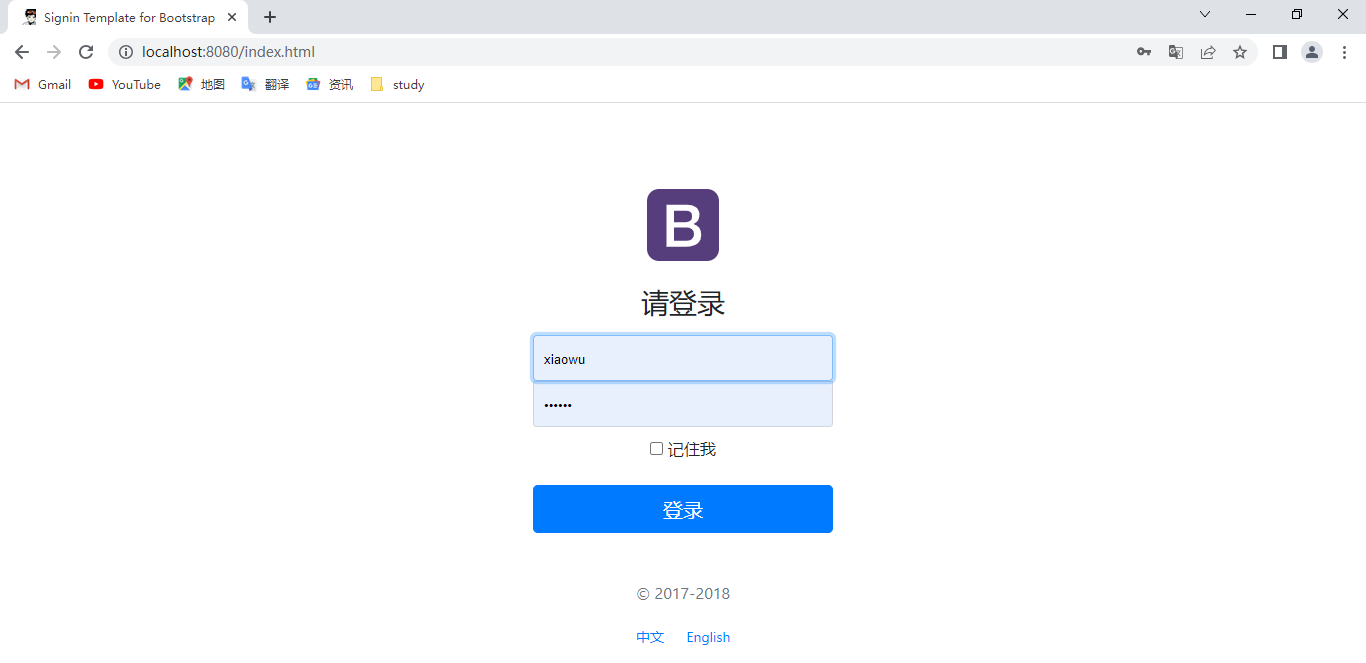

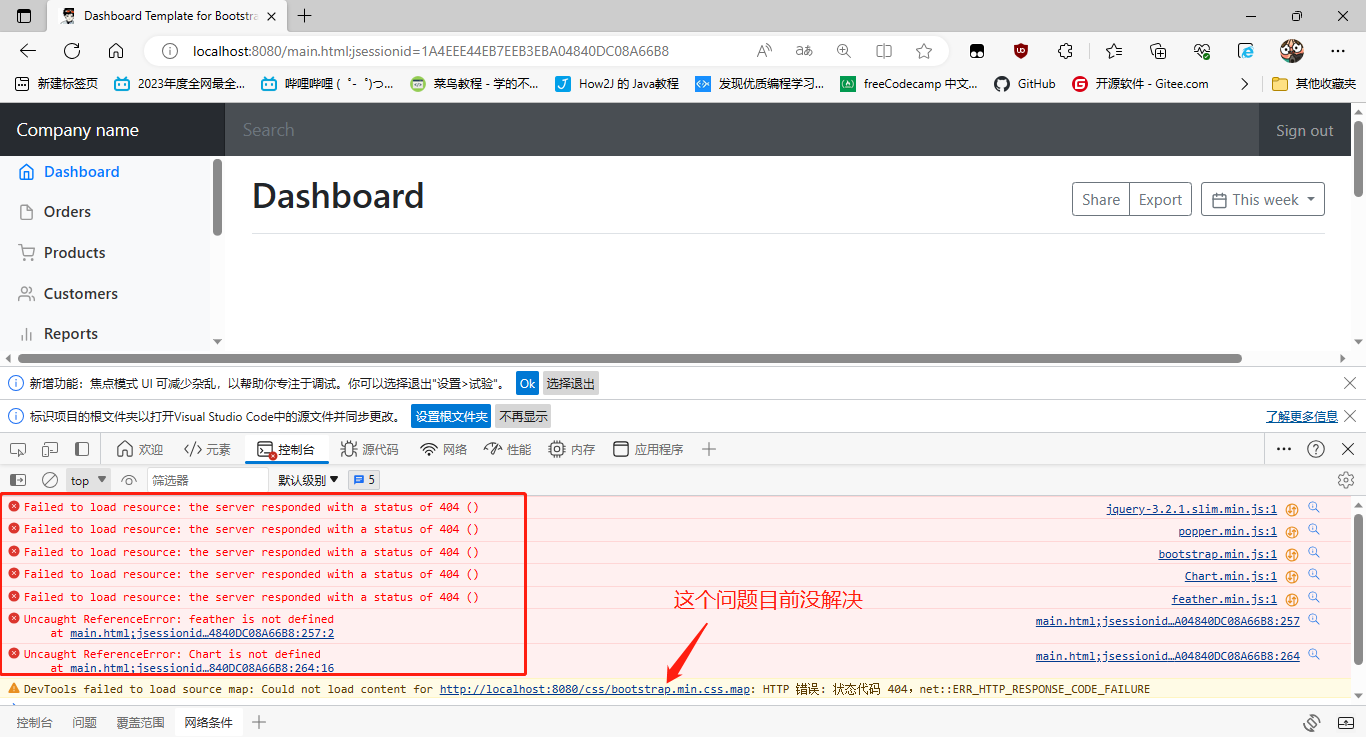
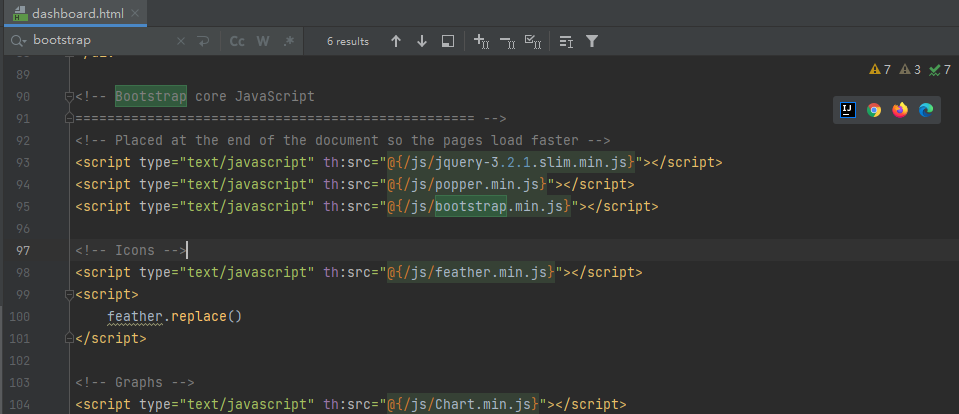
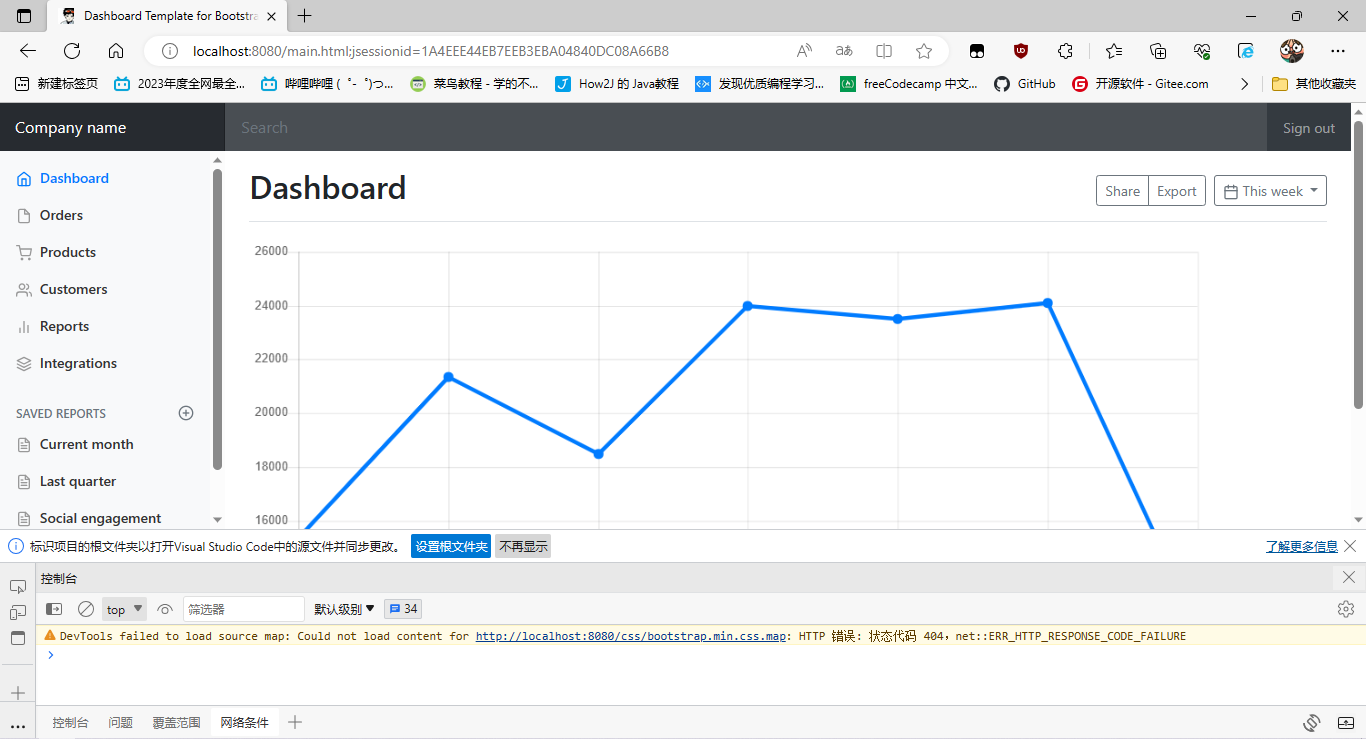
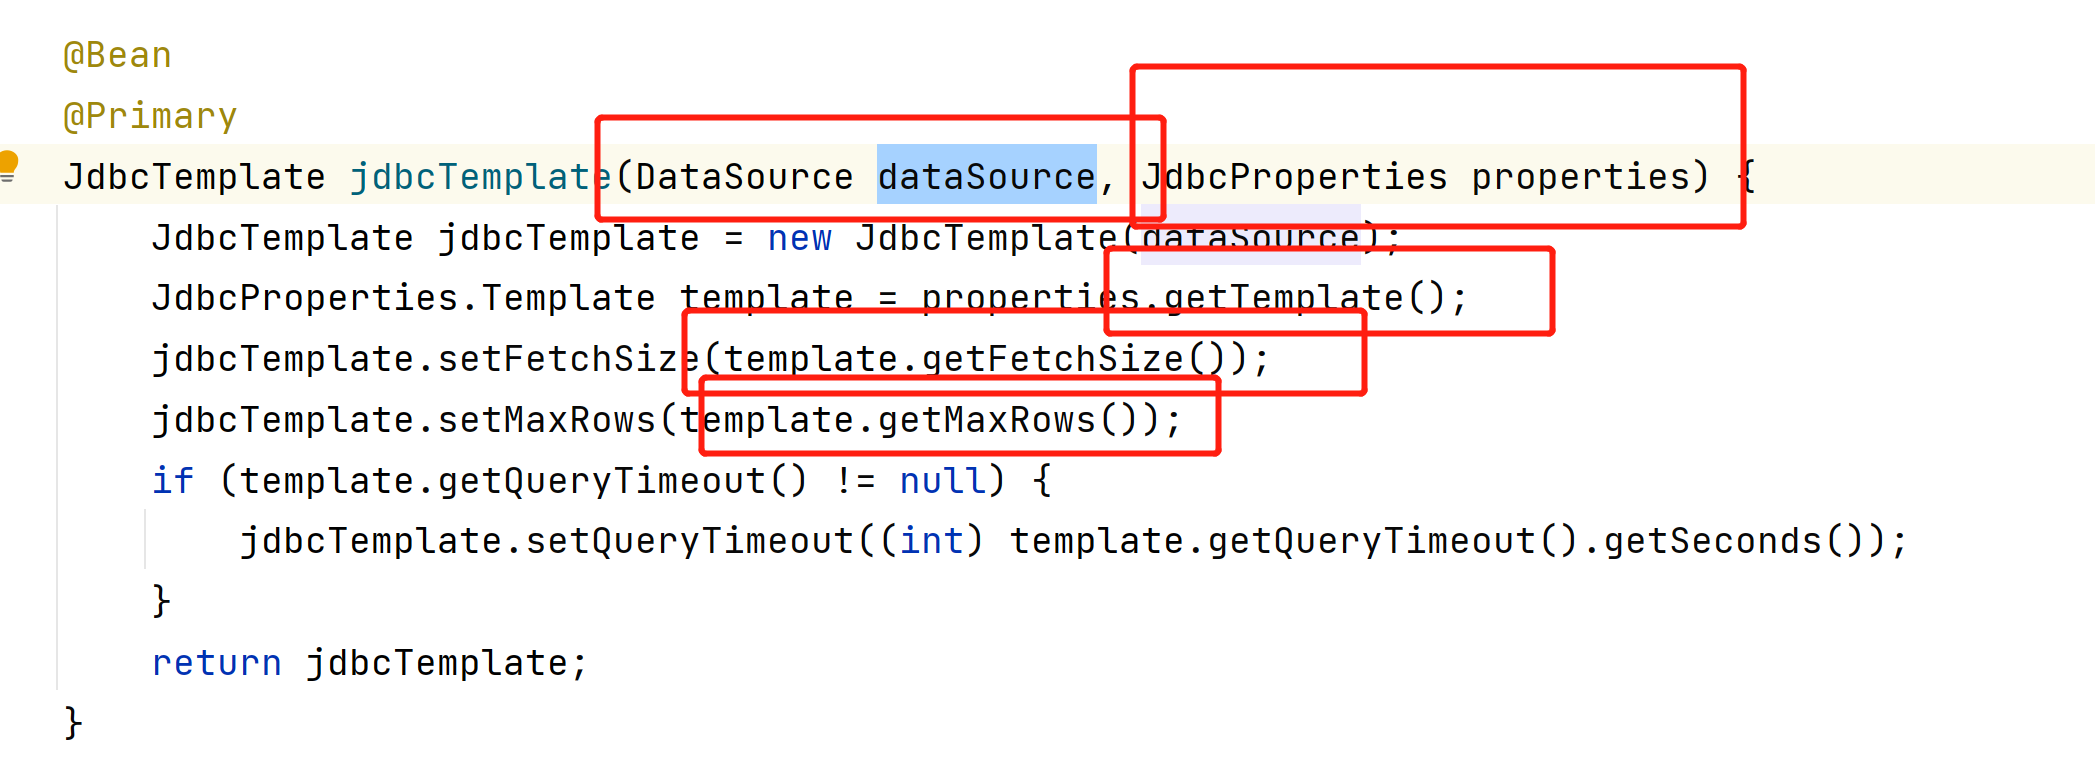
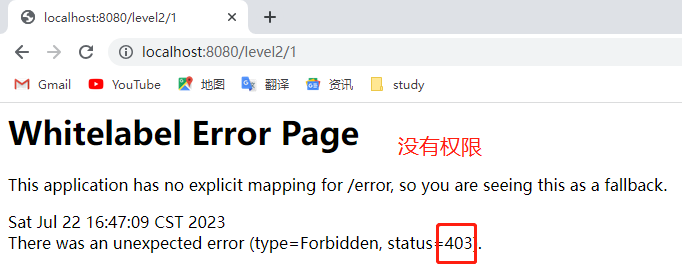

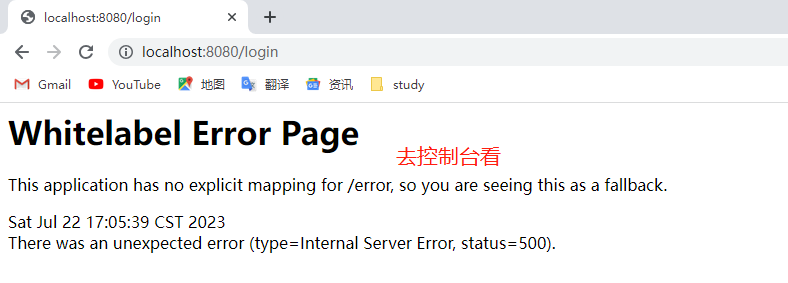

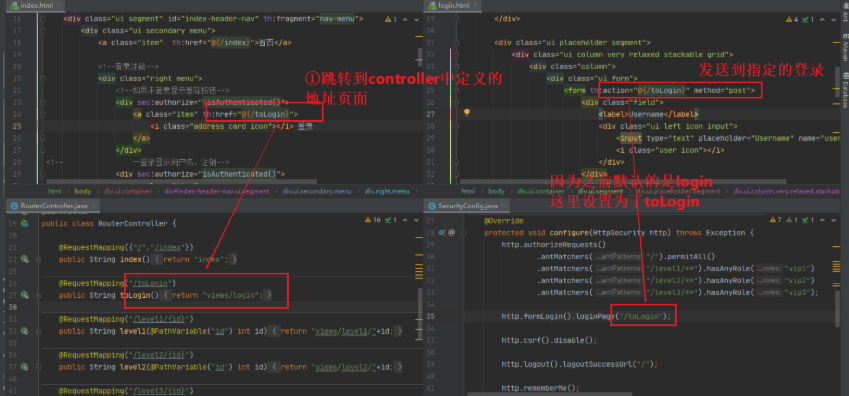


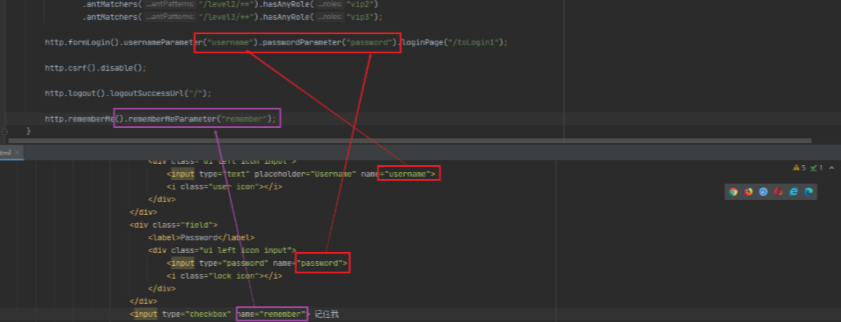
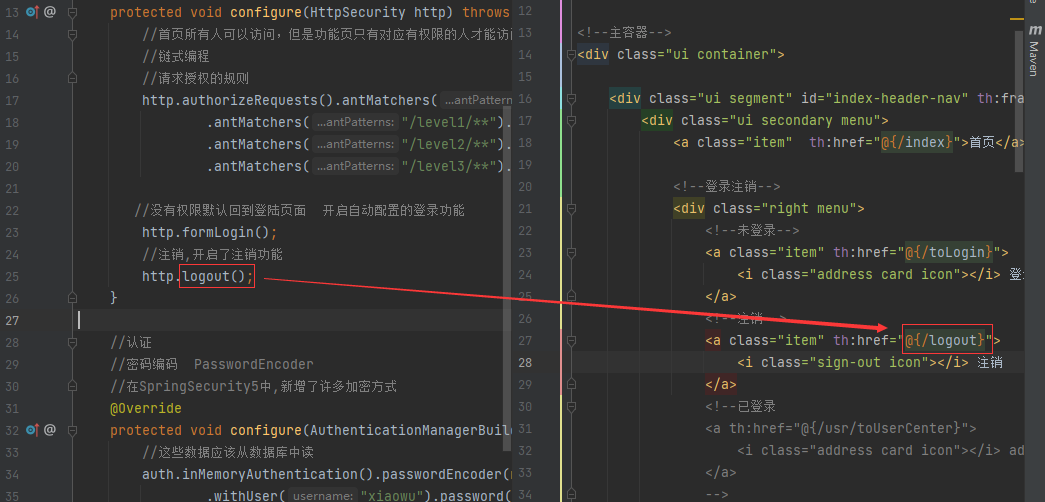
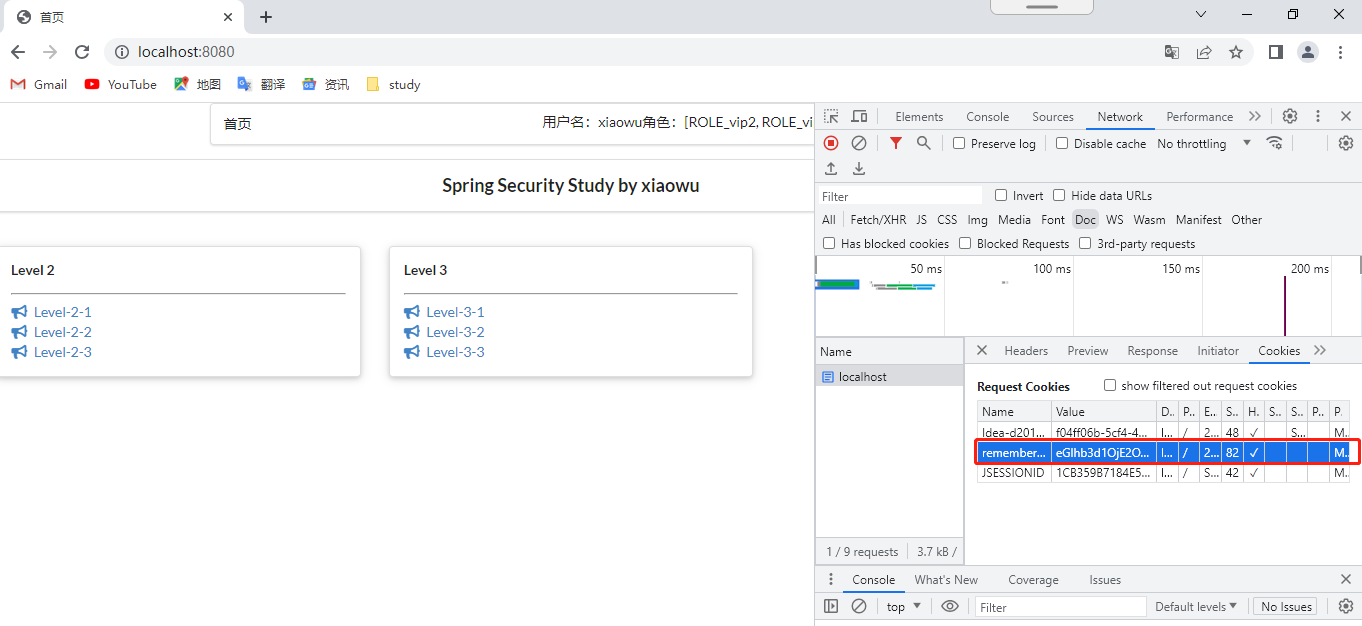

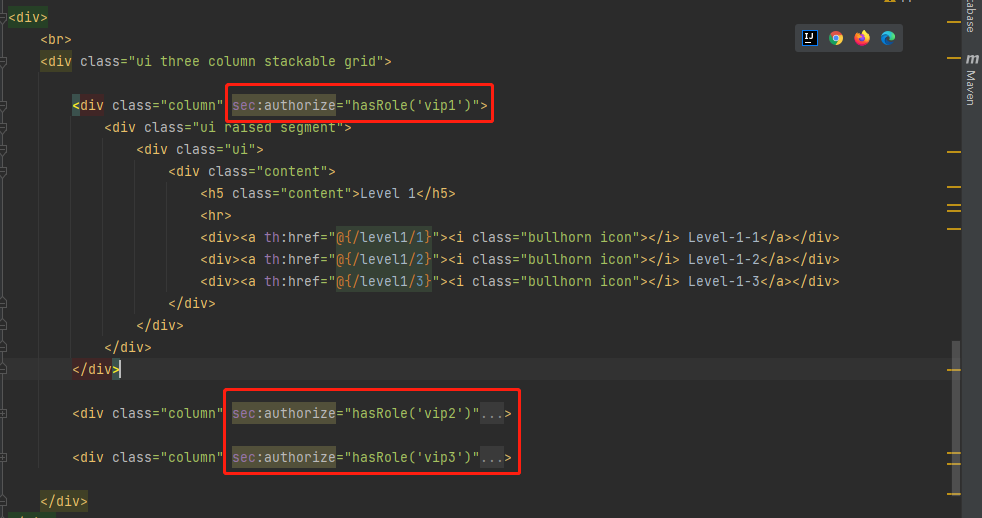
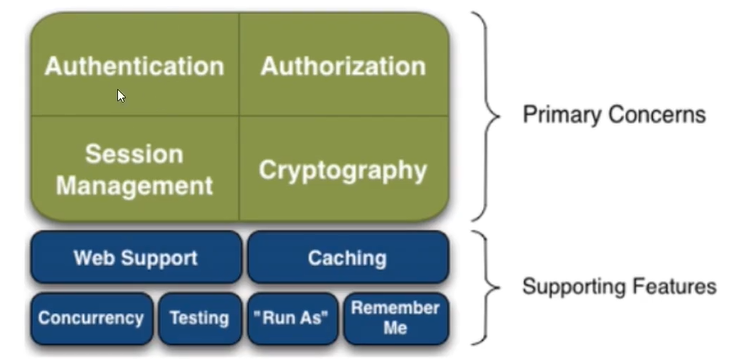
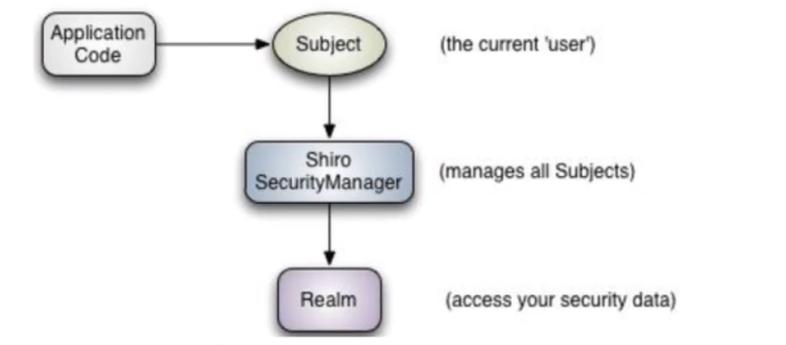
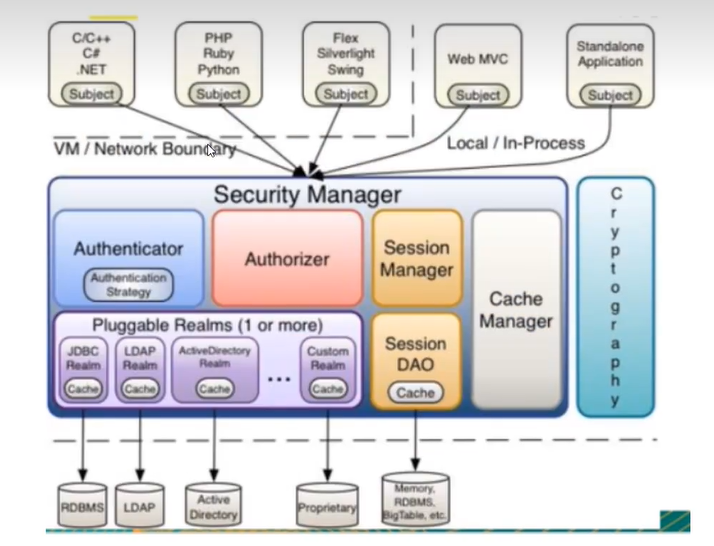

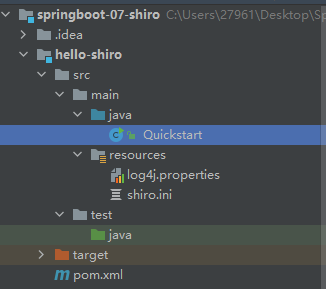
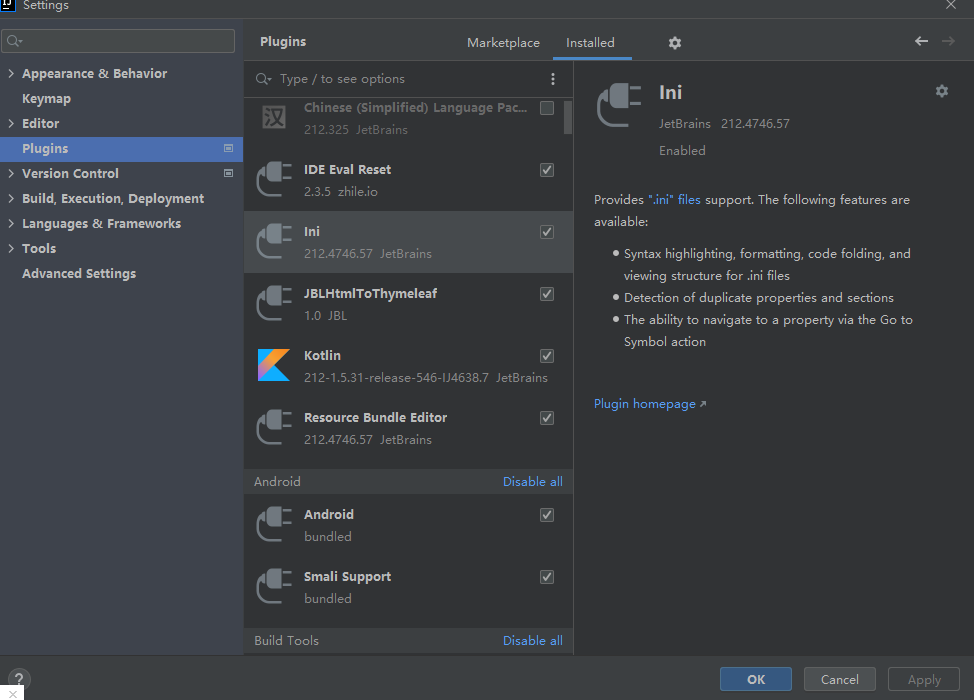
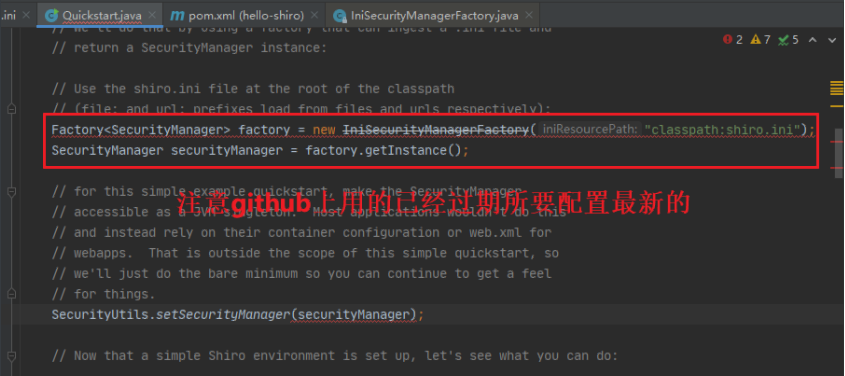


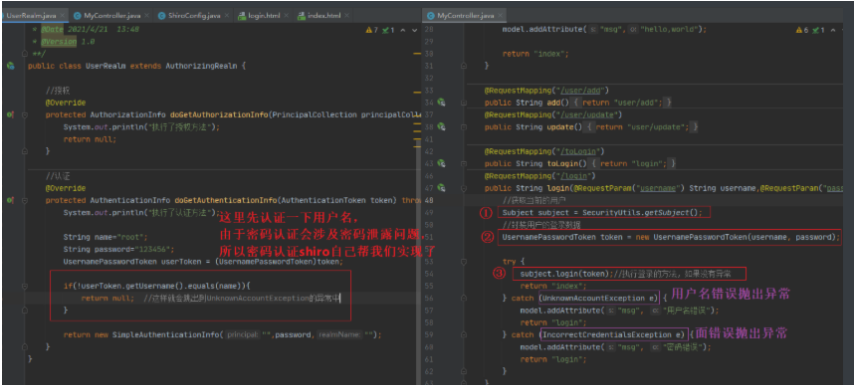
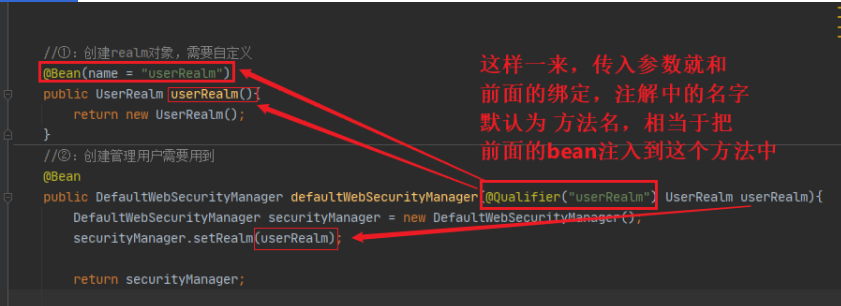
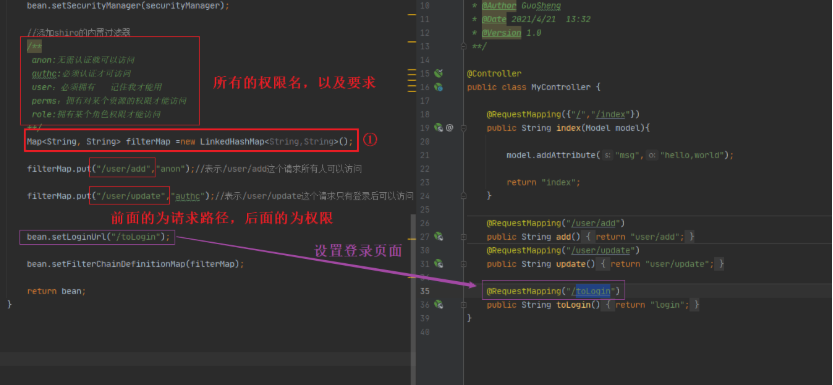
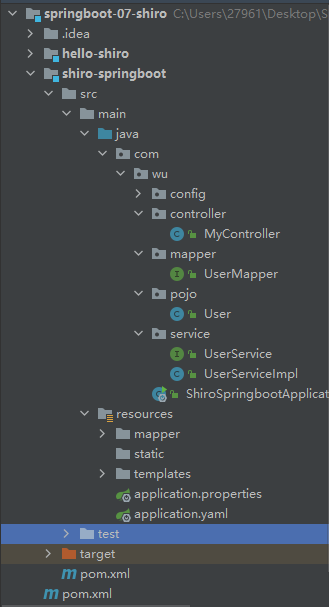
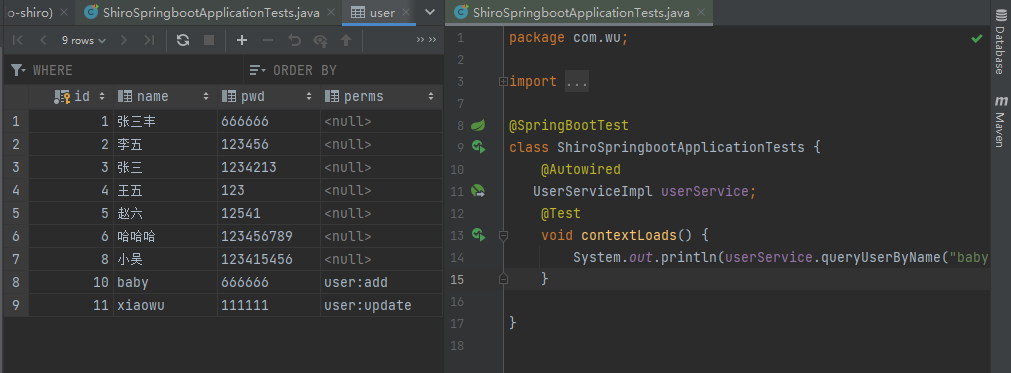


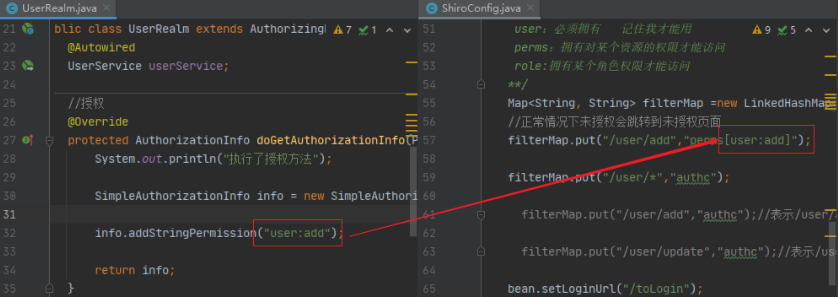
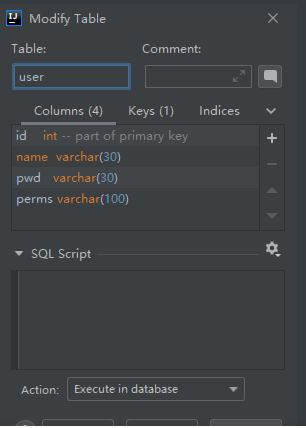
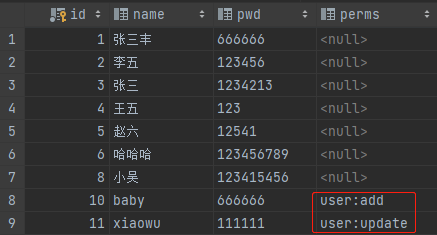

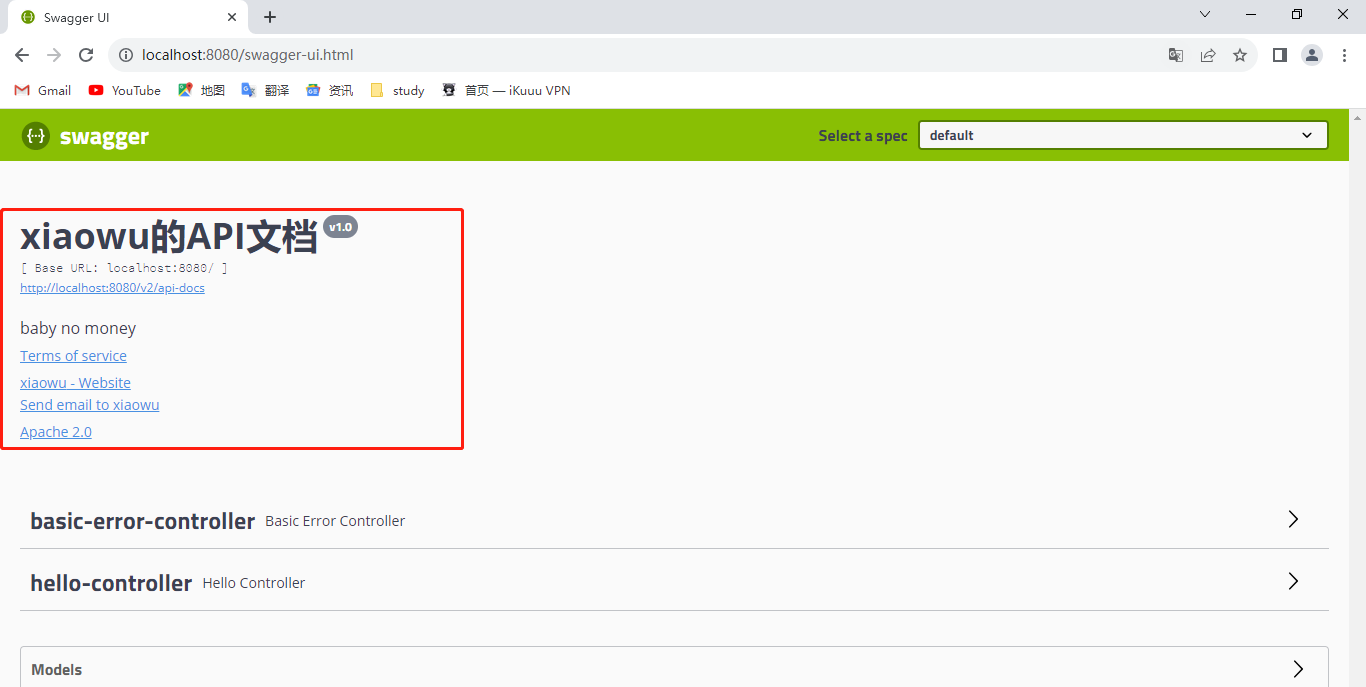
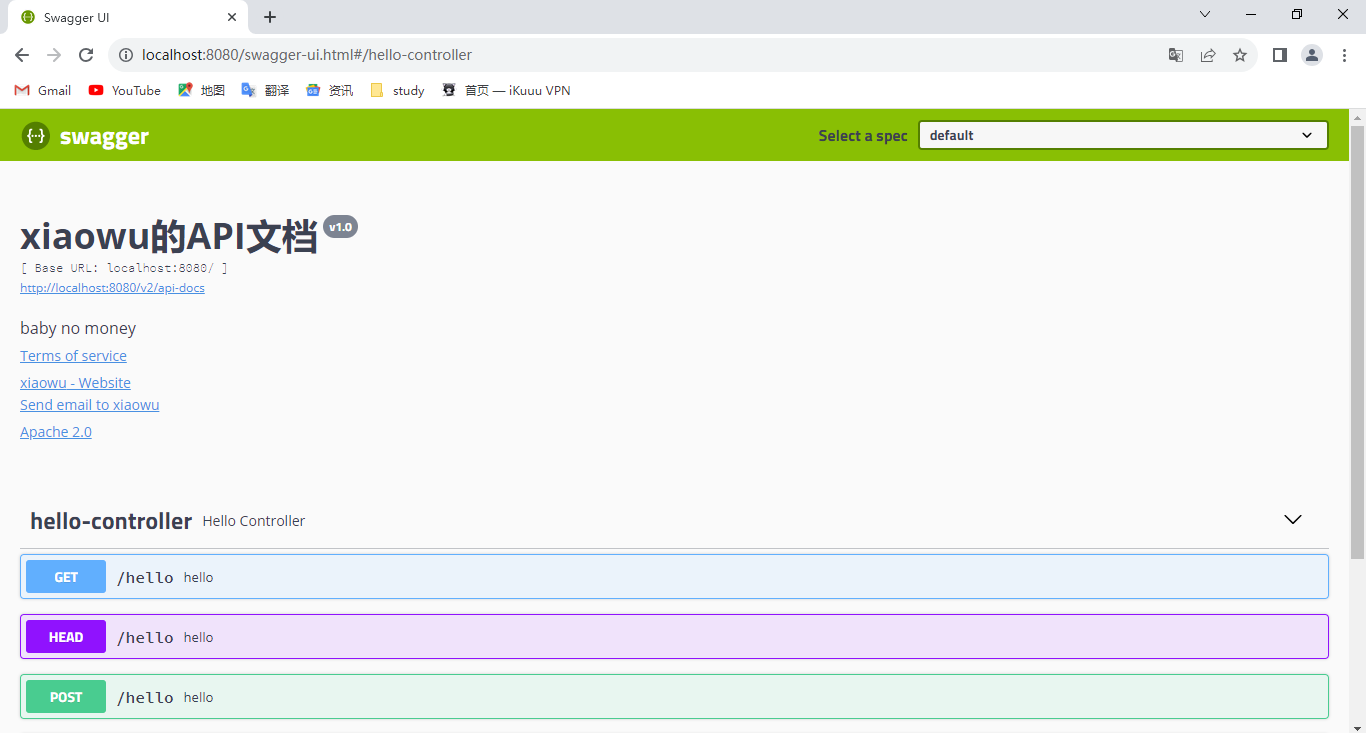


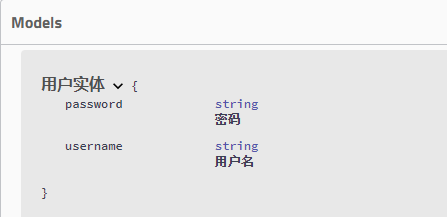


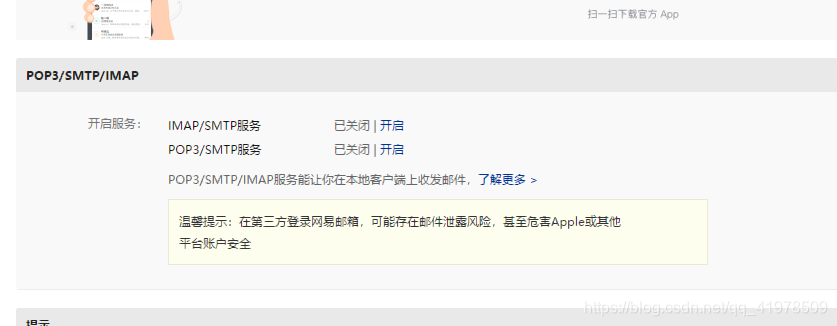
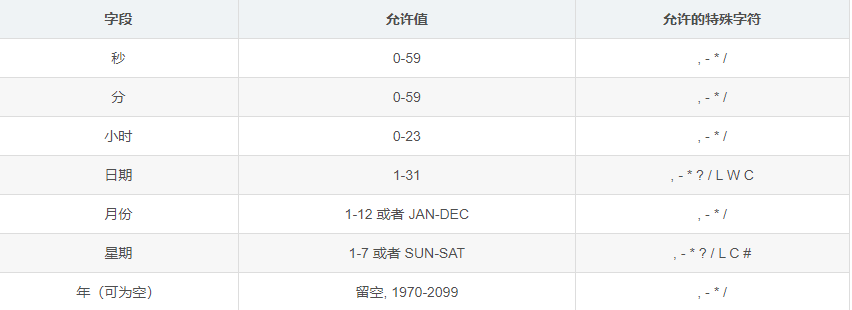
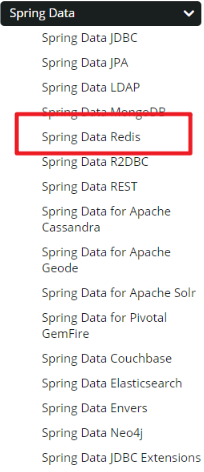
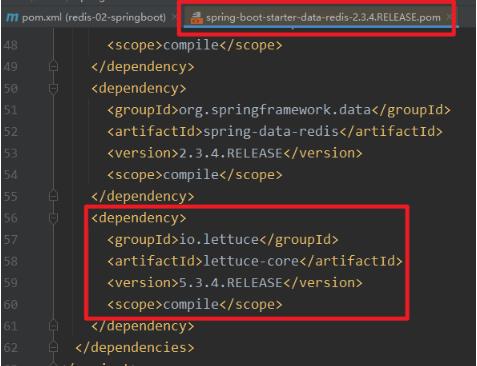

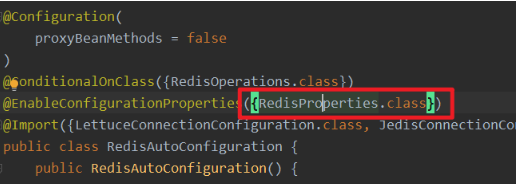
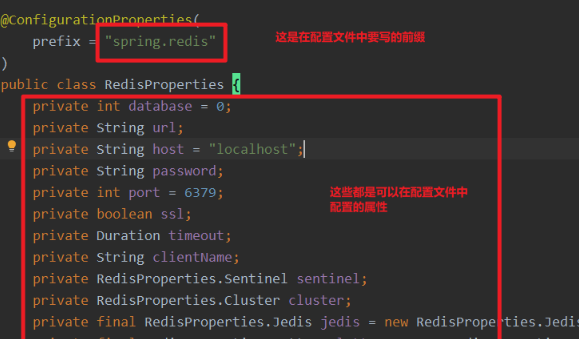
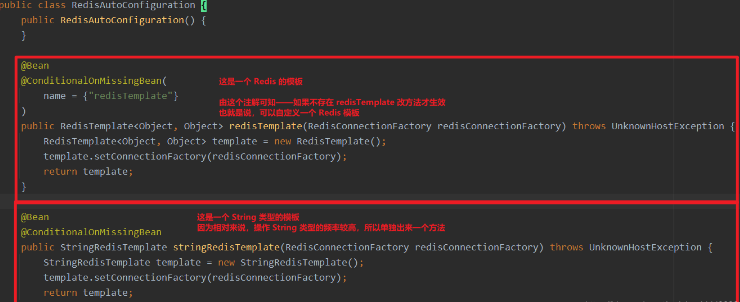

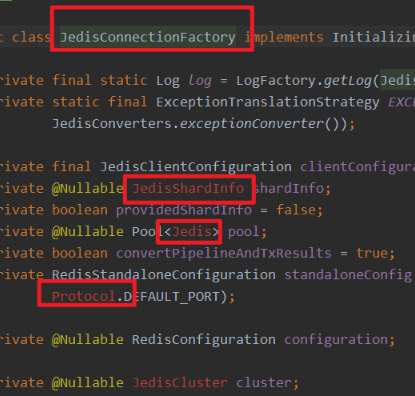
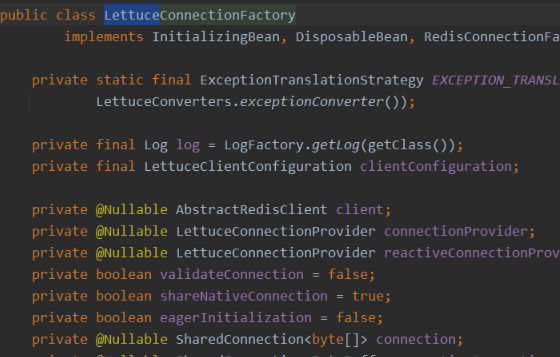
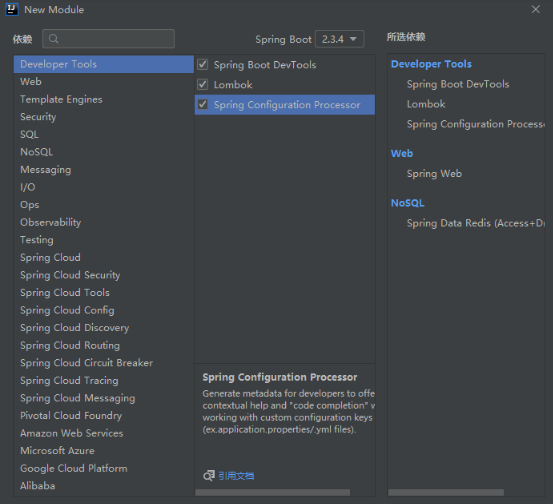


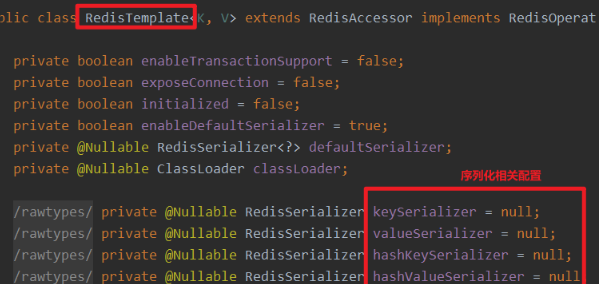
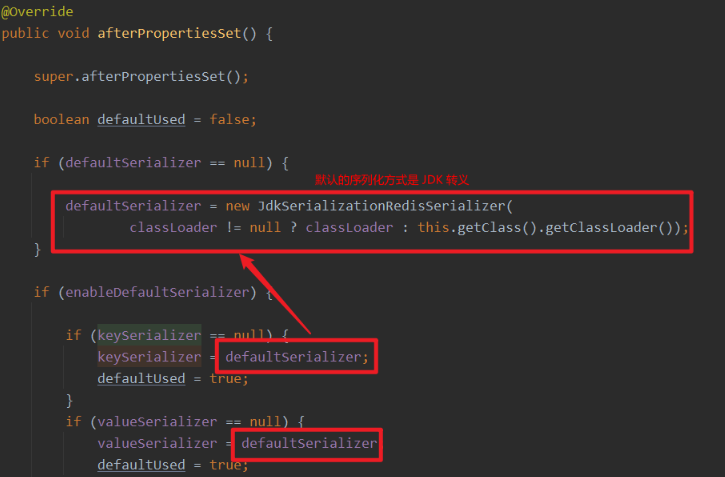


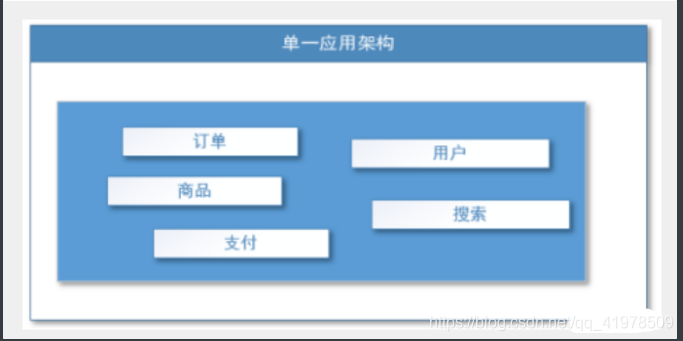
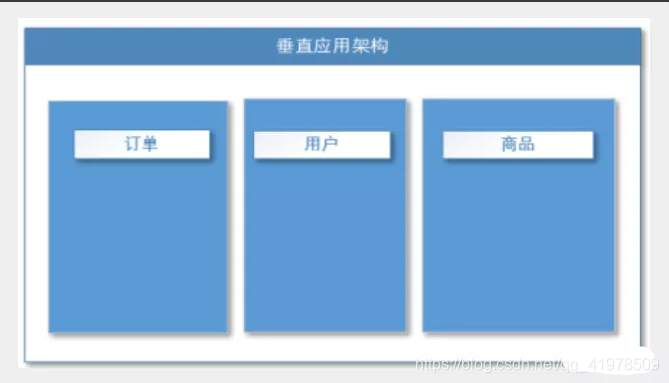
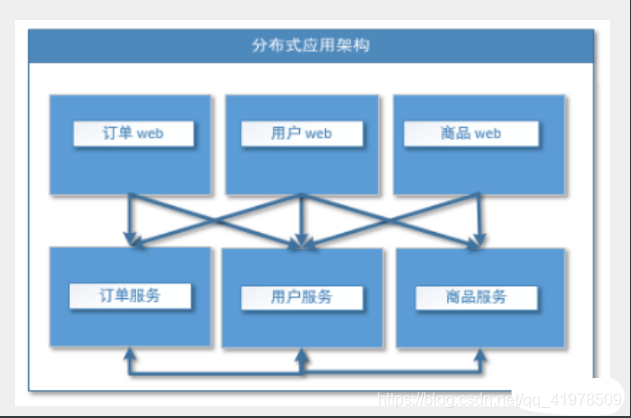
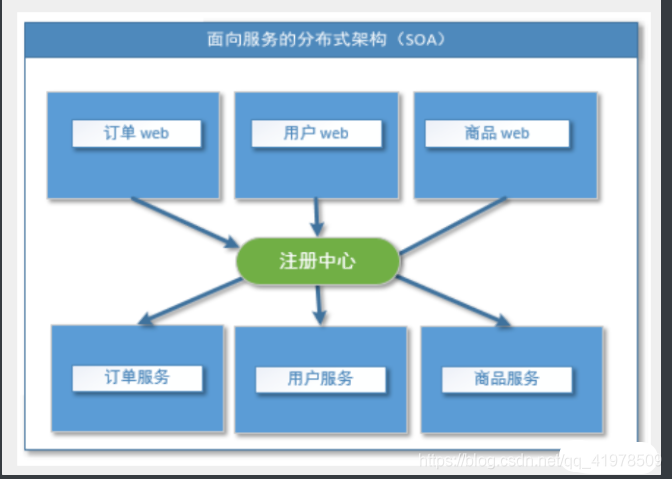
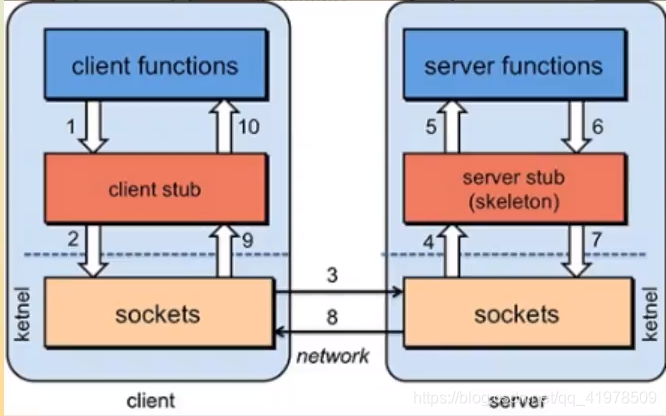
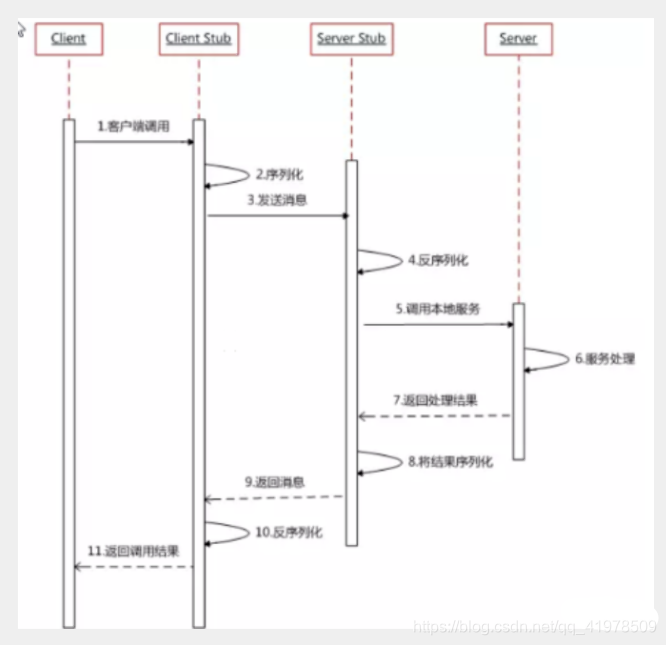
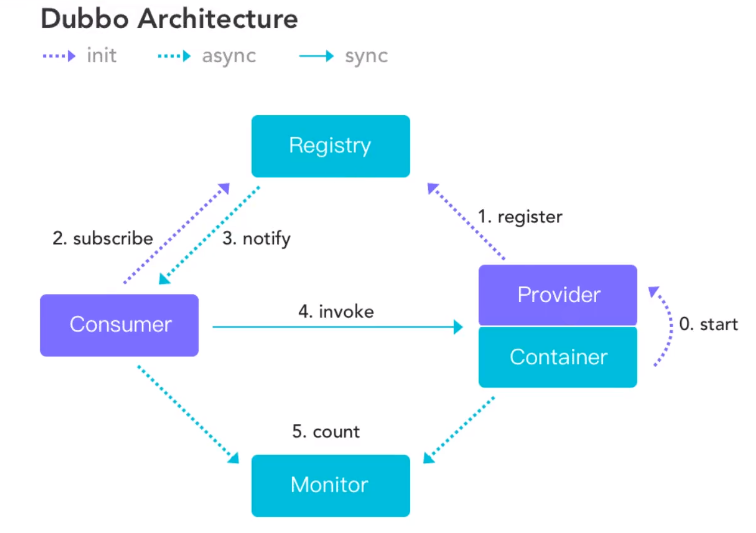
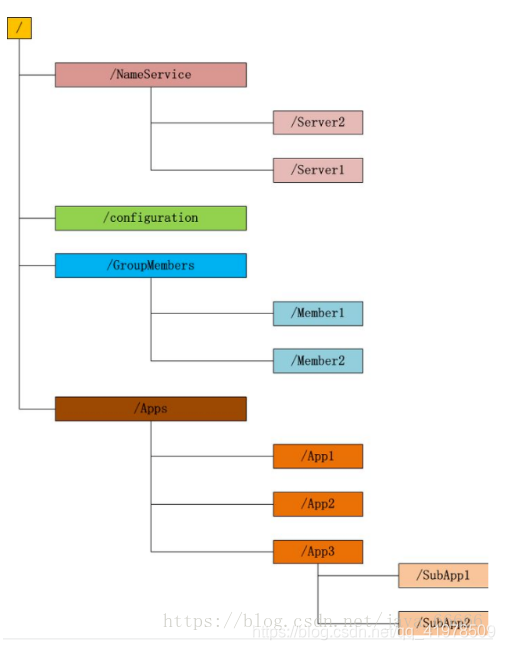
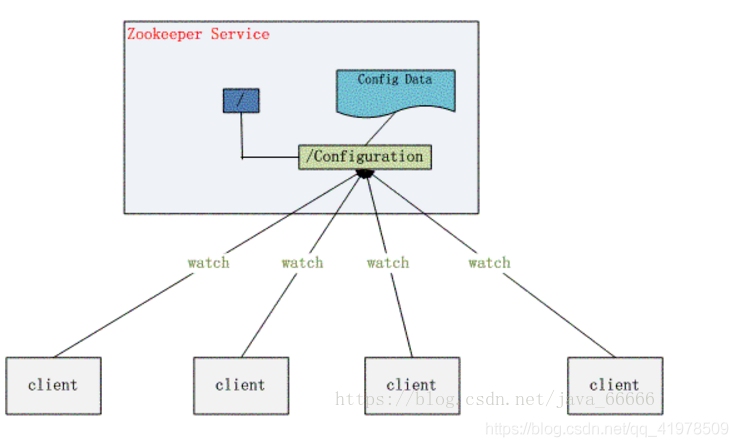

 、
、